Warehouse Transfer
Video Tutorial
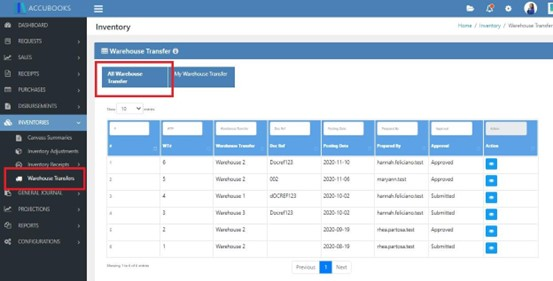
Go to INVENTORIES > Warehouse Transfers > All Warehouse Transfers
Add Warehouse Transfer
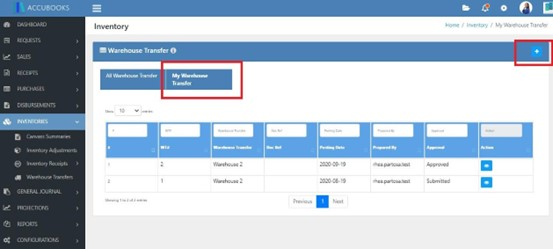
To add a Warehouse Transfer, click My Warehouse Transfer then click the Add Button (+).
Fill up the different fields.
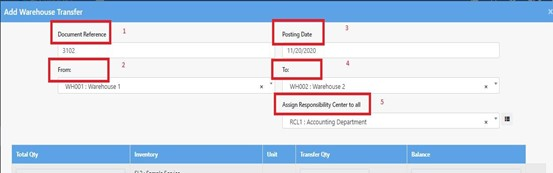
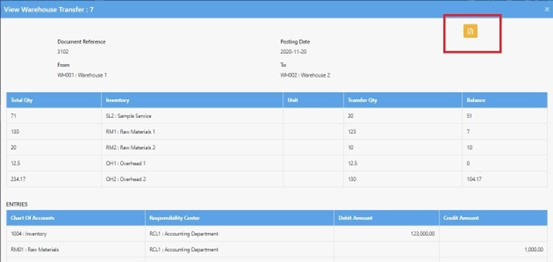
- Document Reference - indicate the supporting documents.
- From - choose from the dropdown list of all warehouses.
- Posting Date - choose the date from the calendar.
- To - choose from the dropdown list of all warehouses.
- Assign Responsibility Center to All - choose from the dropdown list the appropriate responsibility if all the items are classified under one responsibility center.
Fill up the table for the appropriate information.
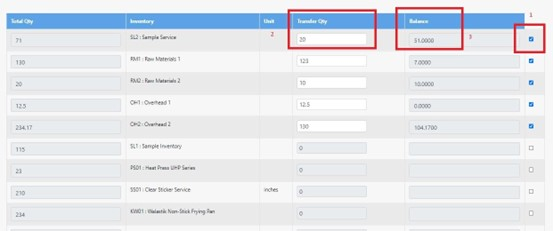
- Check Button - Click the appropriate inventory item that will be transferred.
- Transfer Quantity - Input the number or quantity of the inventories to be transferred.
- Balance - The system automatically computes the balance based on the Total Quantity and the Quantity Transferred.
Below the table is the portion to encode the applicable journal entries but this is optional.
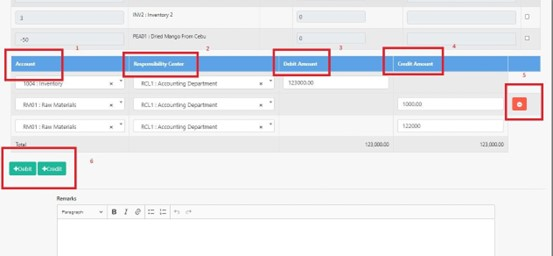
- Chart of Accounts - Choose from the dropdown list of Chart of Accounts
- Responsibility Center - Choose from the dropdown list of Responsibility Centers
- Debit Amount - Input the correct amounts.
- Credit Amount - Input the correct amounts.
- Delete Line Item - Allows the user to delete a particular line item.
- Add Debit/Credit - Allows the user to add a debit or credit line item.
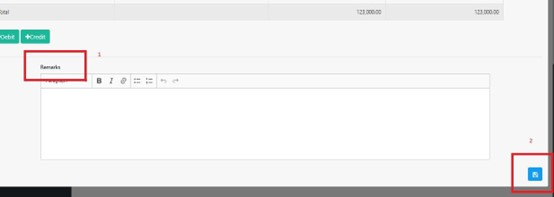
Remarks
The user can also add Remarks in the Remarks Field. Once all information has been filled up. Click the Save Button in the lower right corner of the screen.
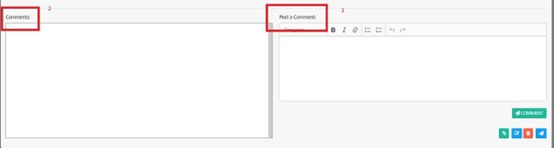
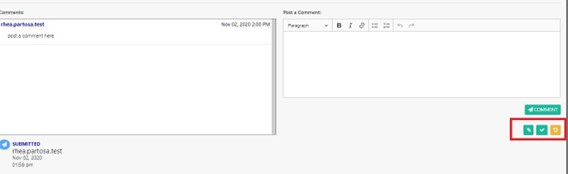
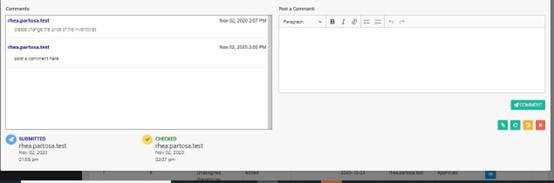
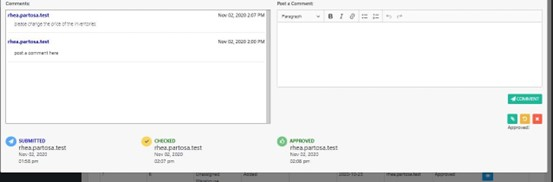
Comments
Upon saving, the system allows the user to input comments using the Comment Box (1) with the Comment History Tracking (2).
Attach/Edit/Delete/Submit
Once the transaction has been saved, the user can attach, edit, delete or submit using the different button located at the lower portion of the screen.

Attachments
To attach a pdf or an image, just click the Paper Clip Icon. The click, Choose Files and the upload button.

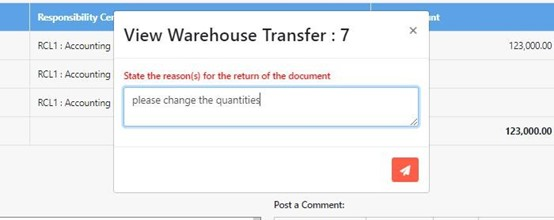
Checker
Upon submission, the checker can either view the attachment, check the transaction or return the transaction if there should be any changes on the transaction.
Return
Clicking the return button will prompt the user to state the reason (s) for the return of the document.
Approver
Once the document transaction is already checked, the approver has the option to view the attachment, approve, return or cancel using the different buttons located at the lower right of the screen.
Once the transaction is already approved, the approver can still return or cancel.
Business Form
There is a downloadable business form in PDF available in Warehouse Transfer.
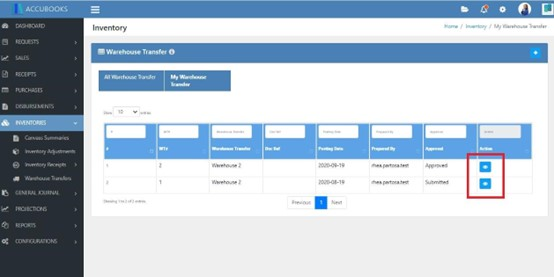
View Transaction
To view the transaction, click the Eye Button.