Company Settings Guide
Video Tutorial
Company Profile
To edit Company Details, Shipping Address, Billing Address, and BIR Details. Click the edit button at the bottom part of company Company
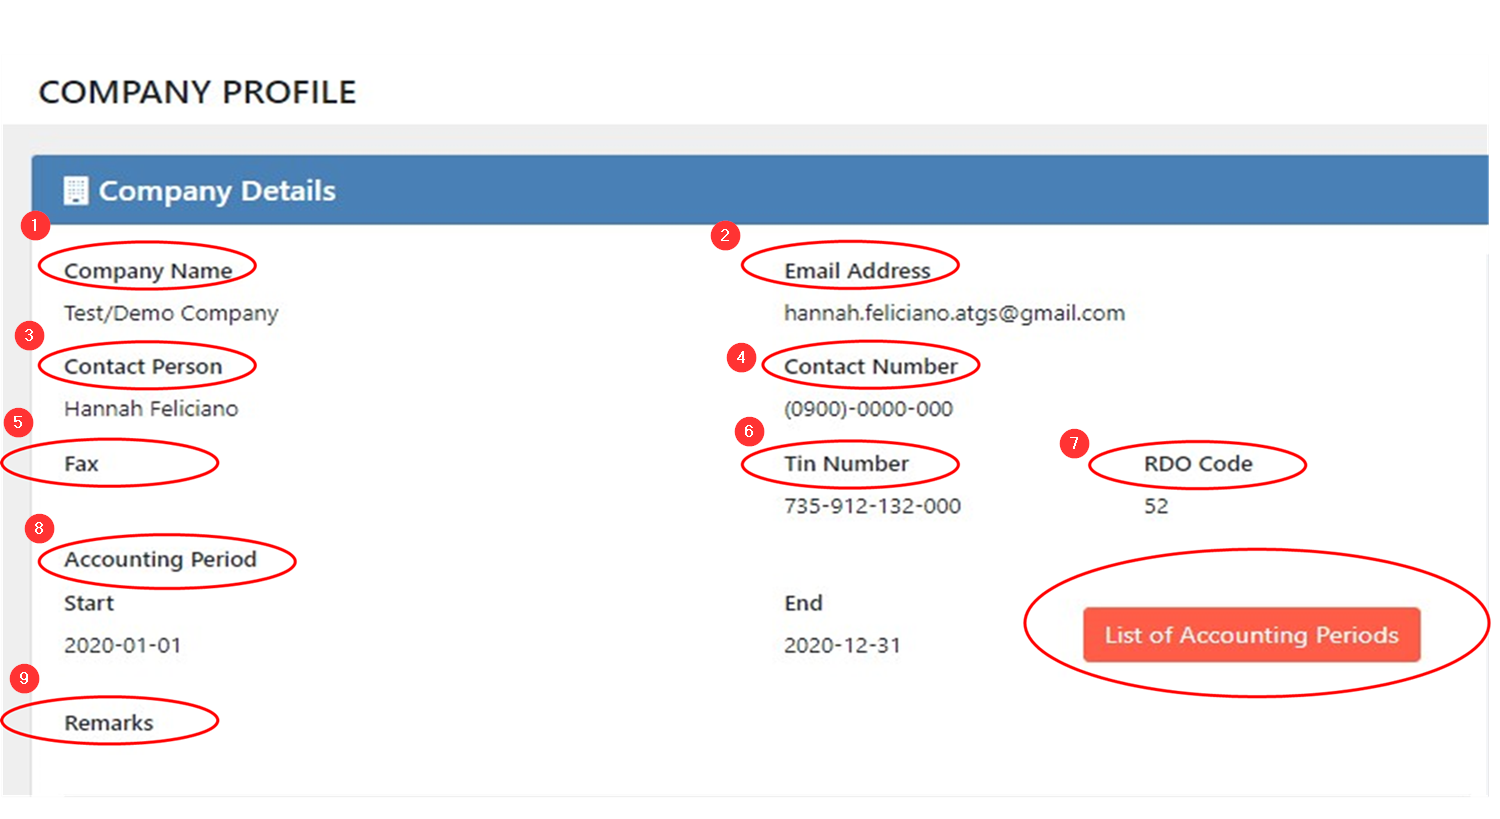
- Company Name
- Email Address
- Contact Person
- Contact Number
- Fax
- TIN Number
- RDO Code
- Accounting Period — Calendar or Fiscal
- Remarks
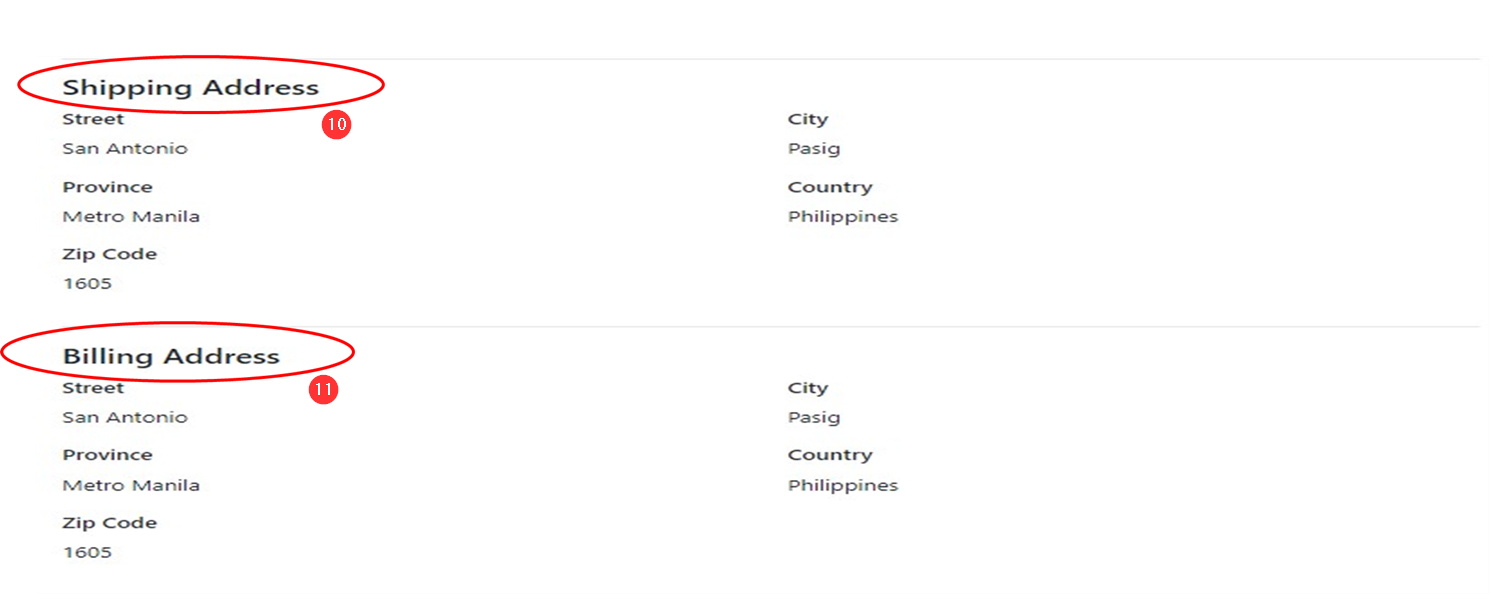
- Shipping Address: Street, City, Province, Country and Zip code
- Billing Address: Street, City, Province, Country and Zip code
BIR
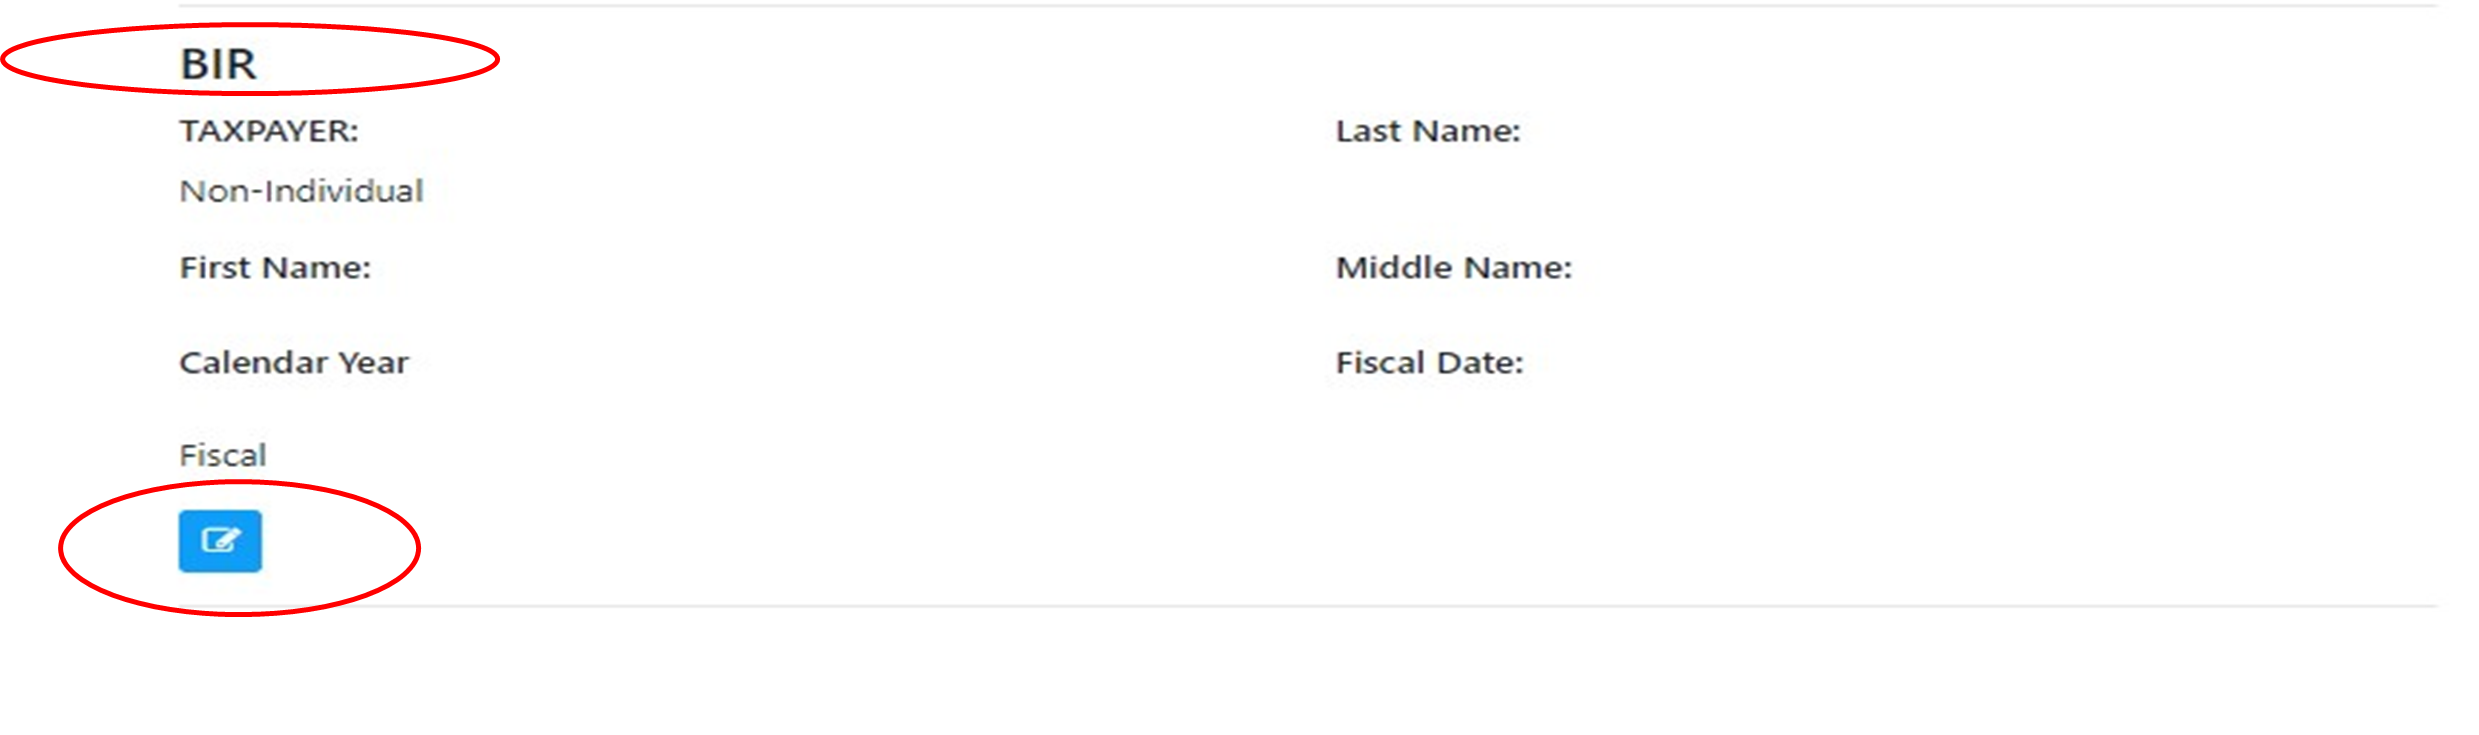
- Tax Payer: Individual/ Non- Individual
- Last Name
- First Name
- Middle Name
- Calendar Year
- Fiscal & Fiscal Date
Company Logo
Company Logo – Right side of company profile. Just click choose file to upload Company Logo and then click save button.

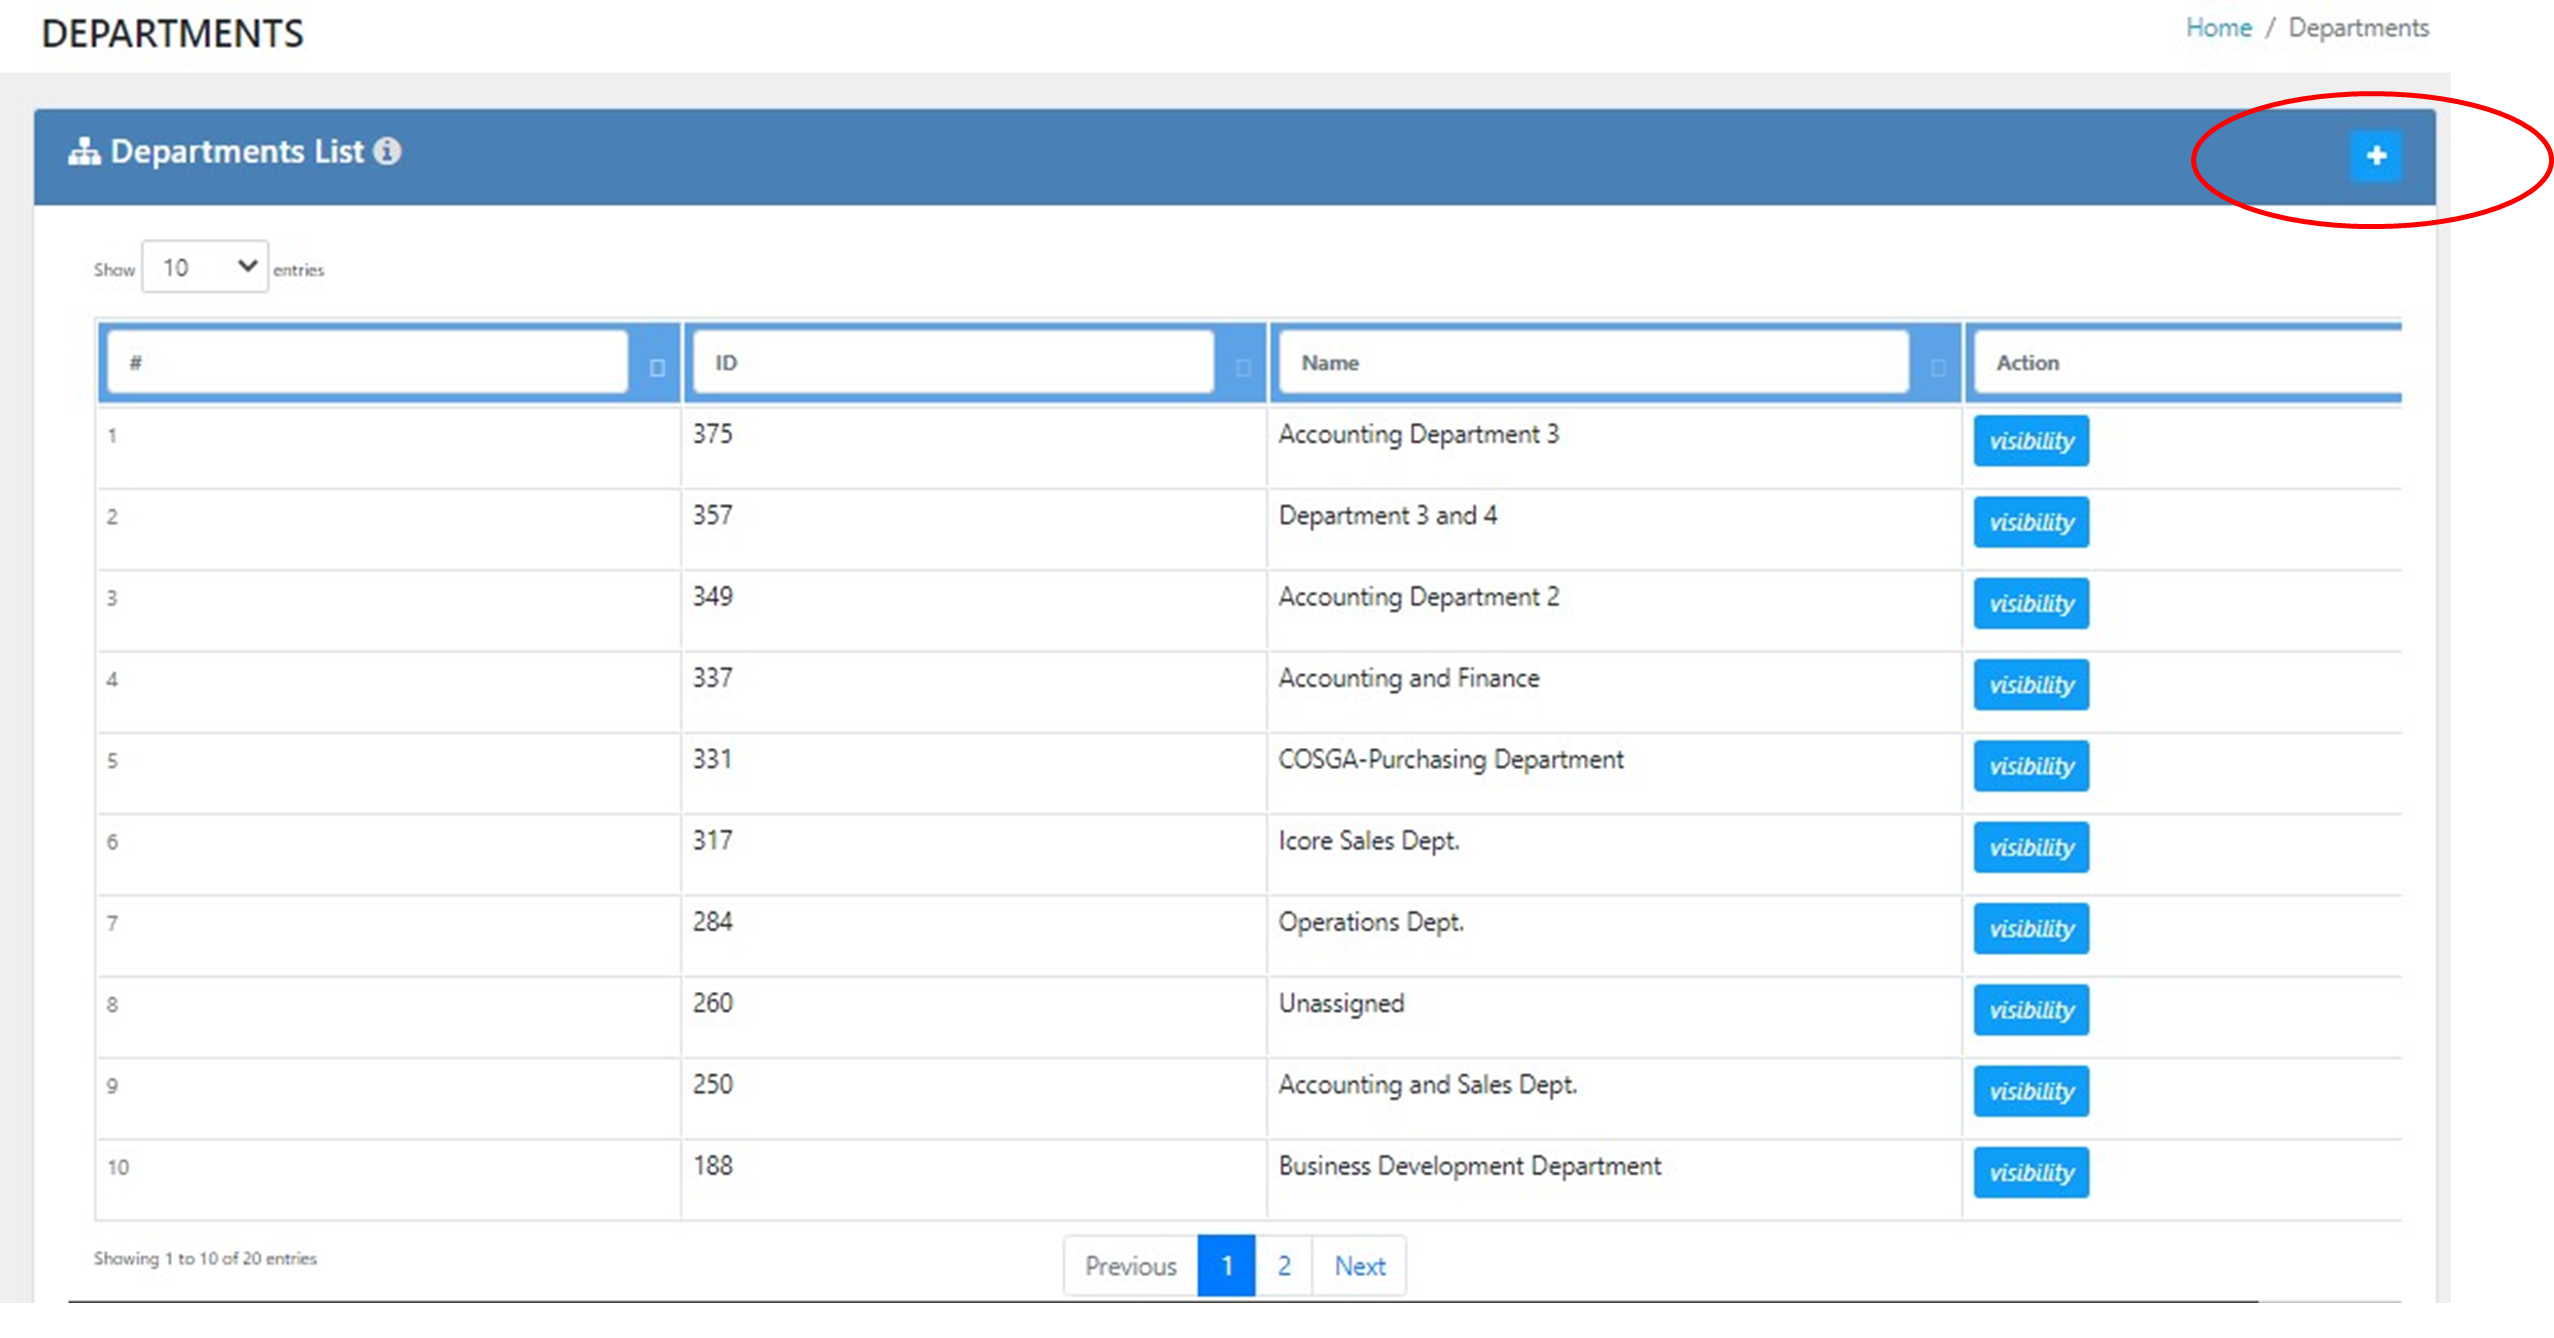
Departments
To add department, click add the button at the upper rightmost part of Department List.
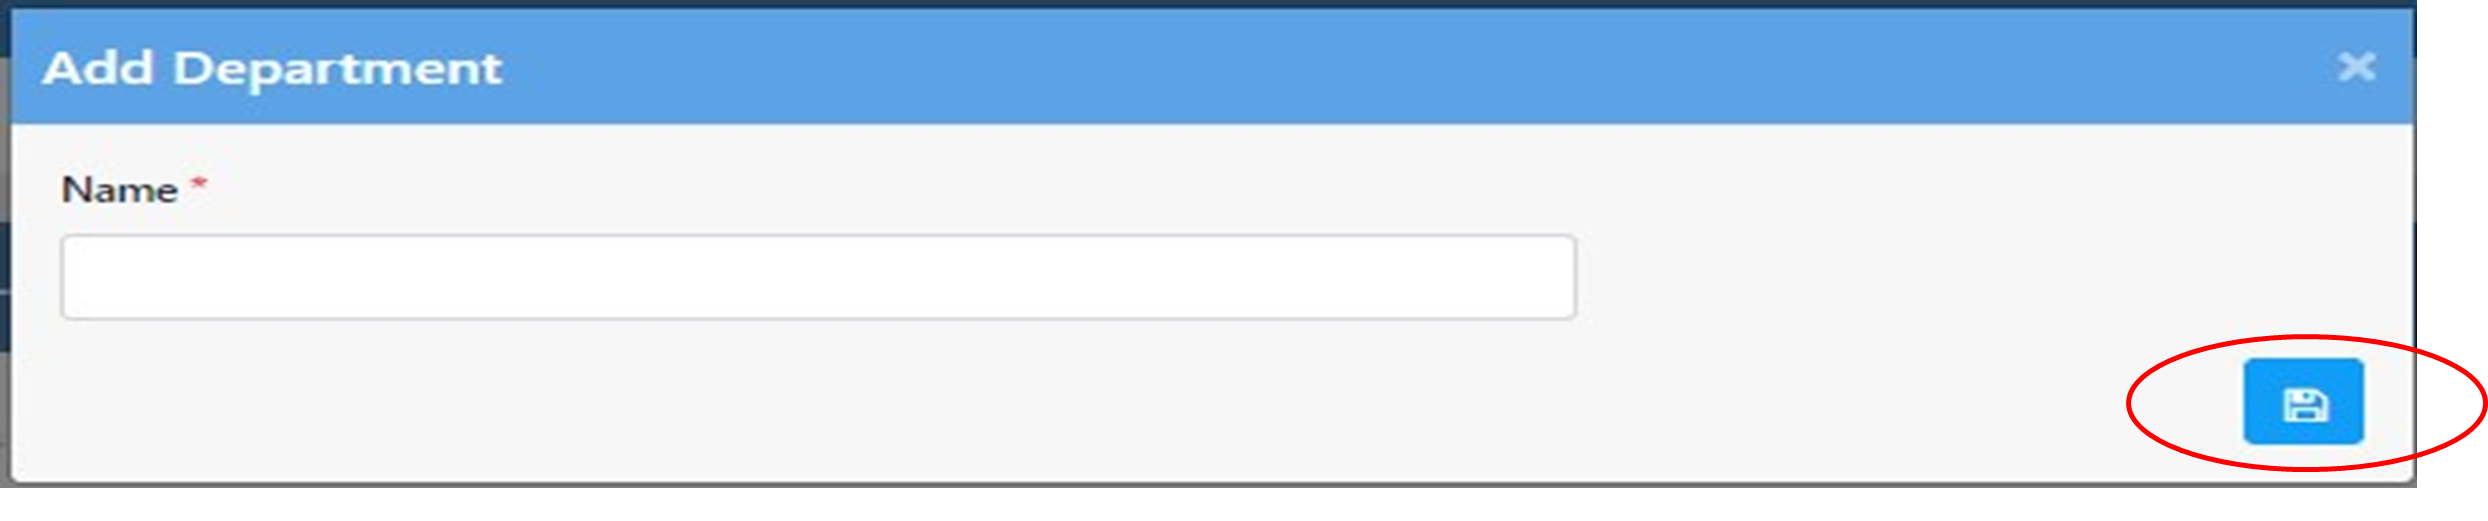
Fill up the require field, input the name of the Department.
To SAVE the department click the save button below the name of the Department.
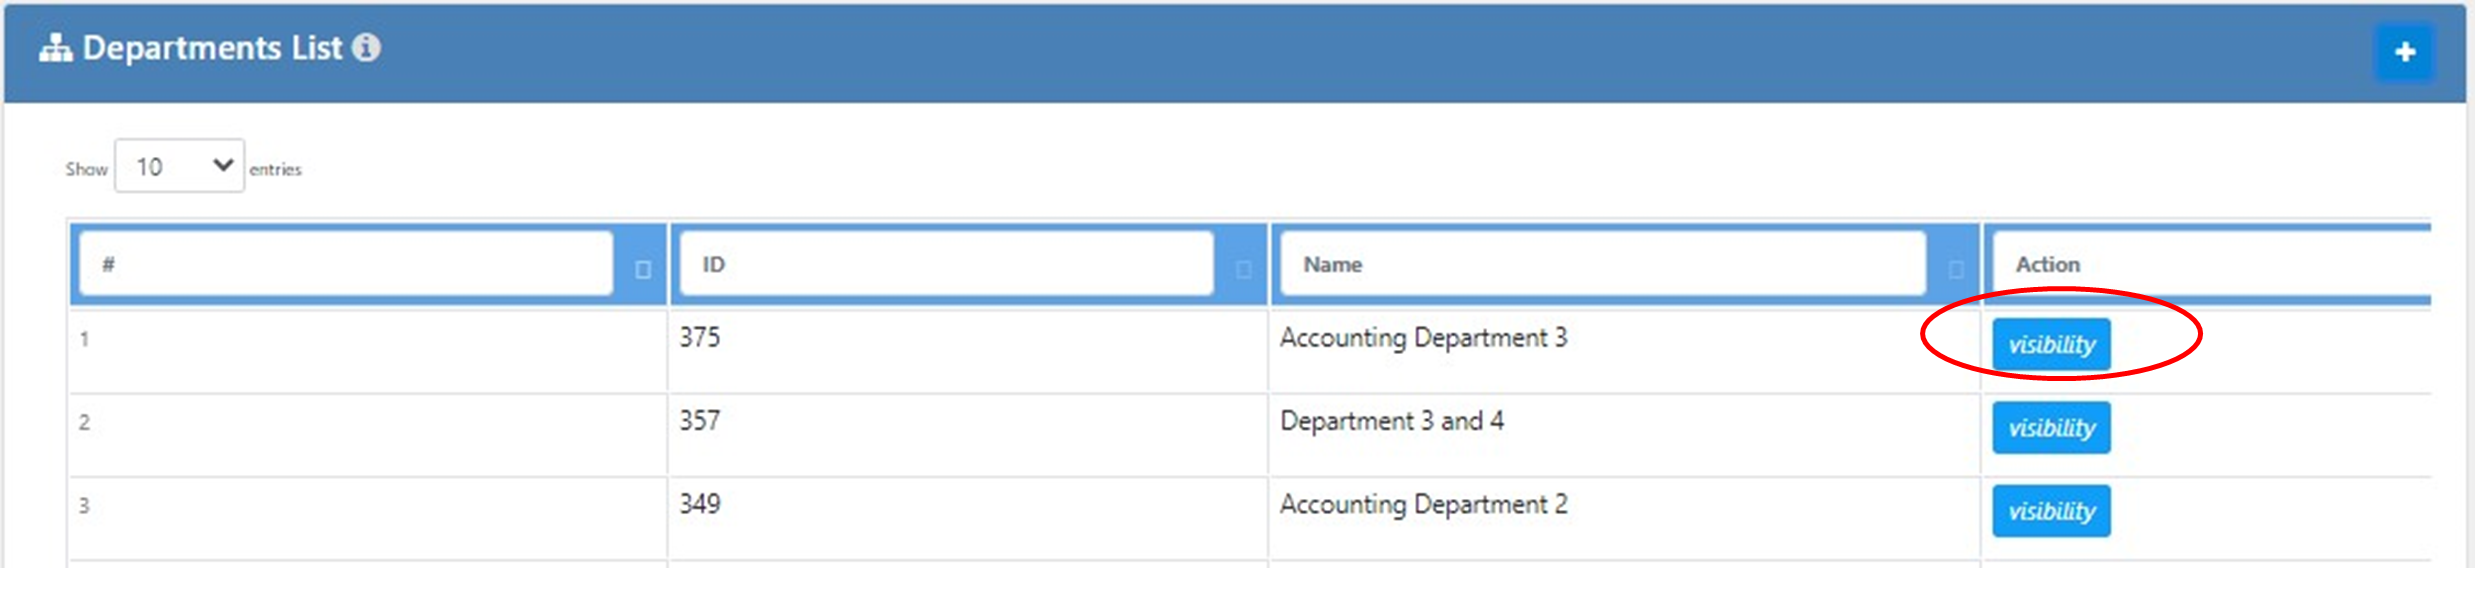
To VIEW the Department, click the view button under the Action Column.
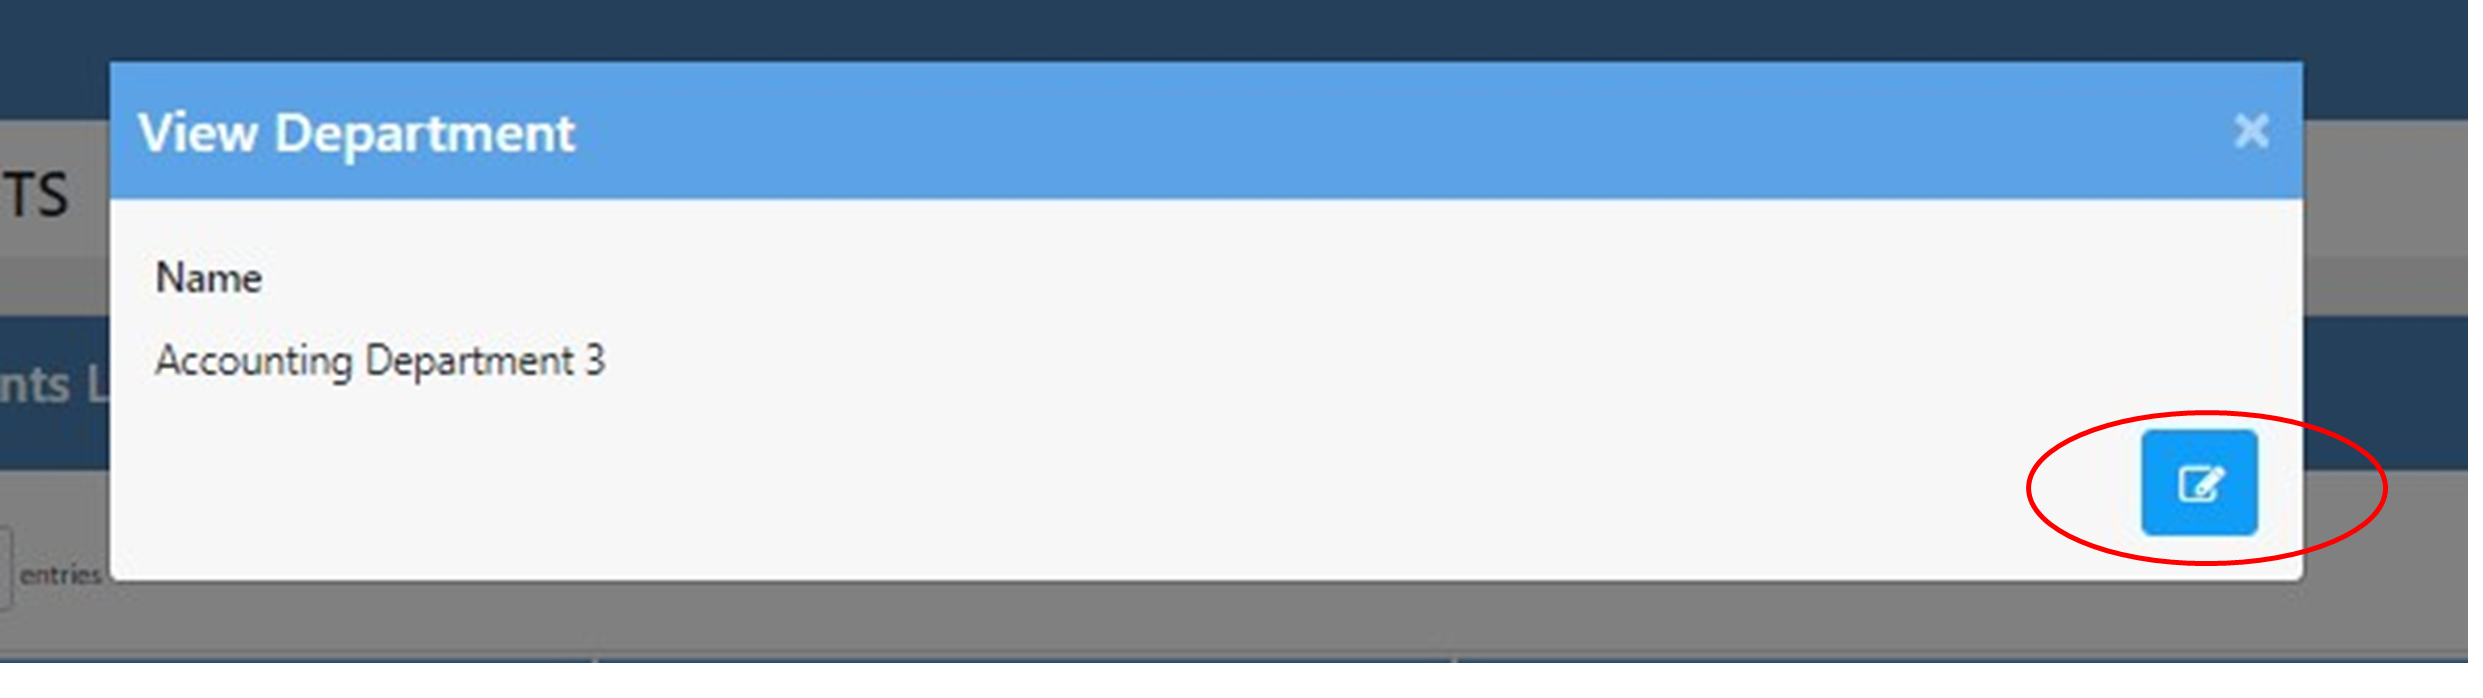
To EDIT the Department Name, click the edit button below its Name.
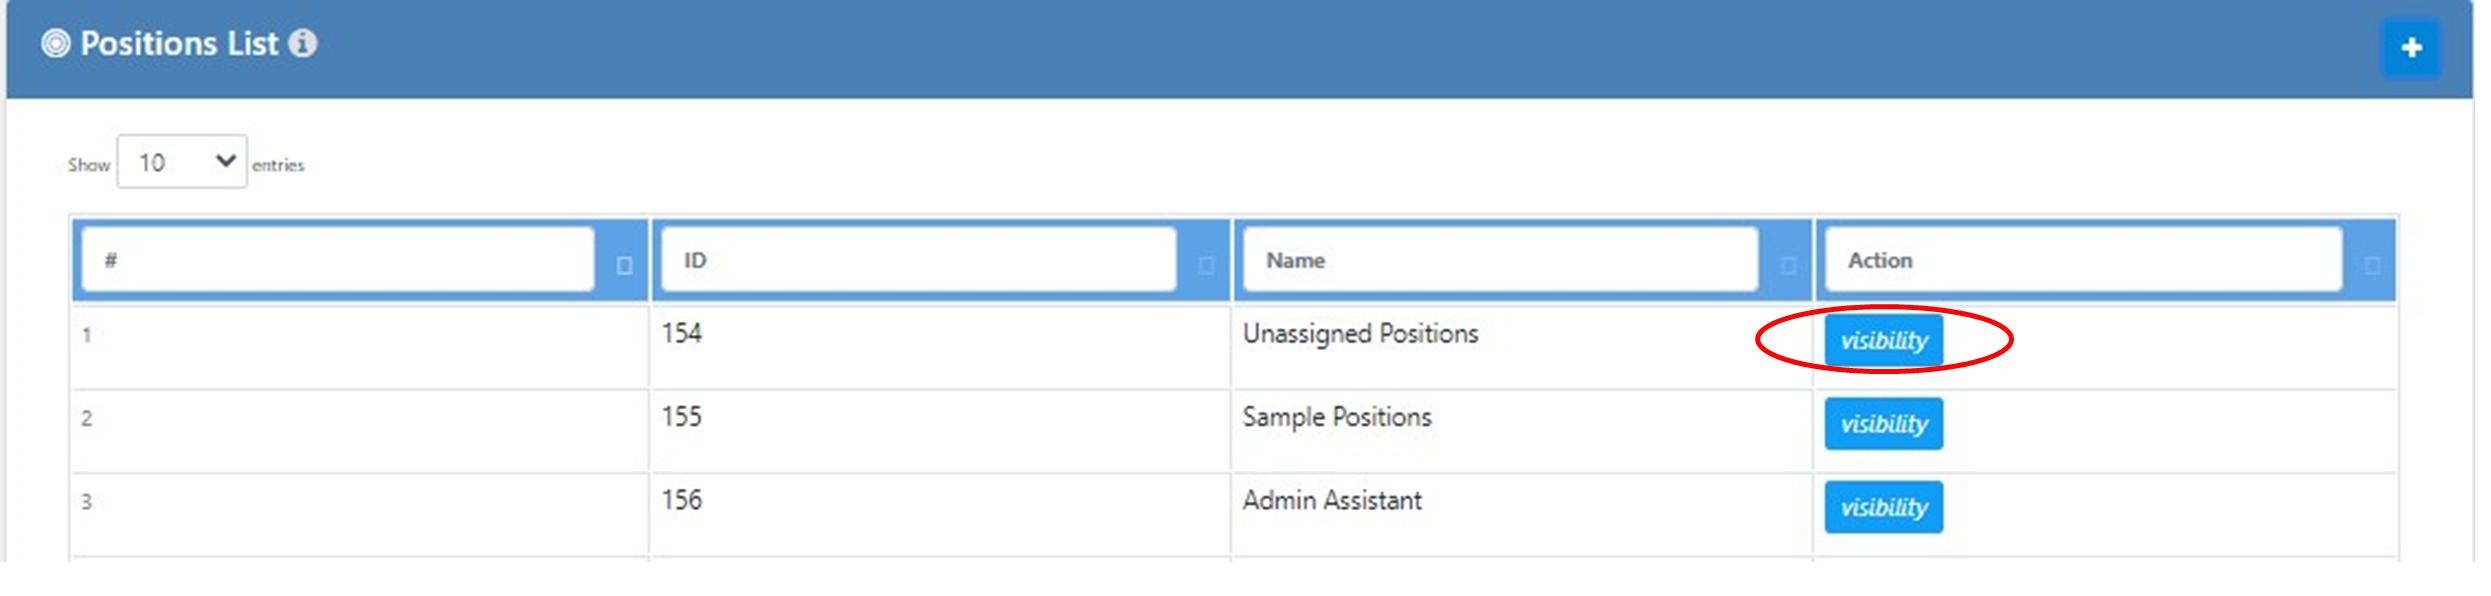
Positions
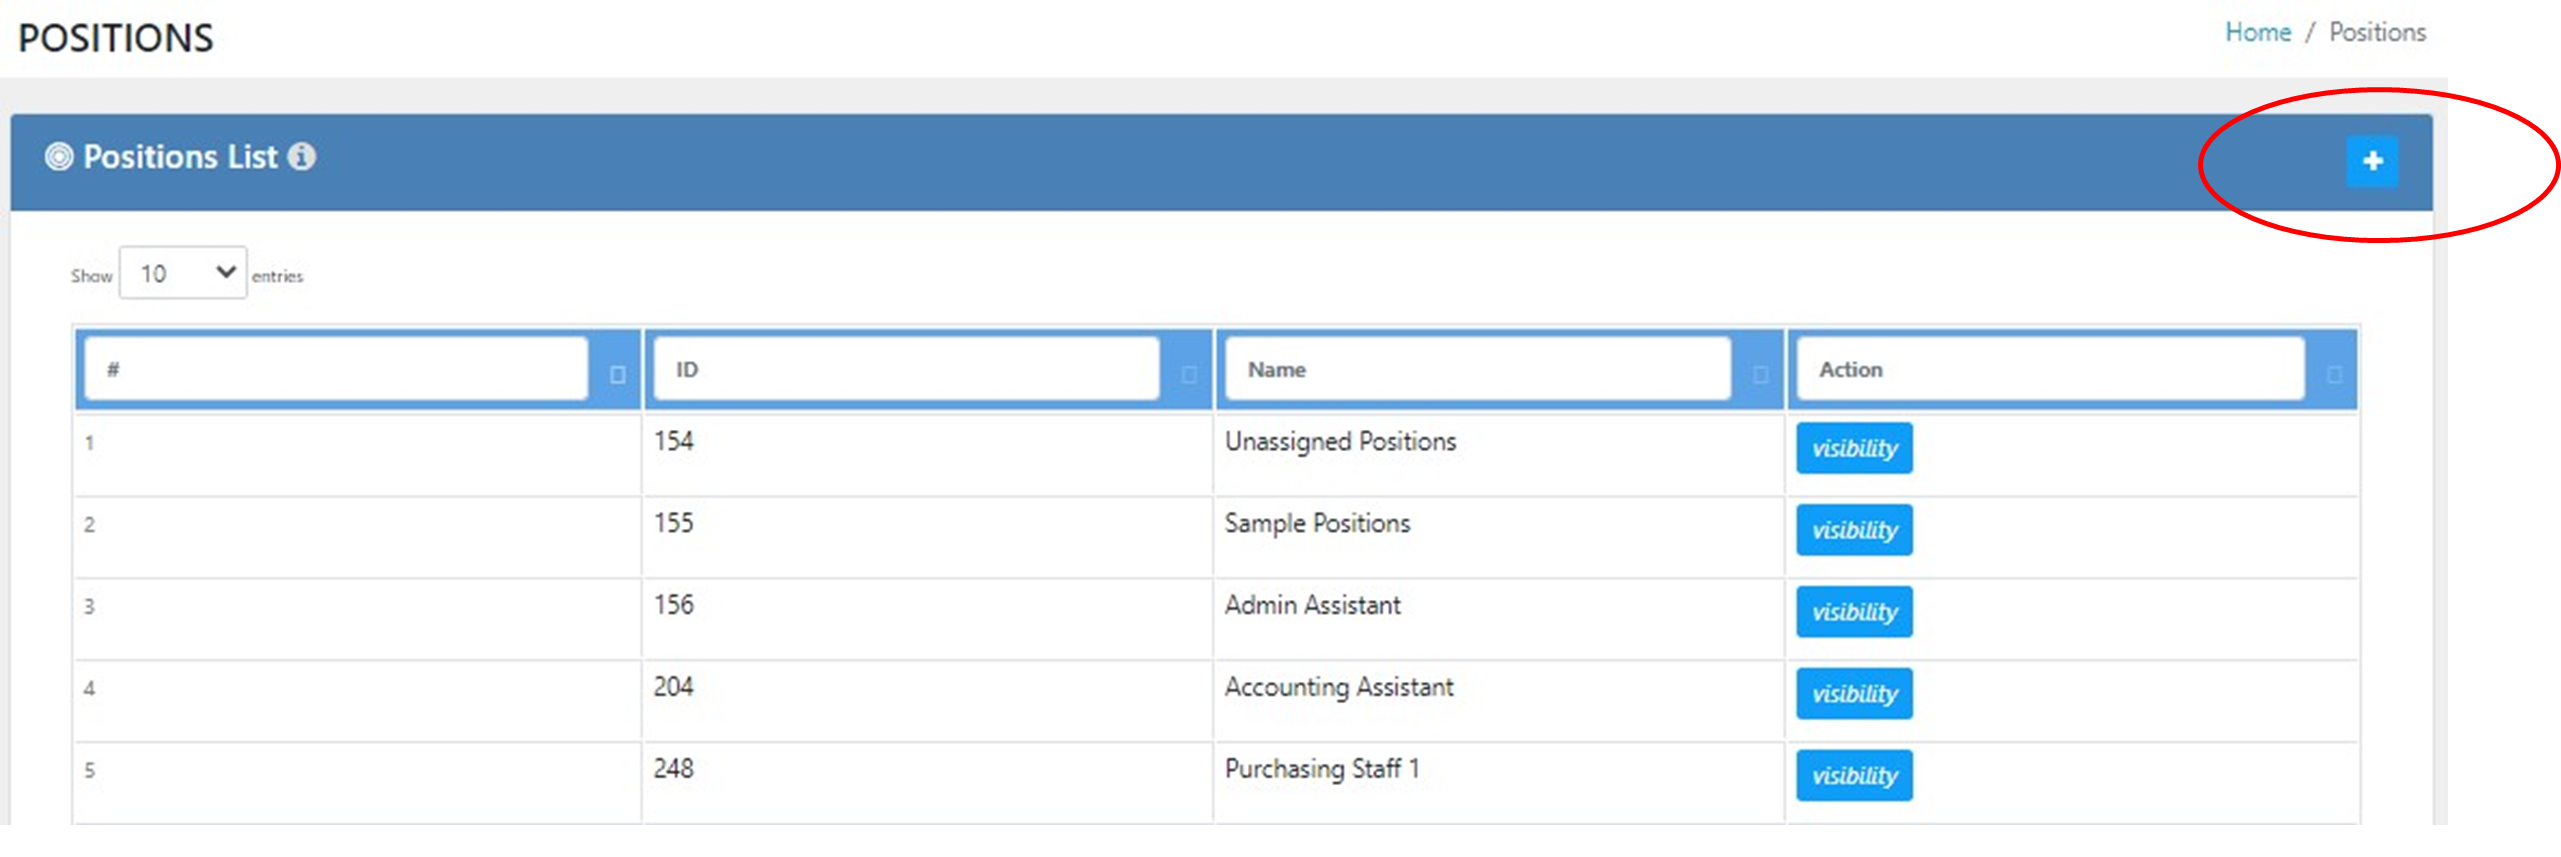
To add Positions, click add the button at the upper rightmost part of Positions List.
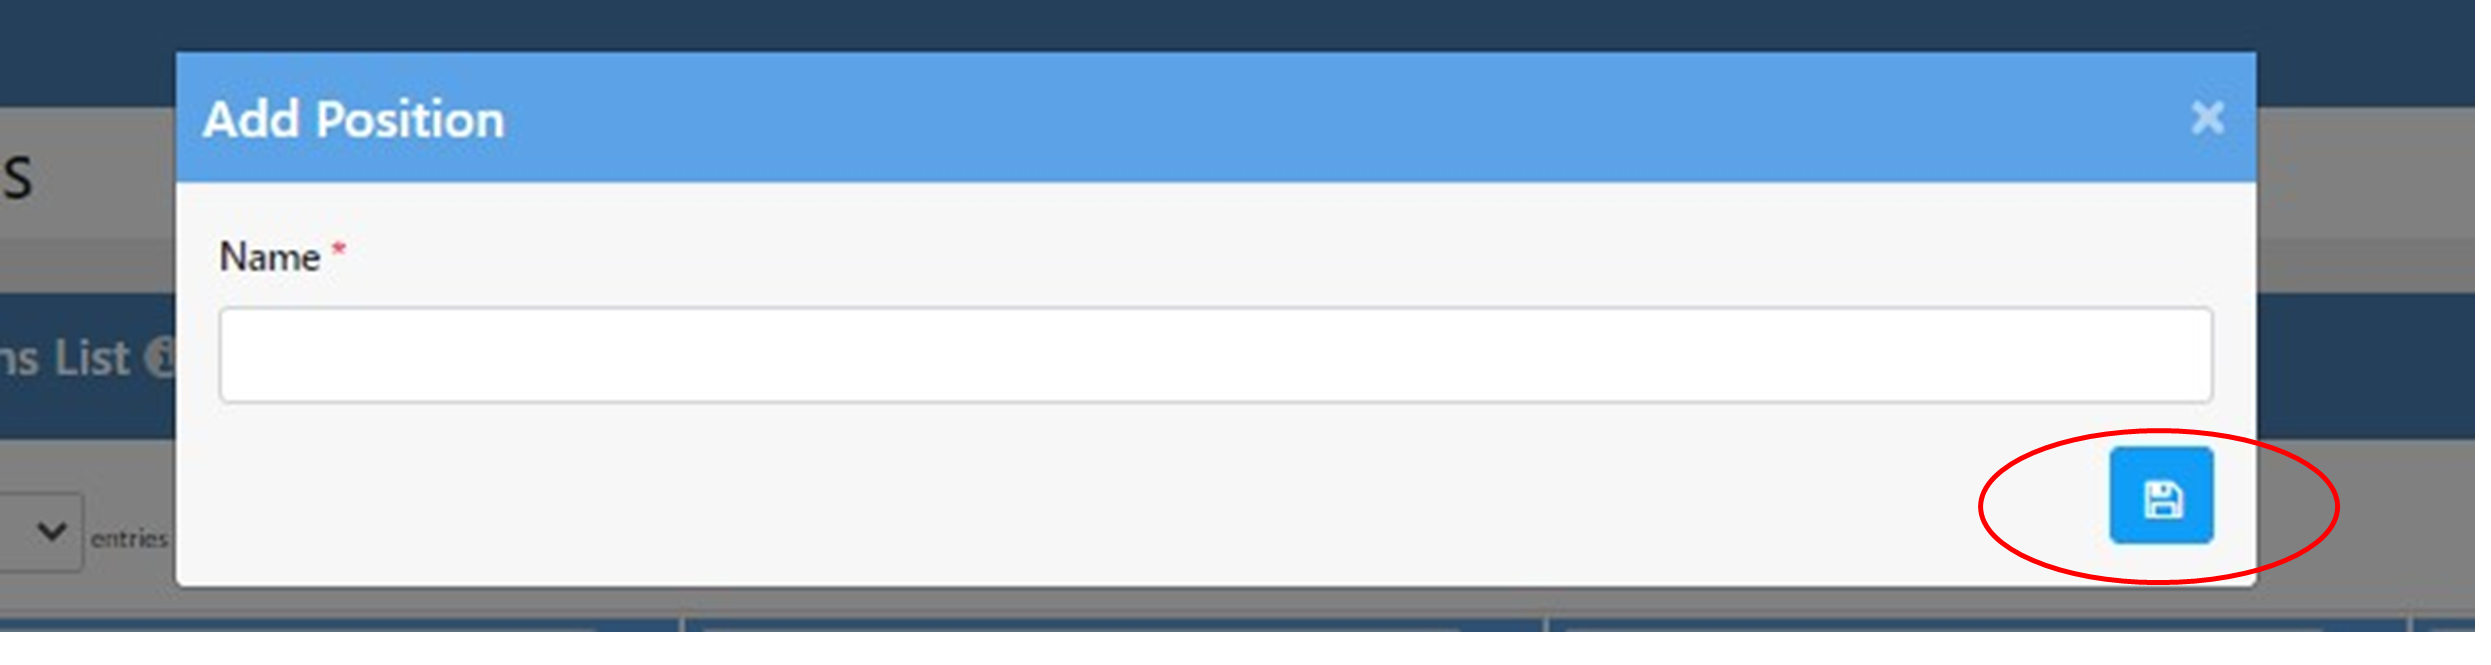
Fill up the require field, input the name of the Positions. To SAVE the positions click the save button below the name of the Positions.
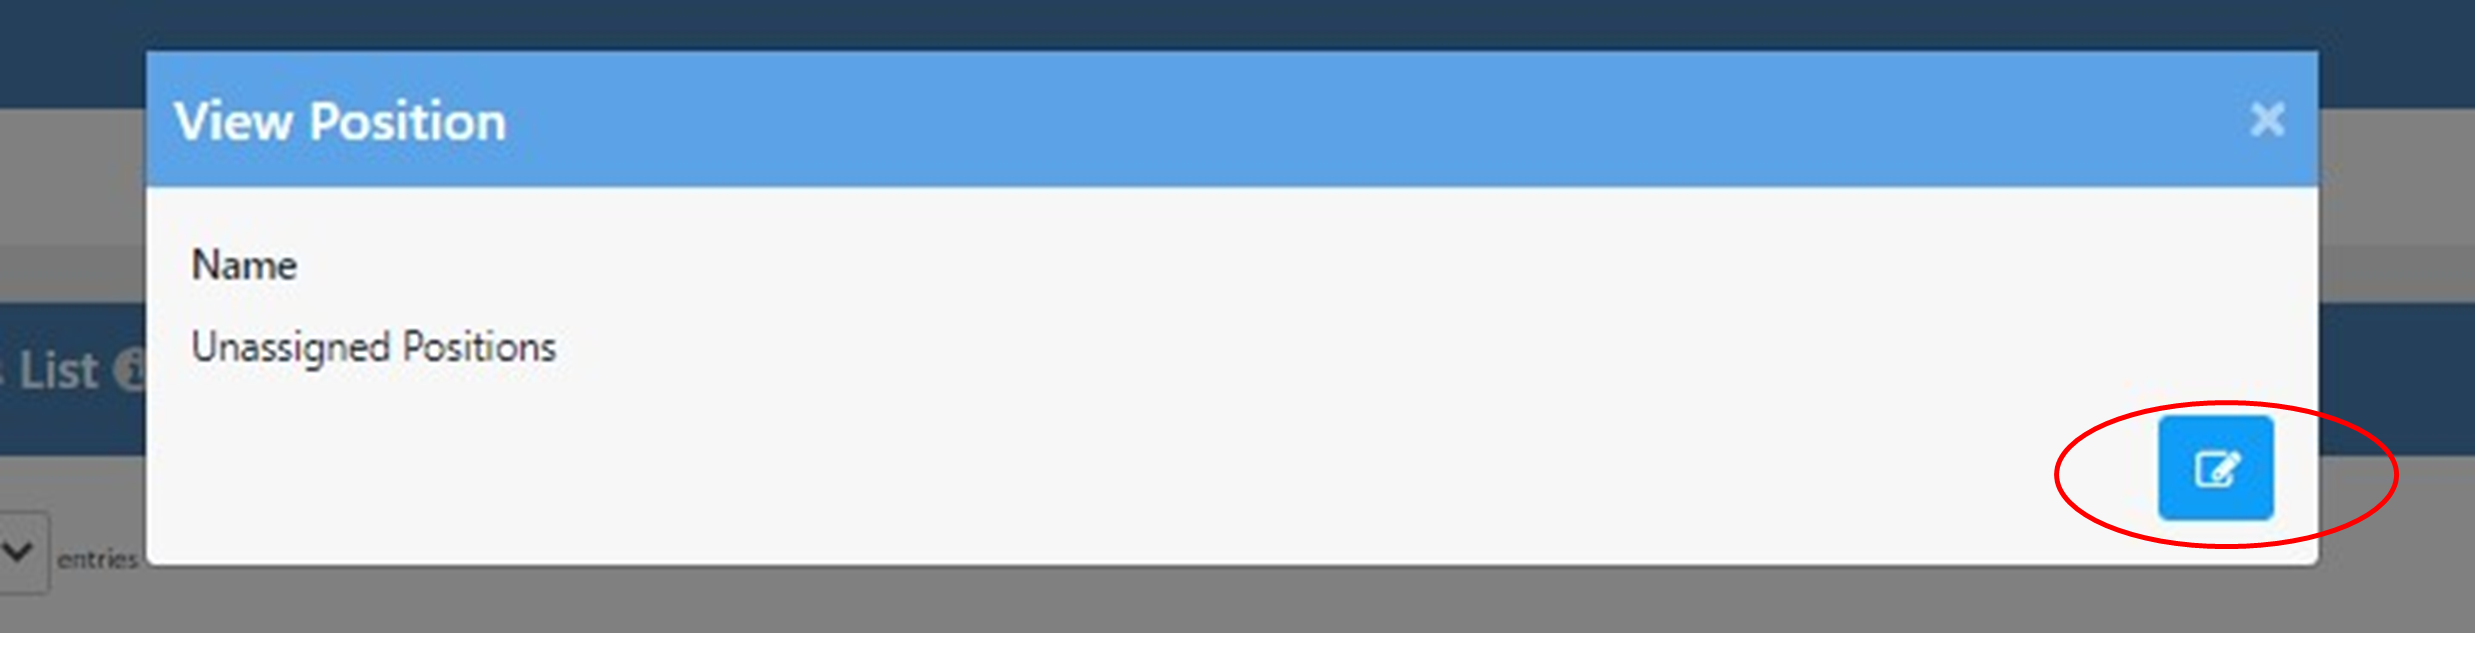
To VIEW the Positions, click the view button under the Action Column.
To EDIT the Positions, click the edit button below its Name.
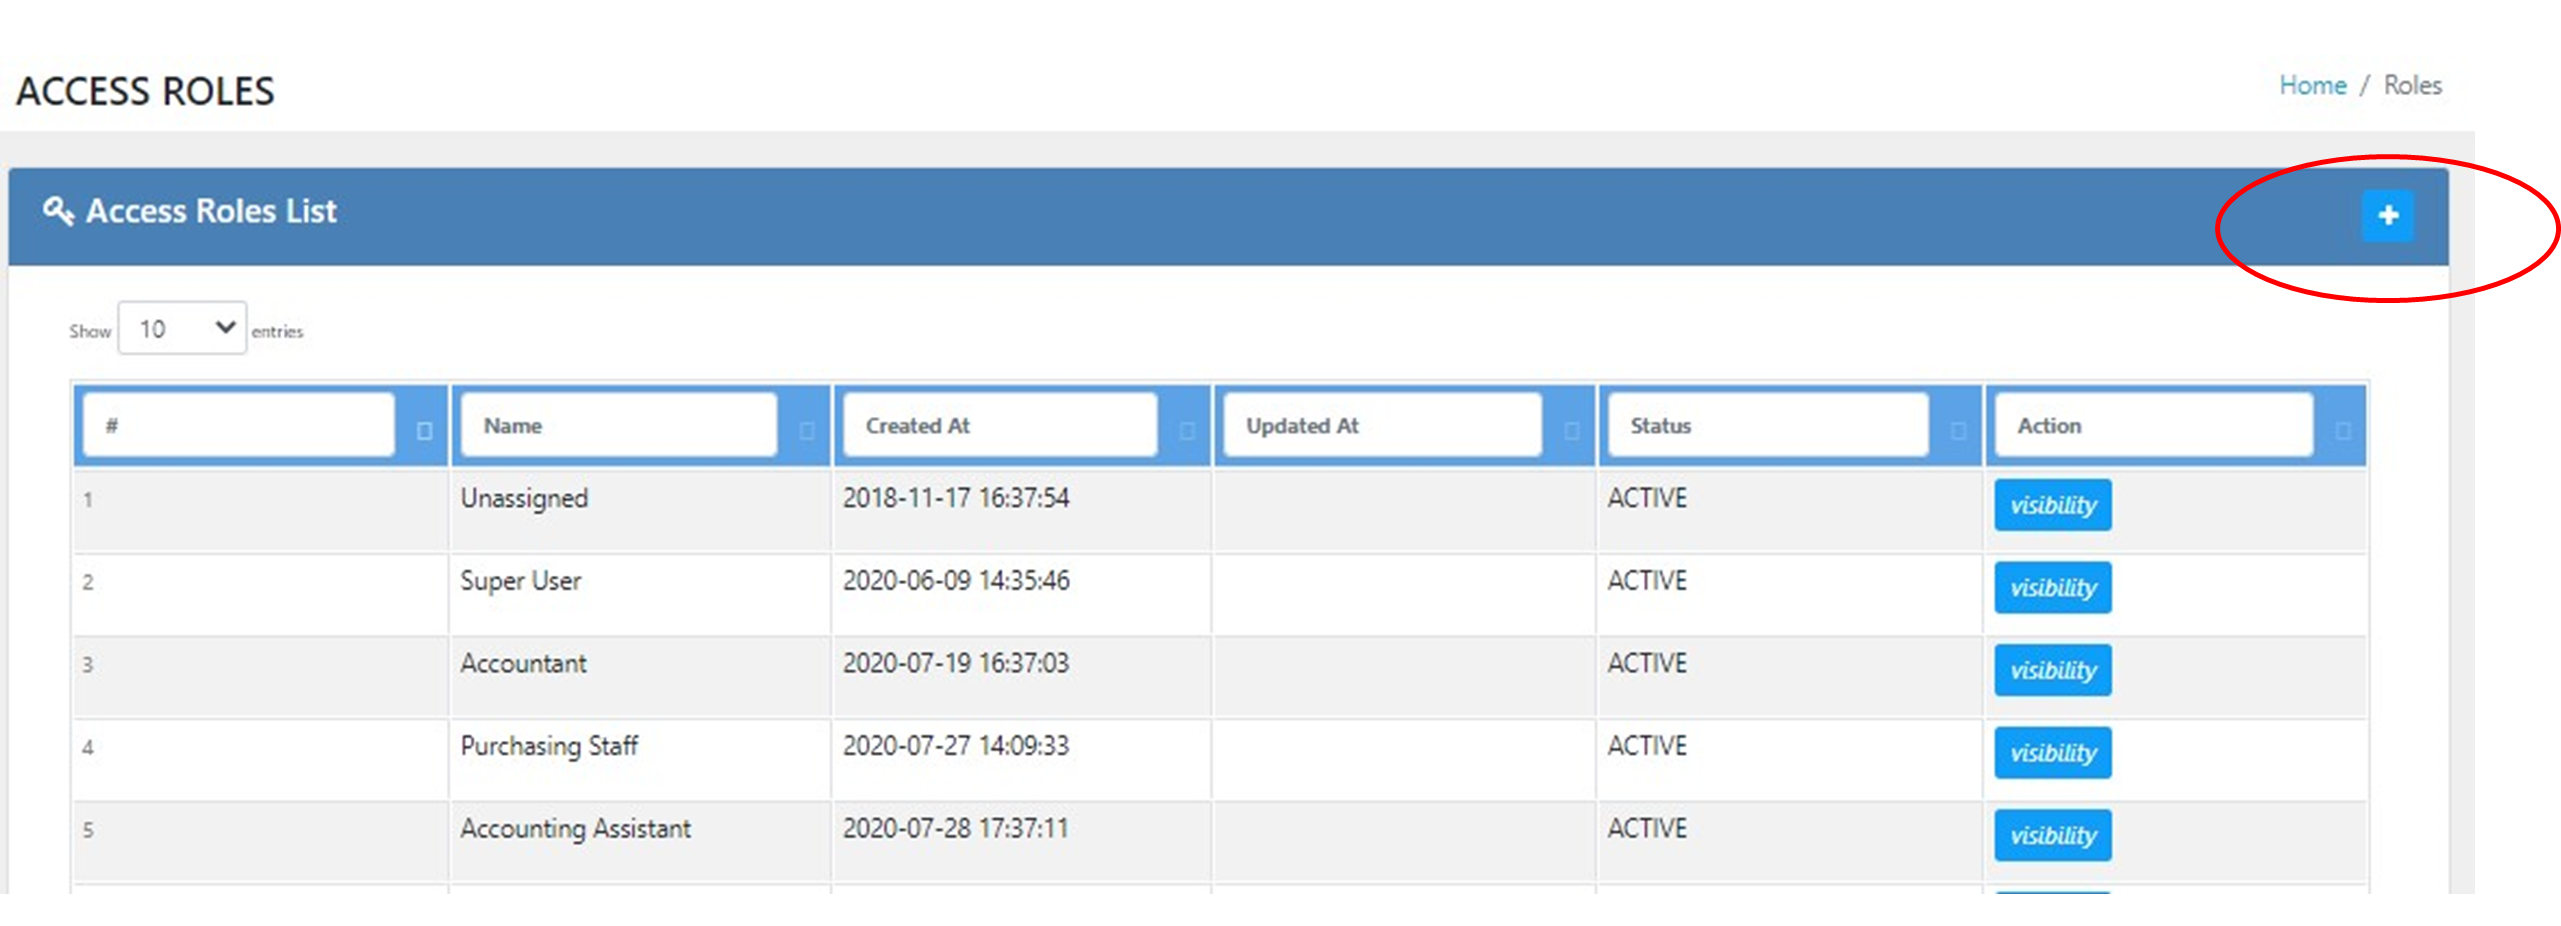
Access Roles
To ADD an Access Role, click the Add Button at the right topmost part of the screen.
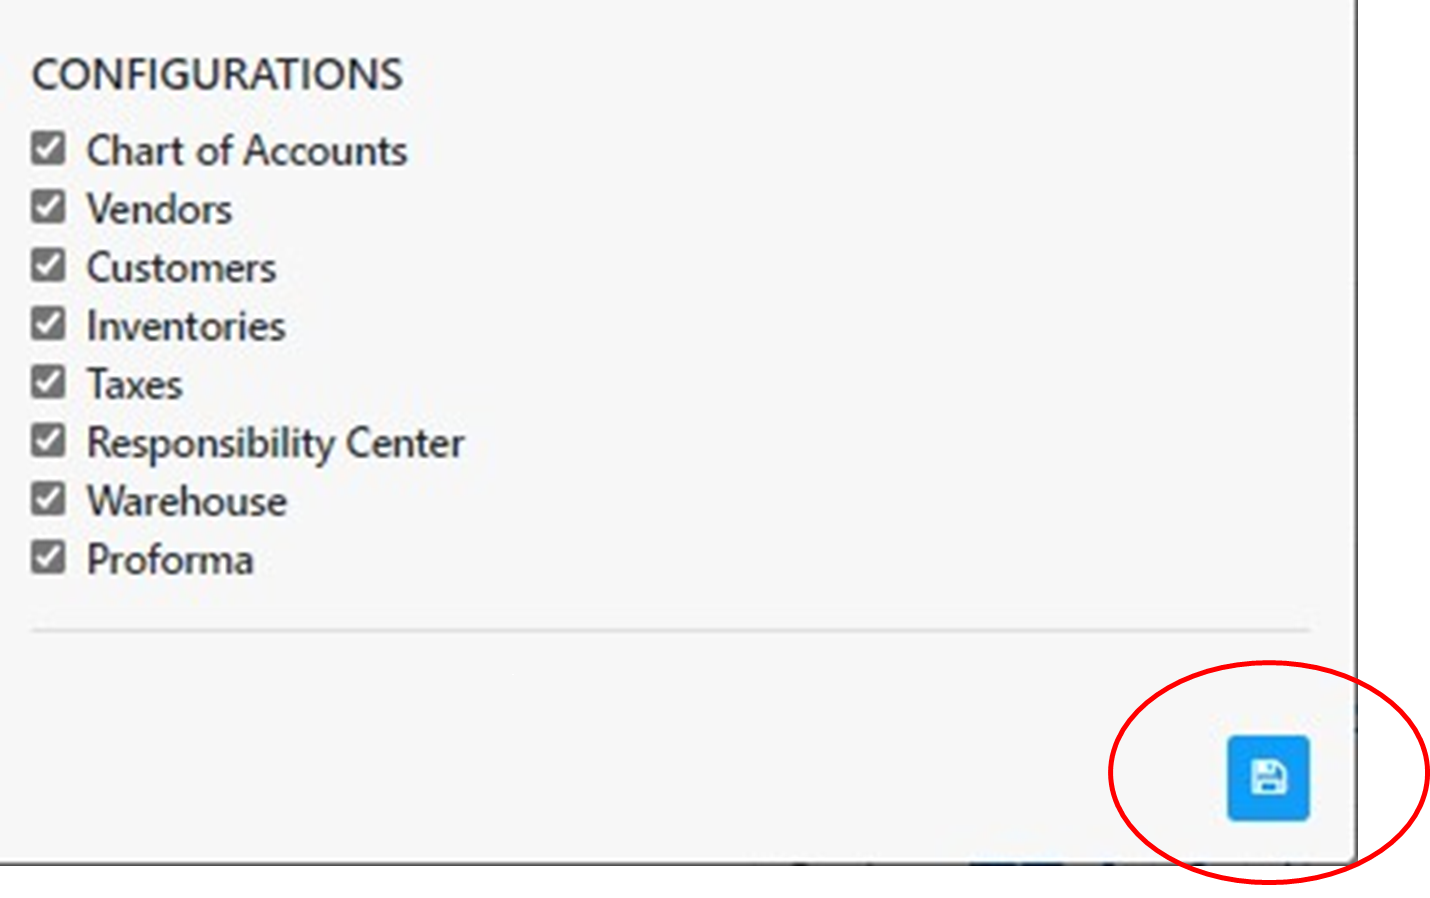
Fill up the required field, input the Access Role Name. Then click the check Button to select the appropriate modules that can be access.
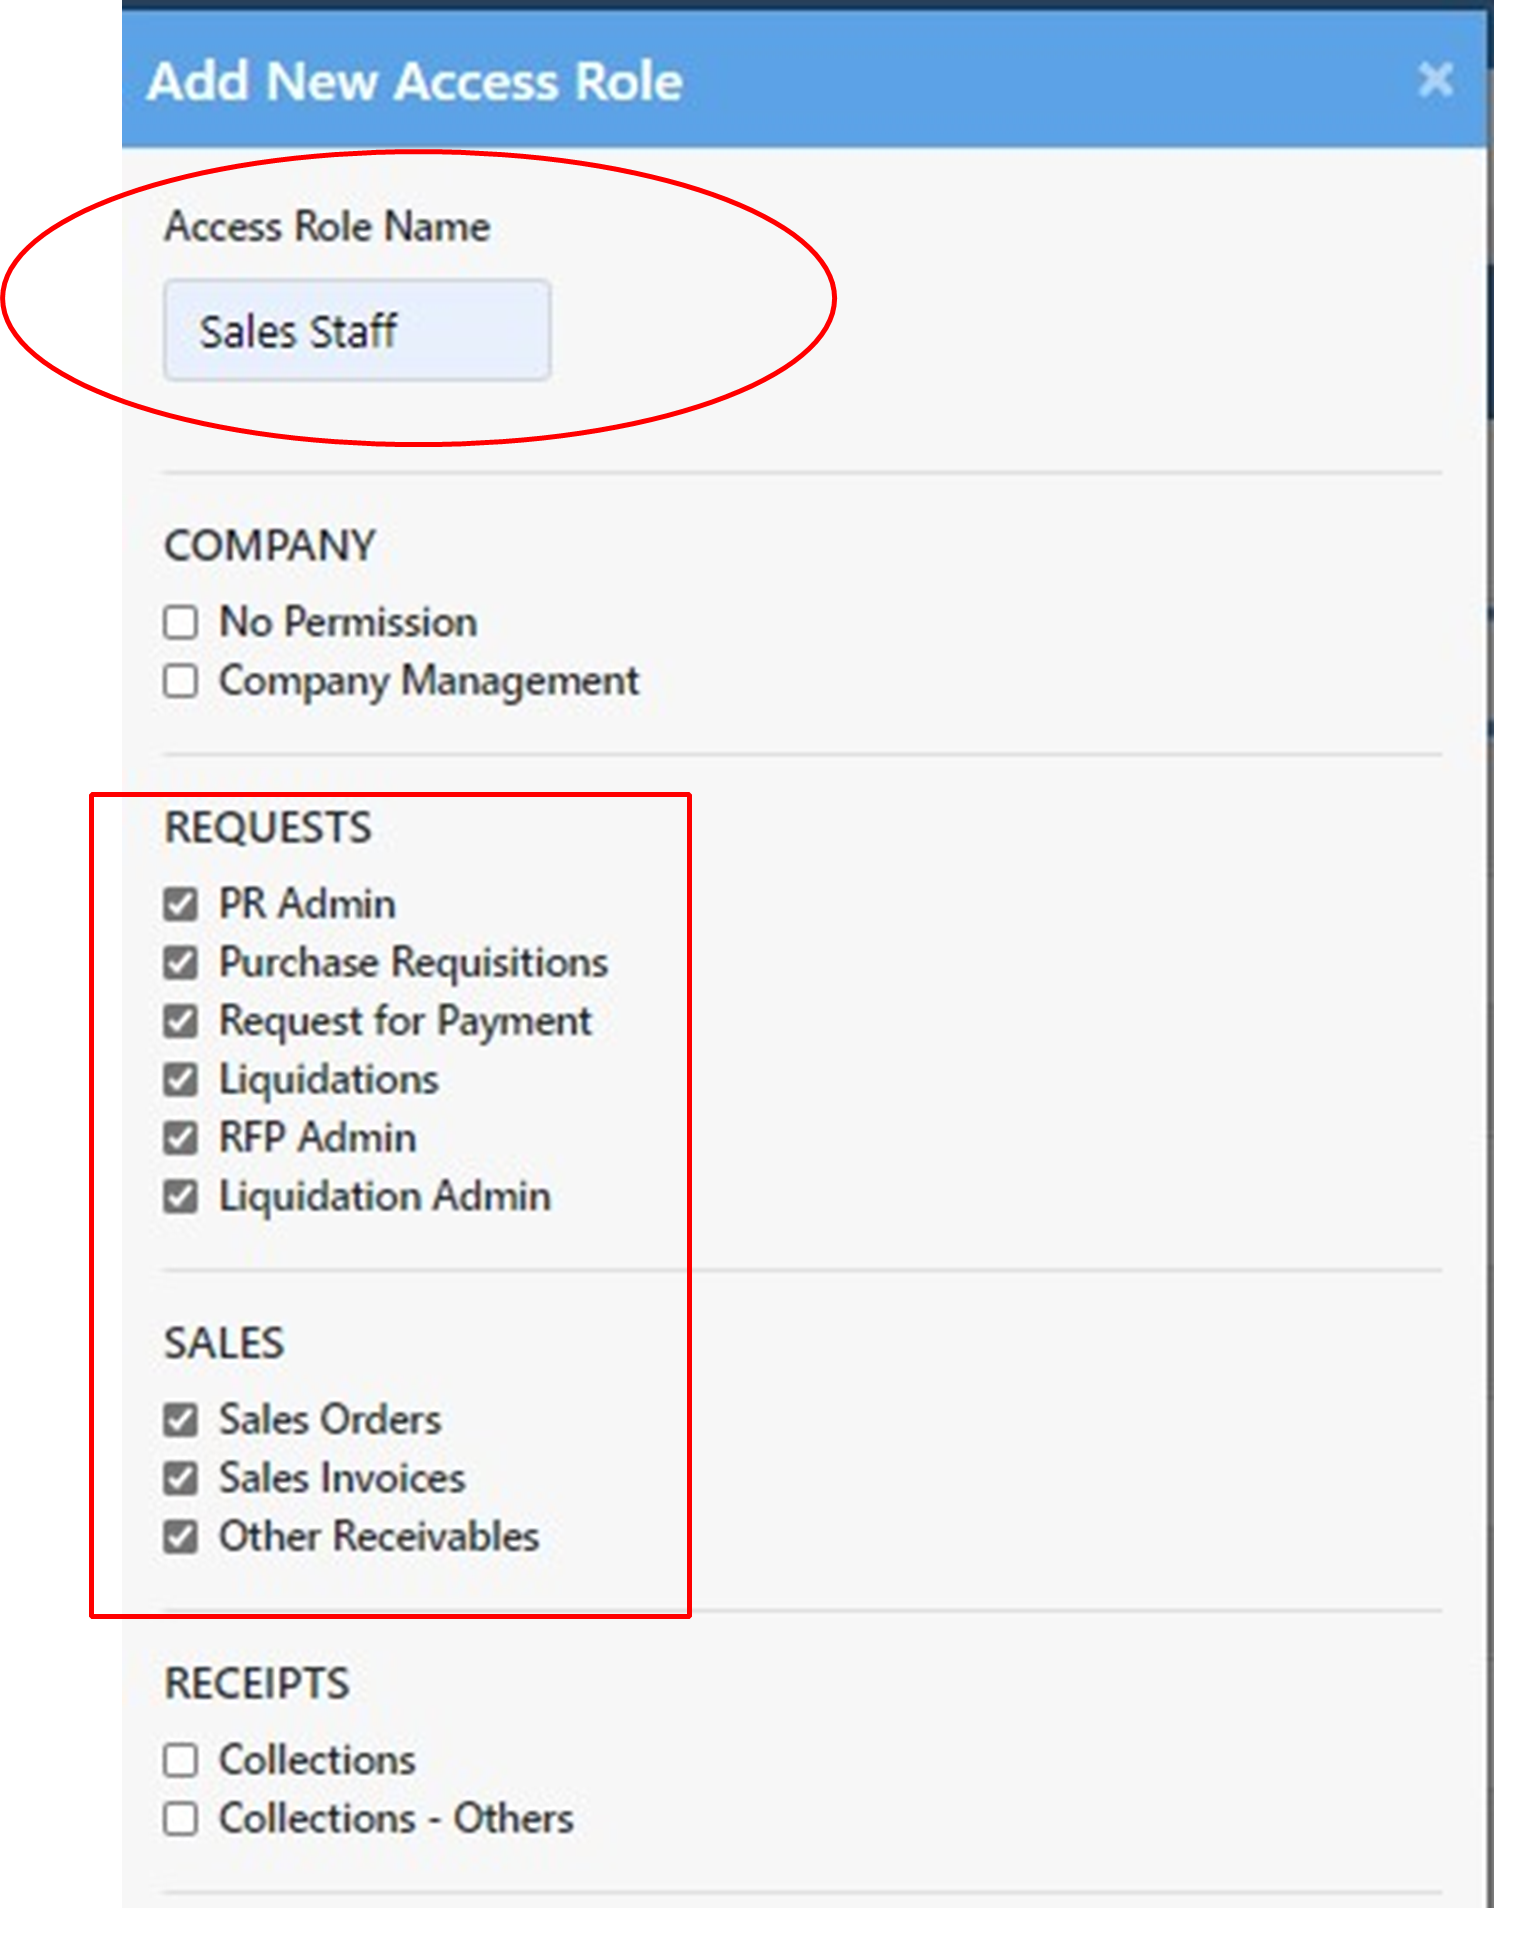
To SAVE the Role Access, click the Save Button.
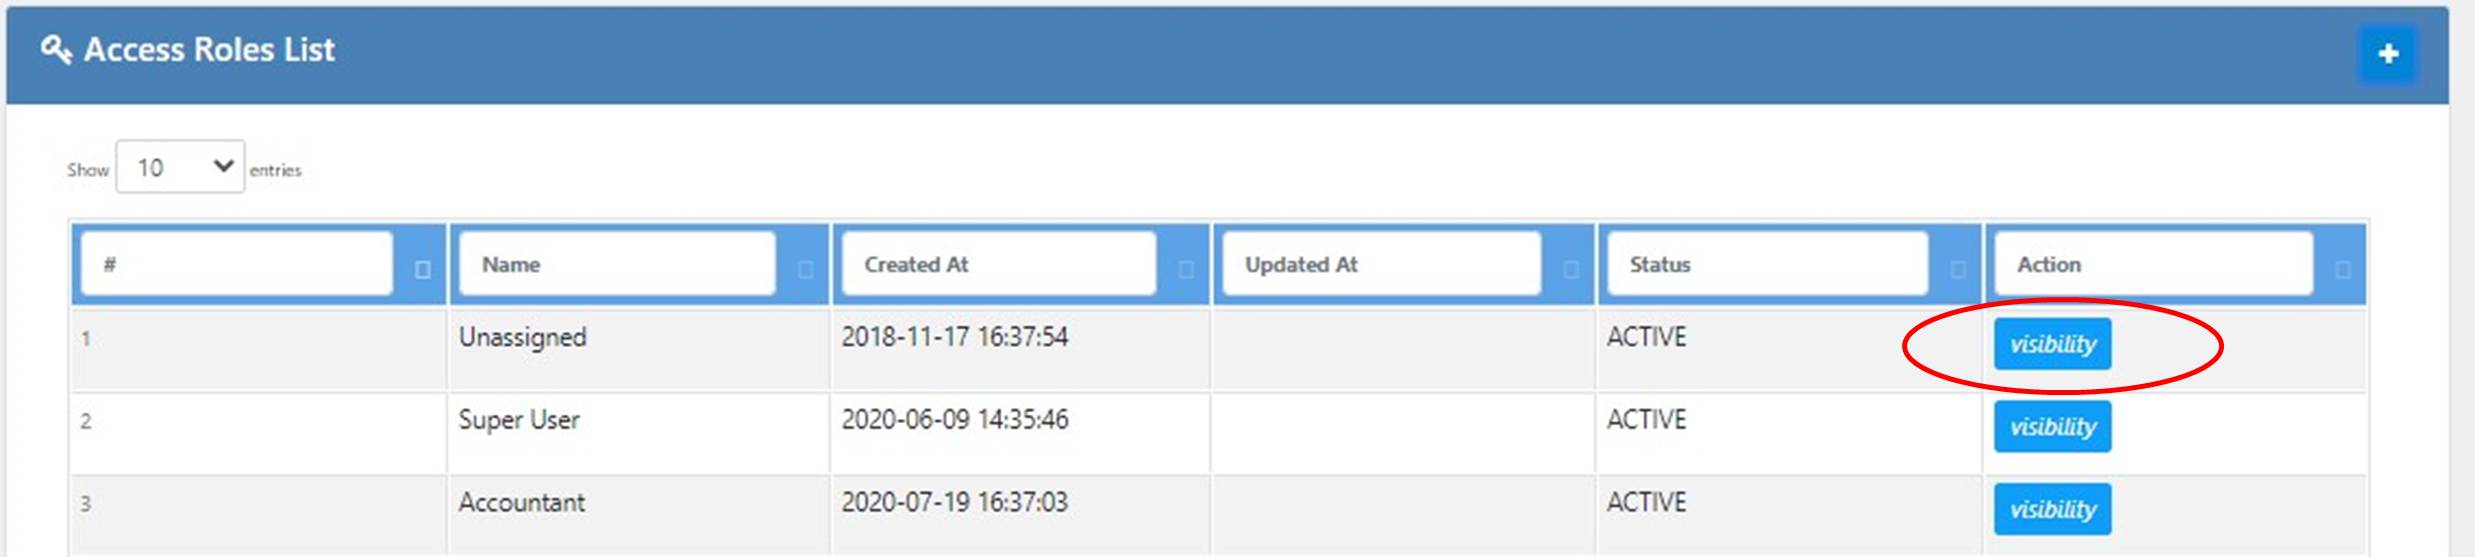
To VIEW Access Role, click the view button under the Action
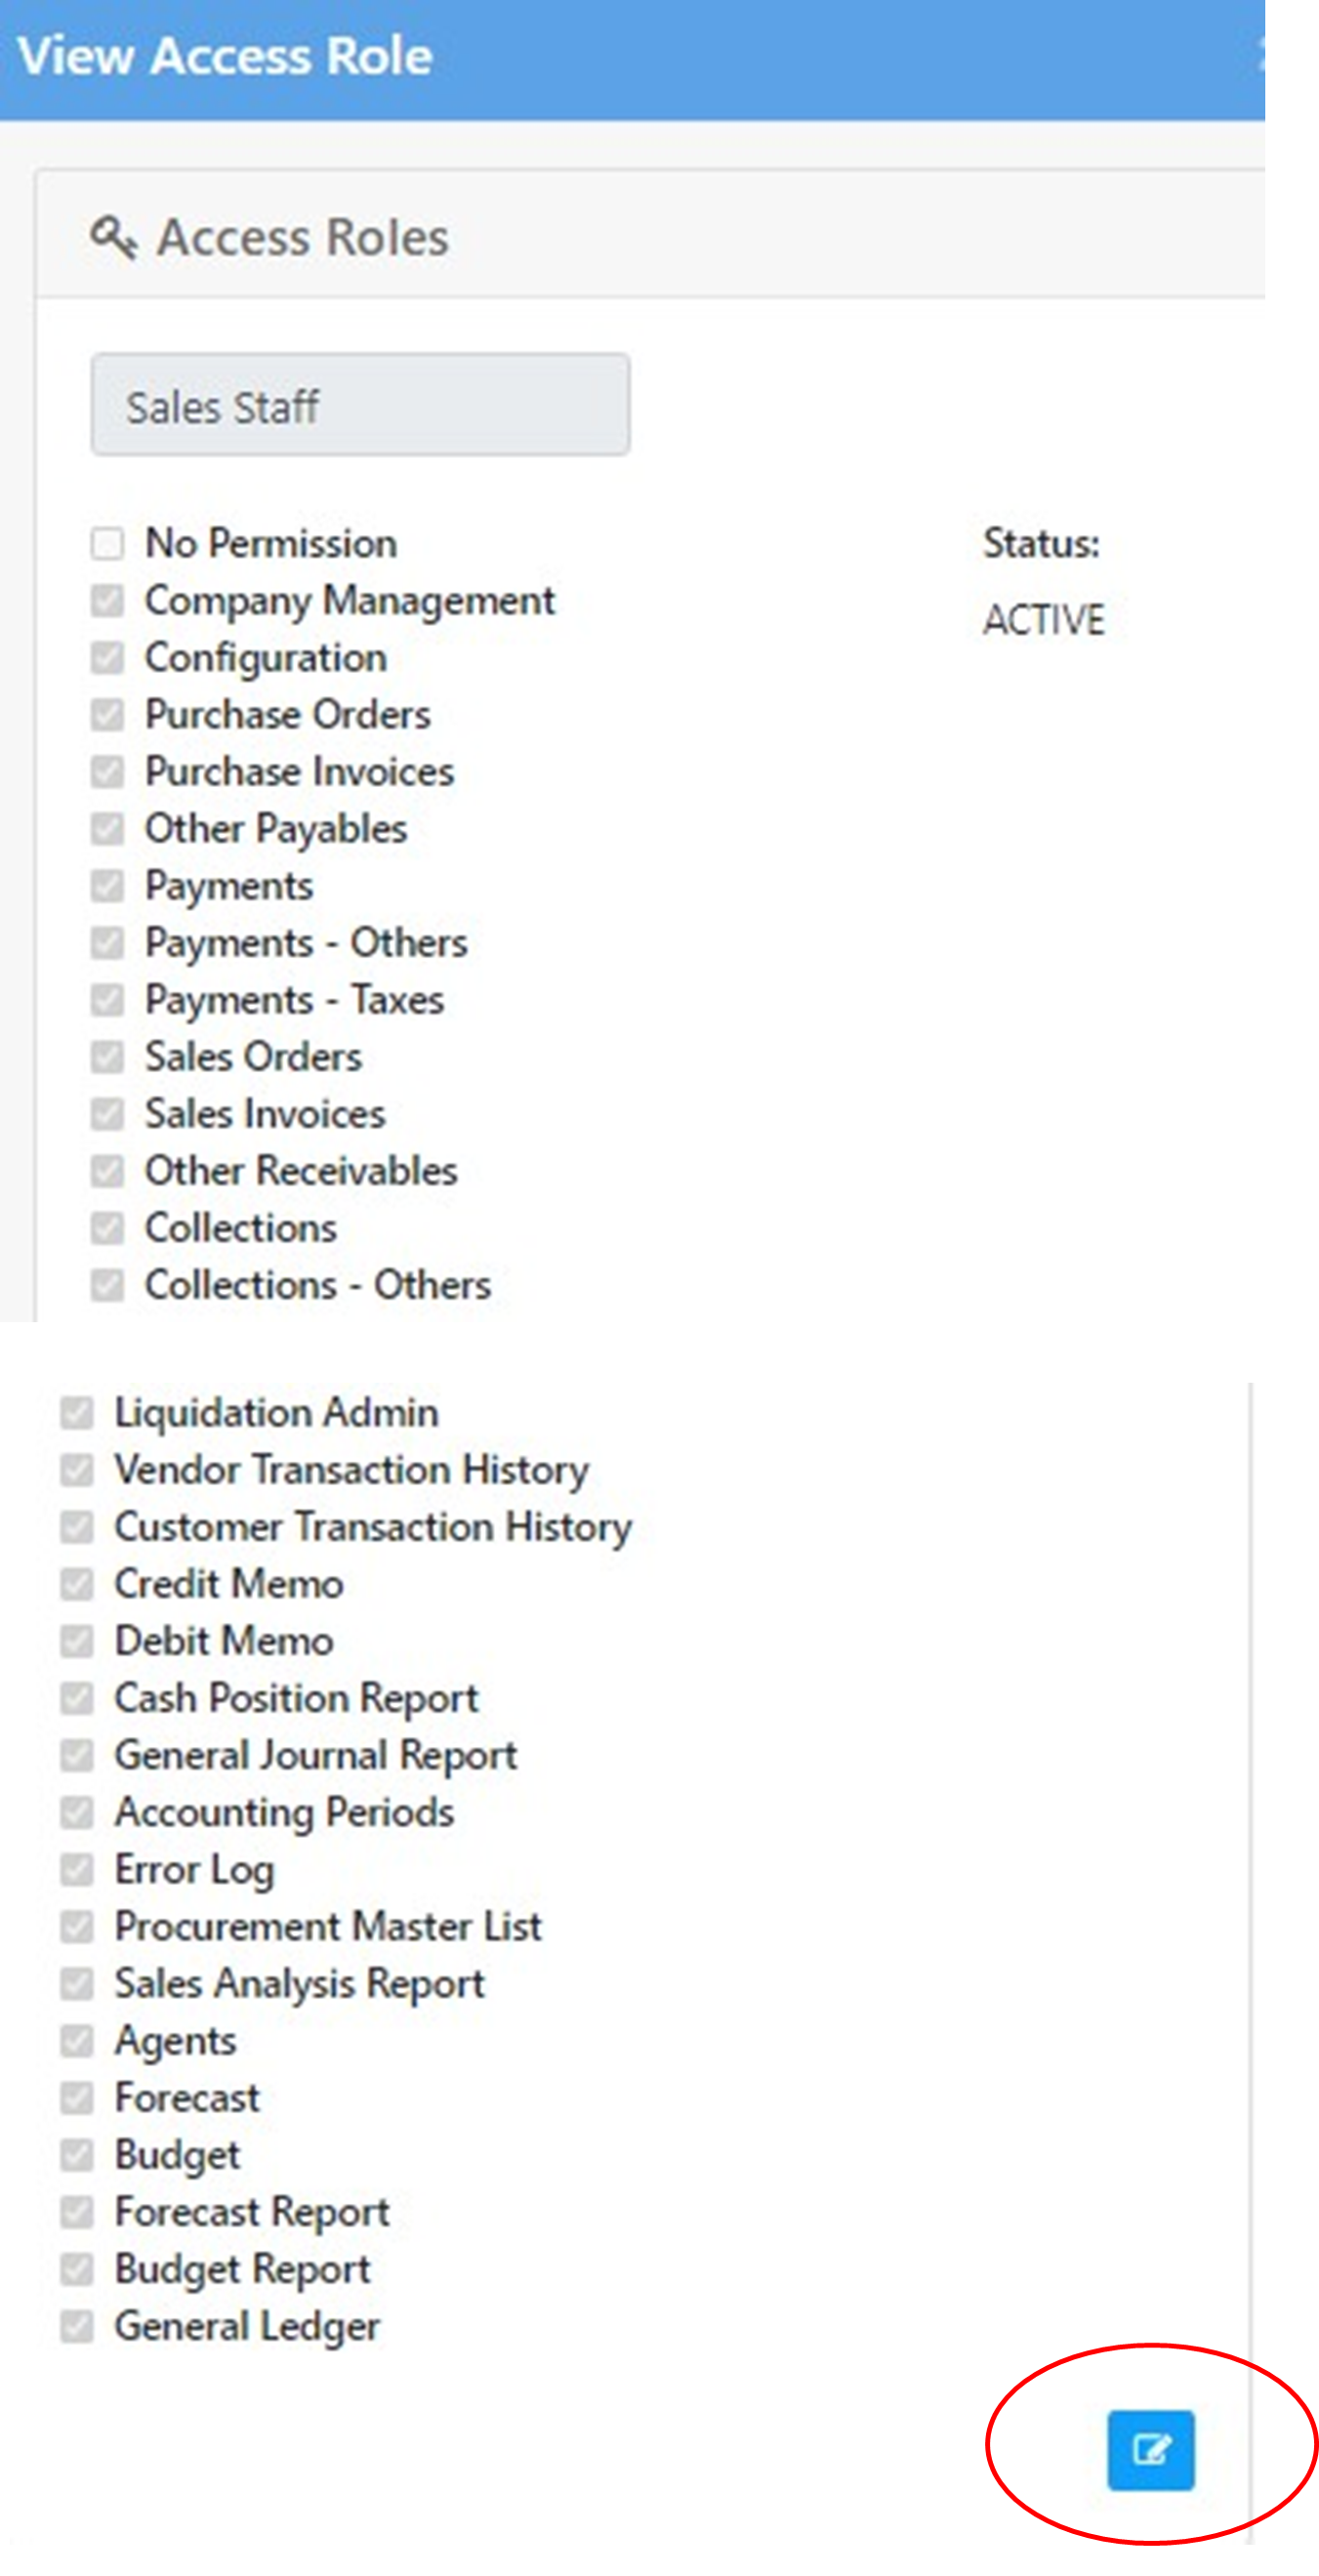
To EDIT Access Role, click the edit button at the lower part of the screen.
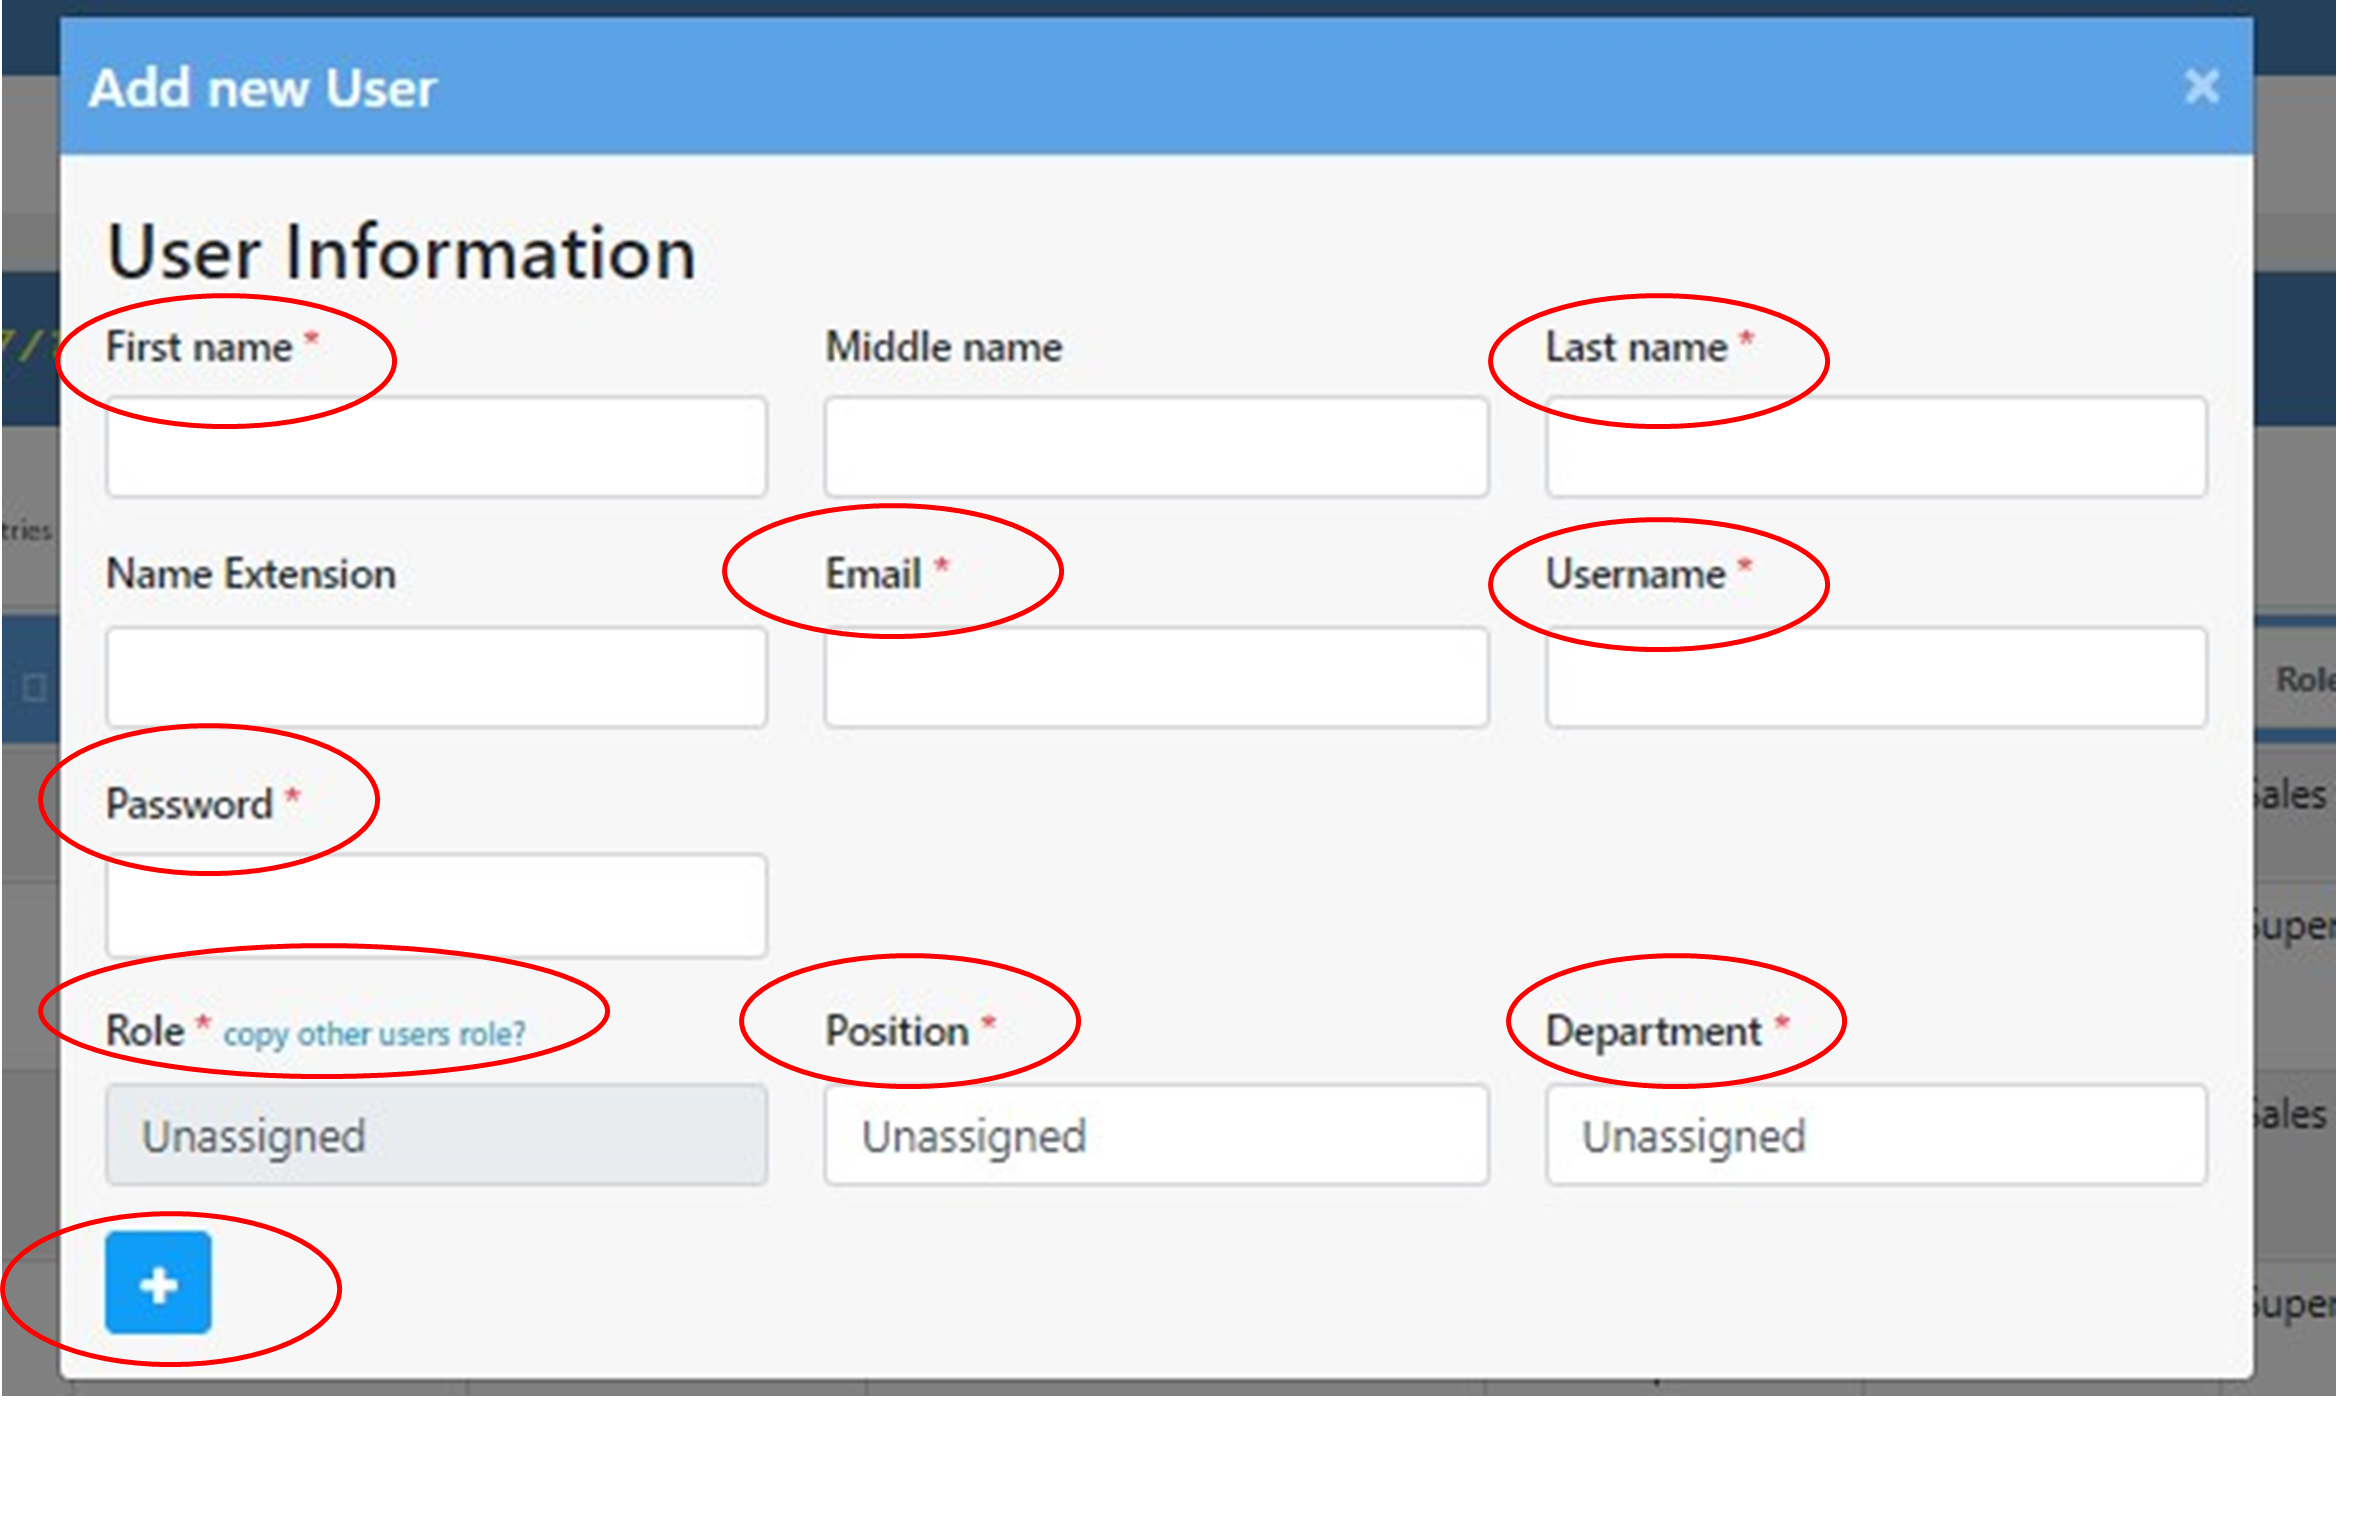
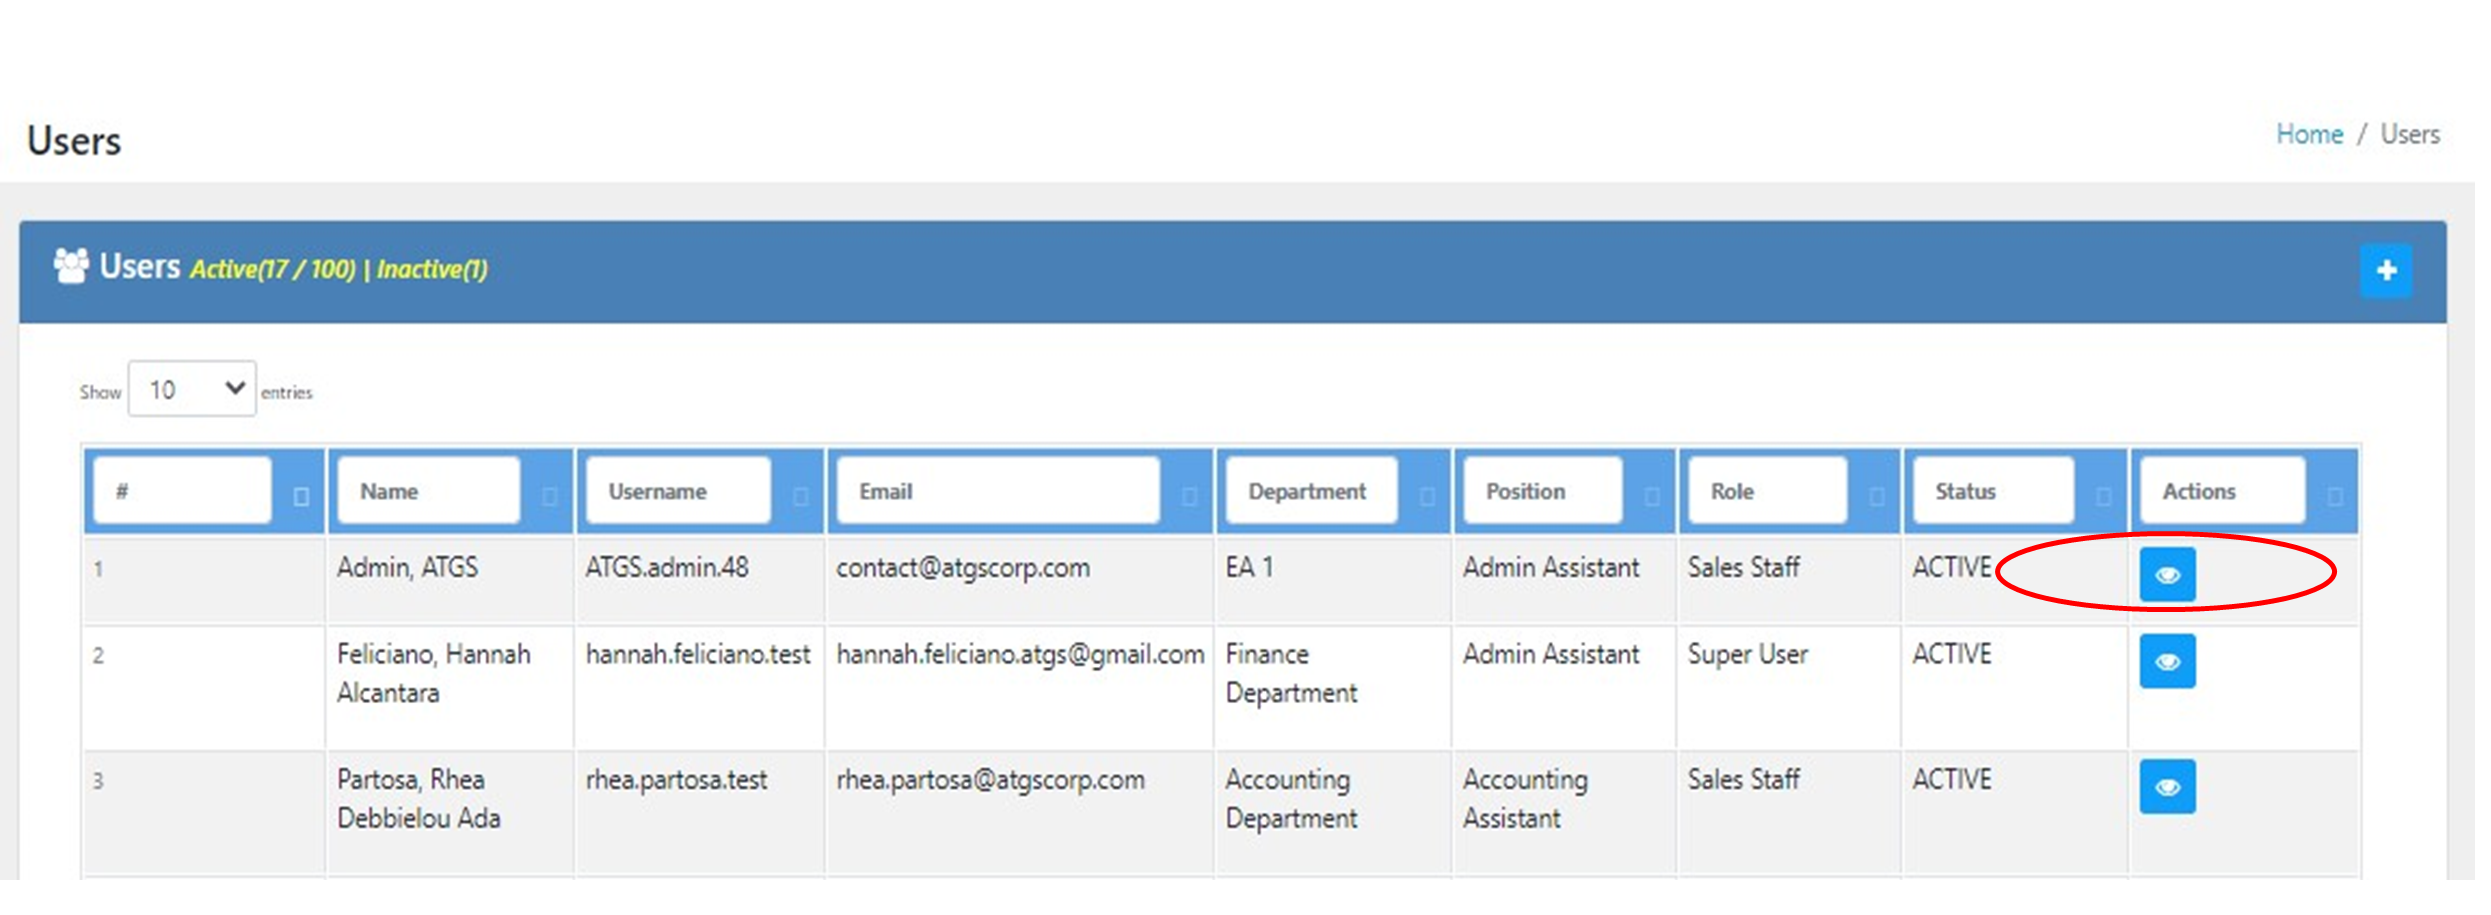
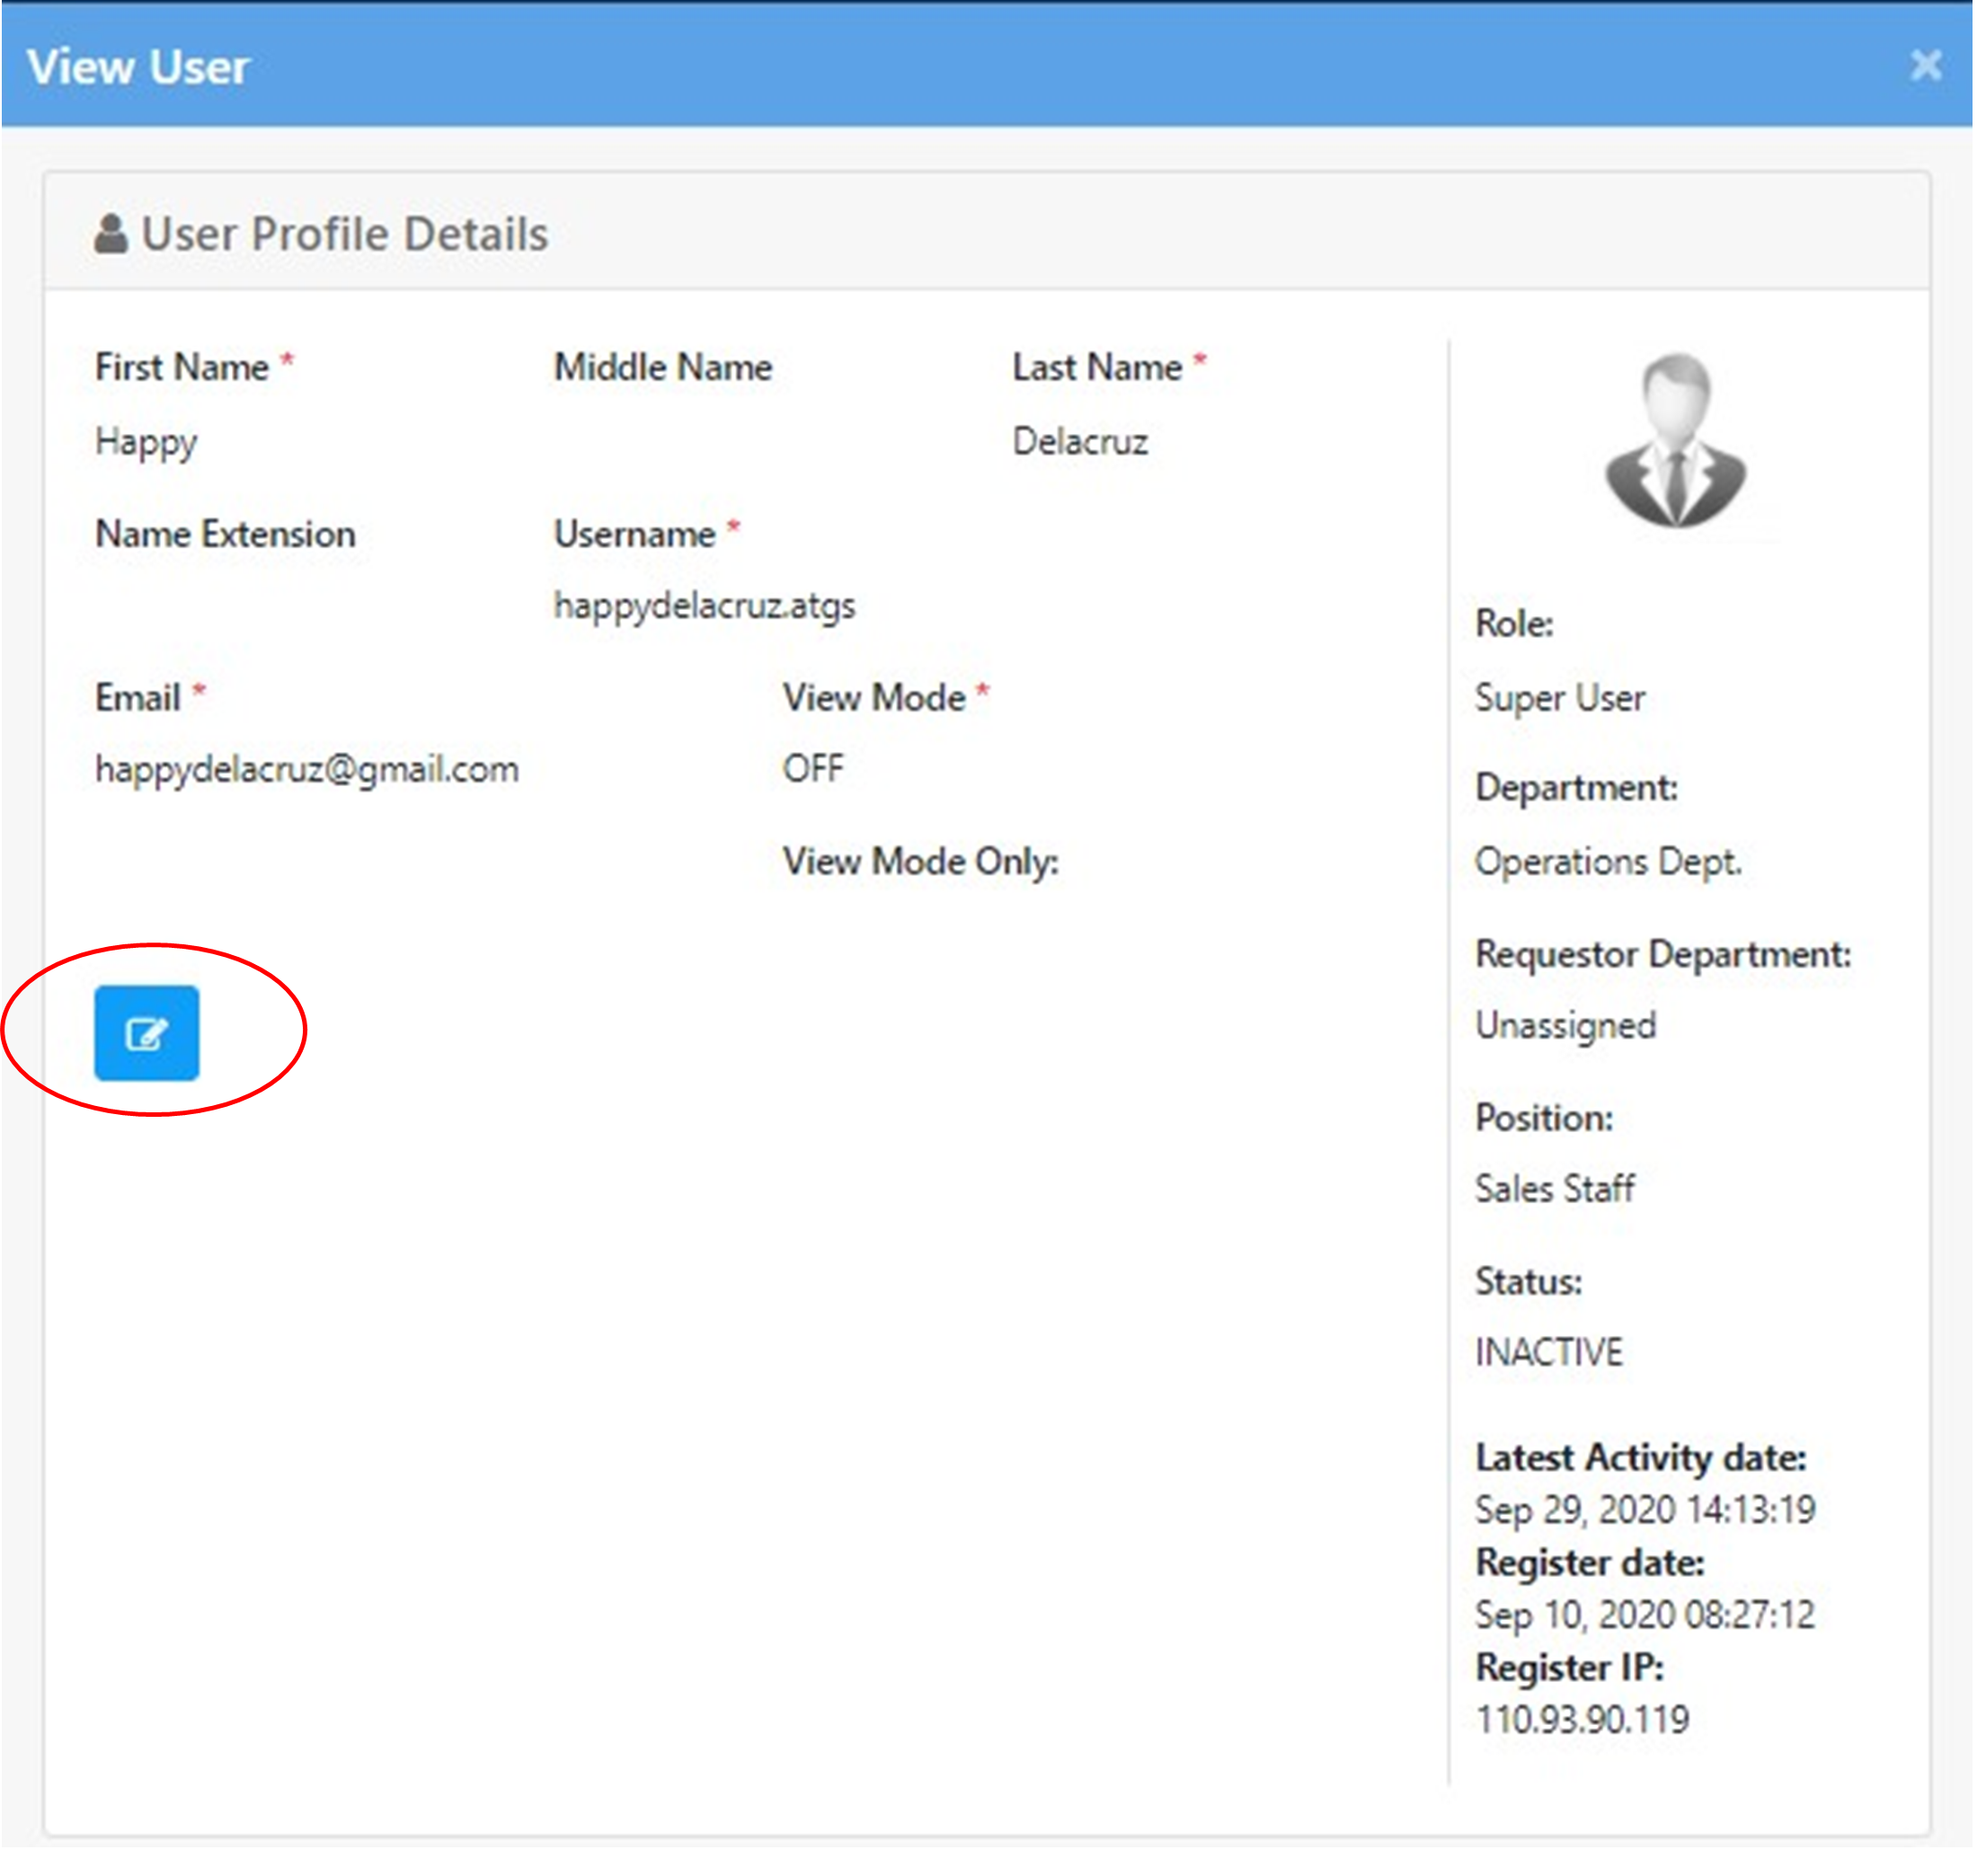
Users
To ADD Users, click the add button at the upper topmost part of the screen.
User Information - Fill up required fields and click the add button to save users information.
- First Name
- Middle Name
- Last Name
- Name Extension
- Username & Password
- Role — you can copy other user role
- Position
- Department
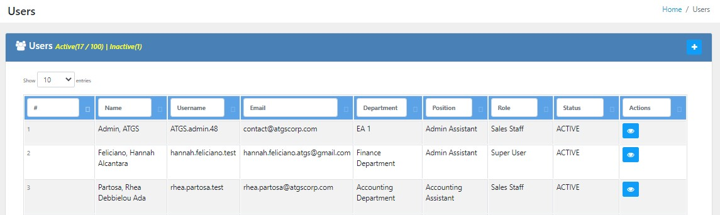
To VIEW Users, click the view button under Action Column.
To EDIT Users Information, click the edit button at the left side part of the screen.
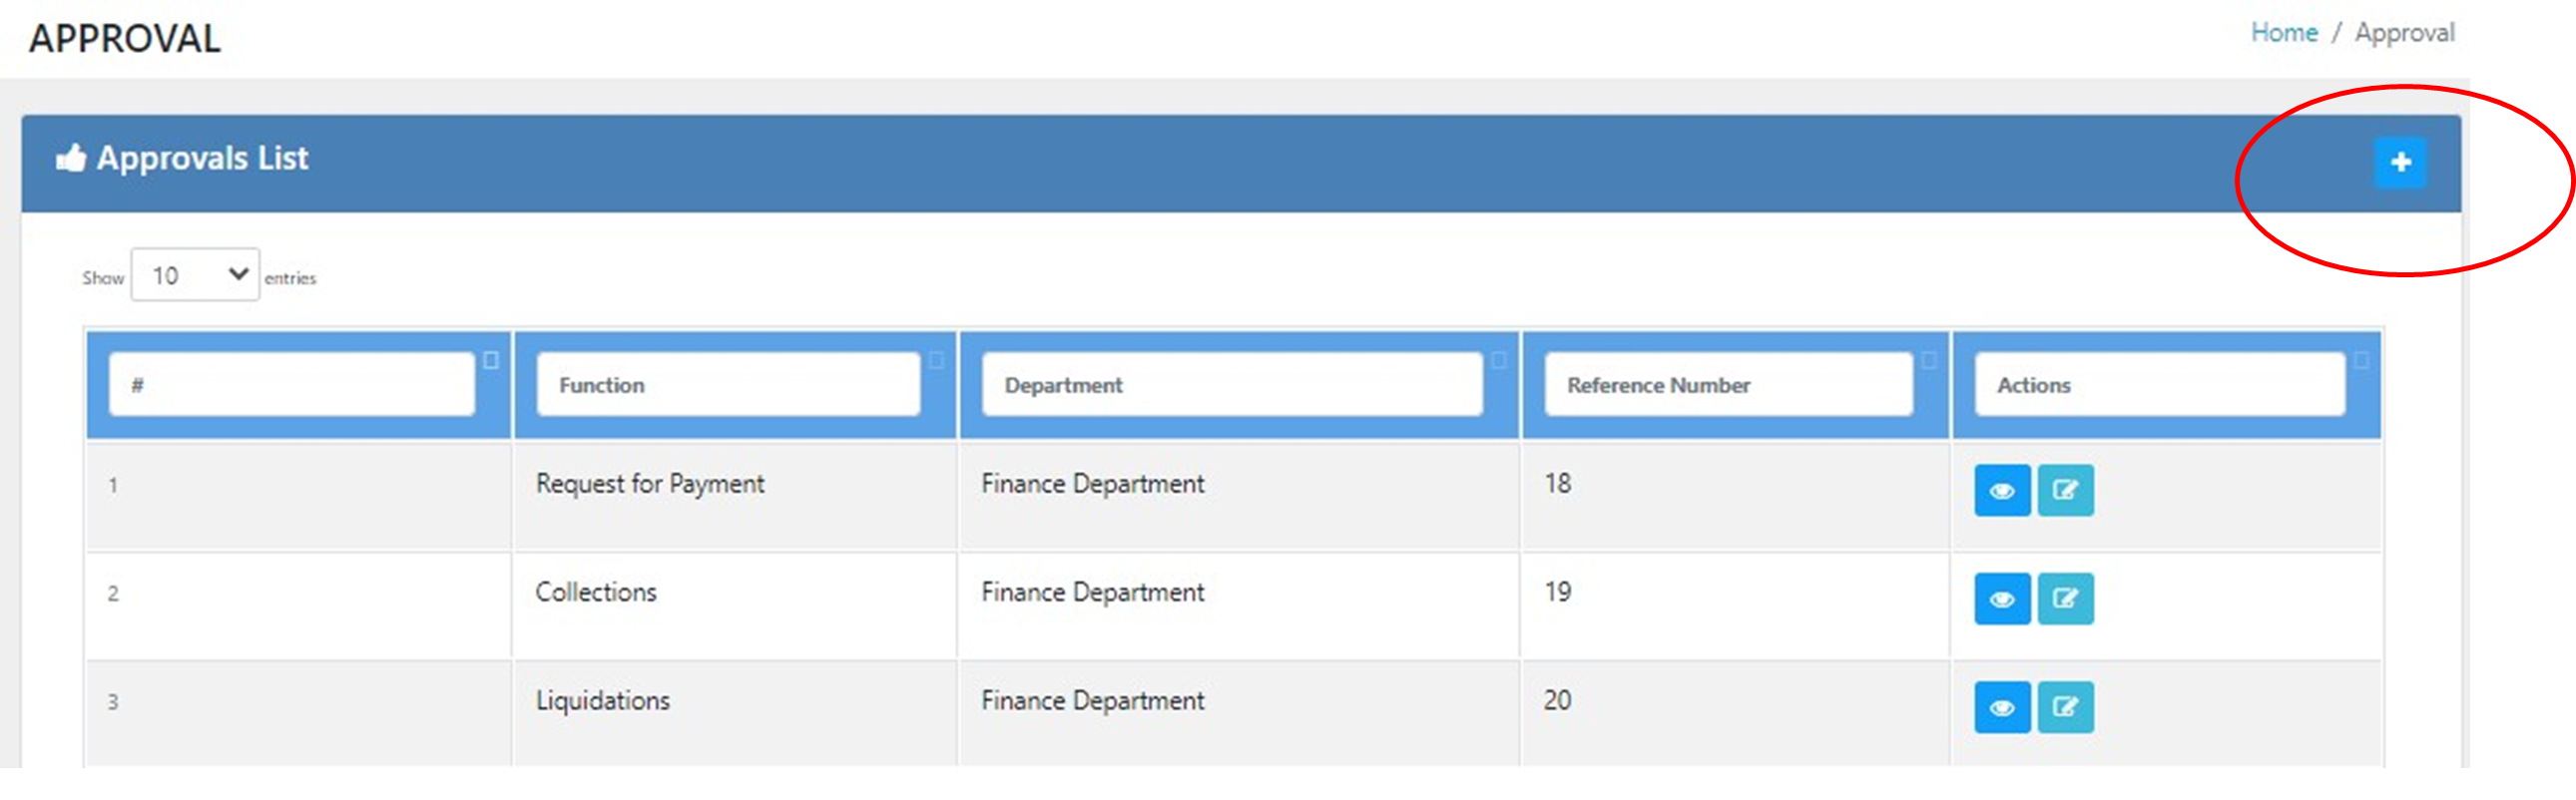
Approval
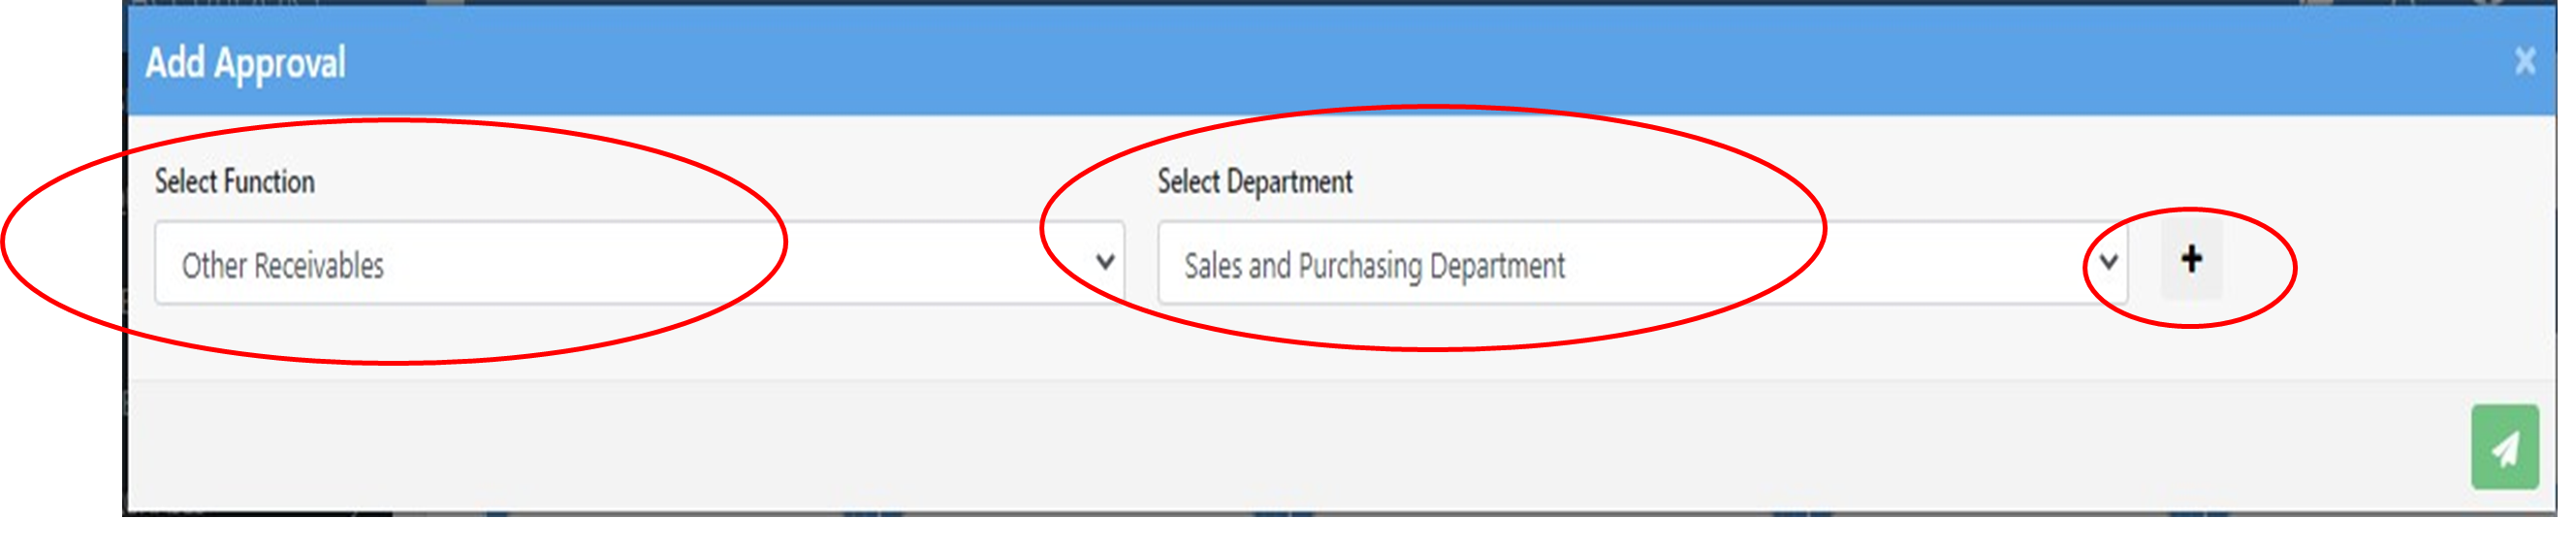
To ADD and SET approval for each module, click the add button at the upper topmost part of the screen.
To add approval kindly select function (modules) and department (assigned department).
Click the ADD button behind select department to set checker and approver of assigned module.
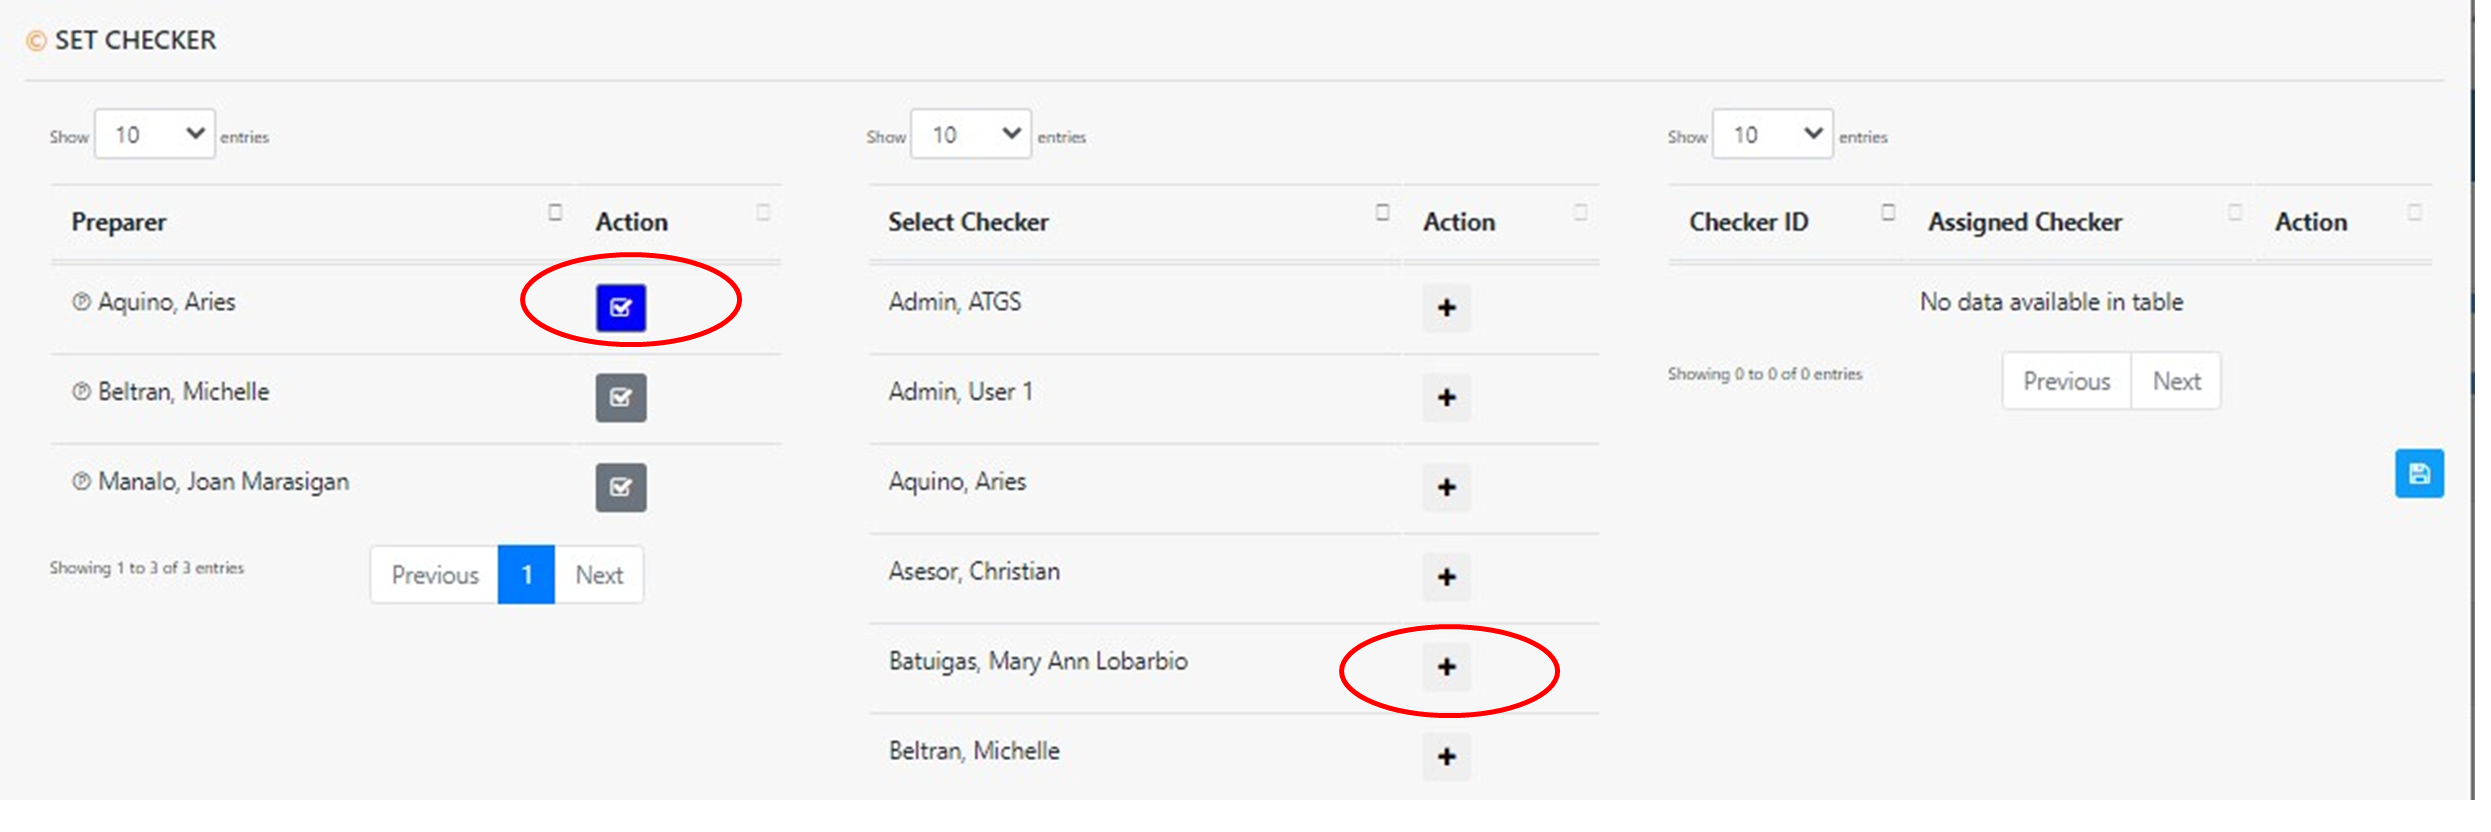
Preparer were already set up in USER. To set checker for the module, click the check mark button under Action Column.

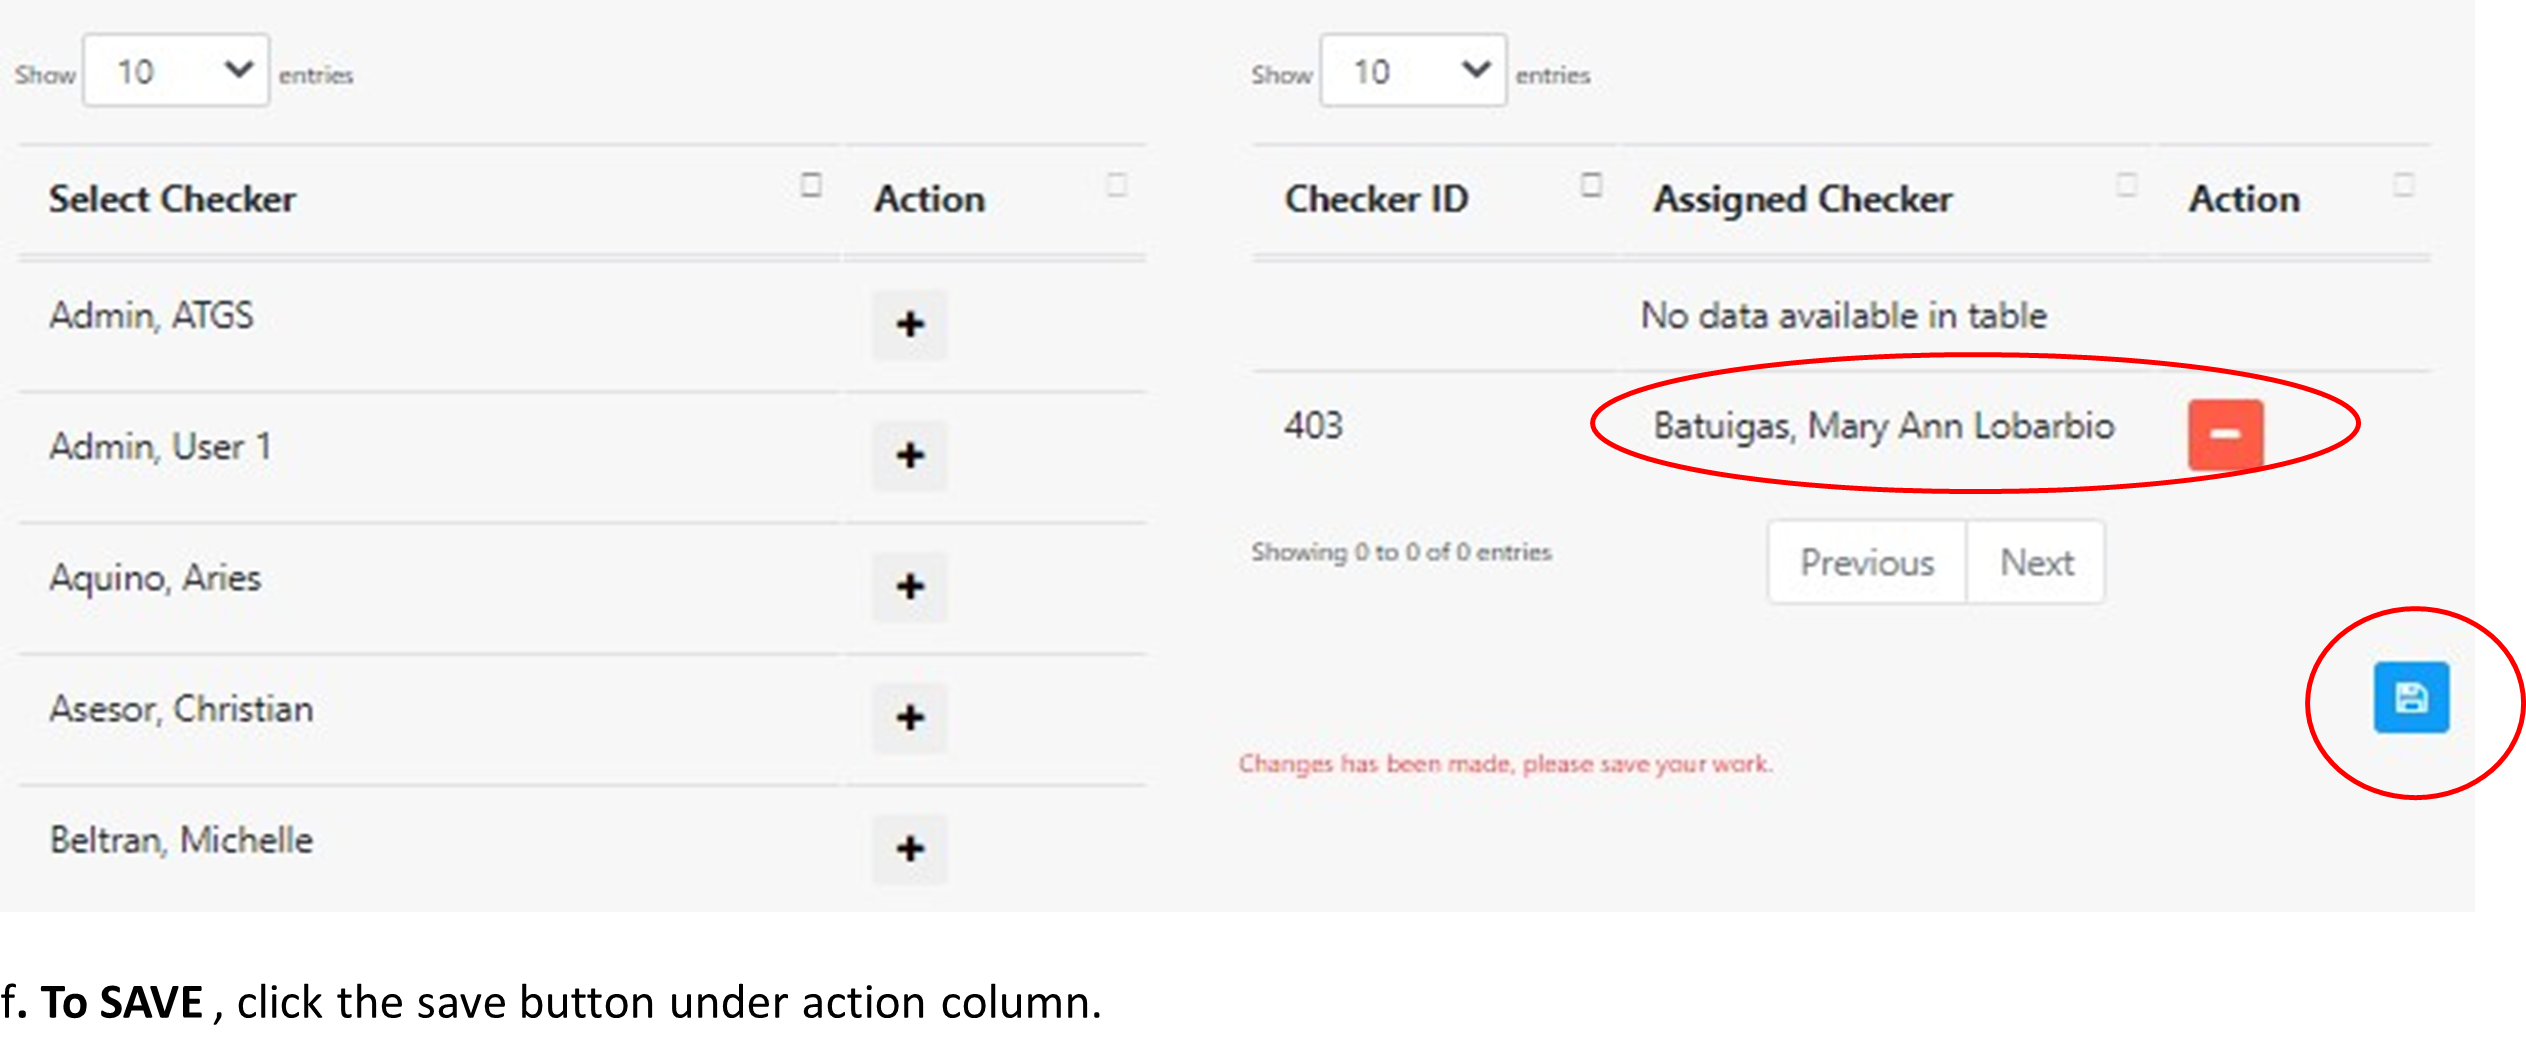
To select checker, click the add button under Action Column then it will appear on the Assigned Checker.
To SAVE, click the save button under action column.
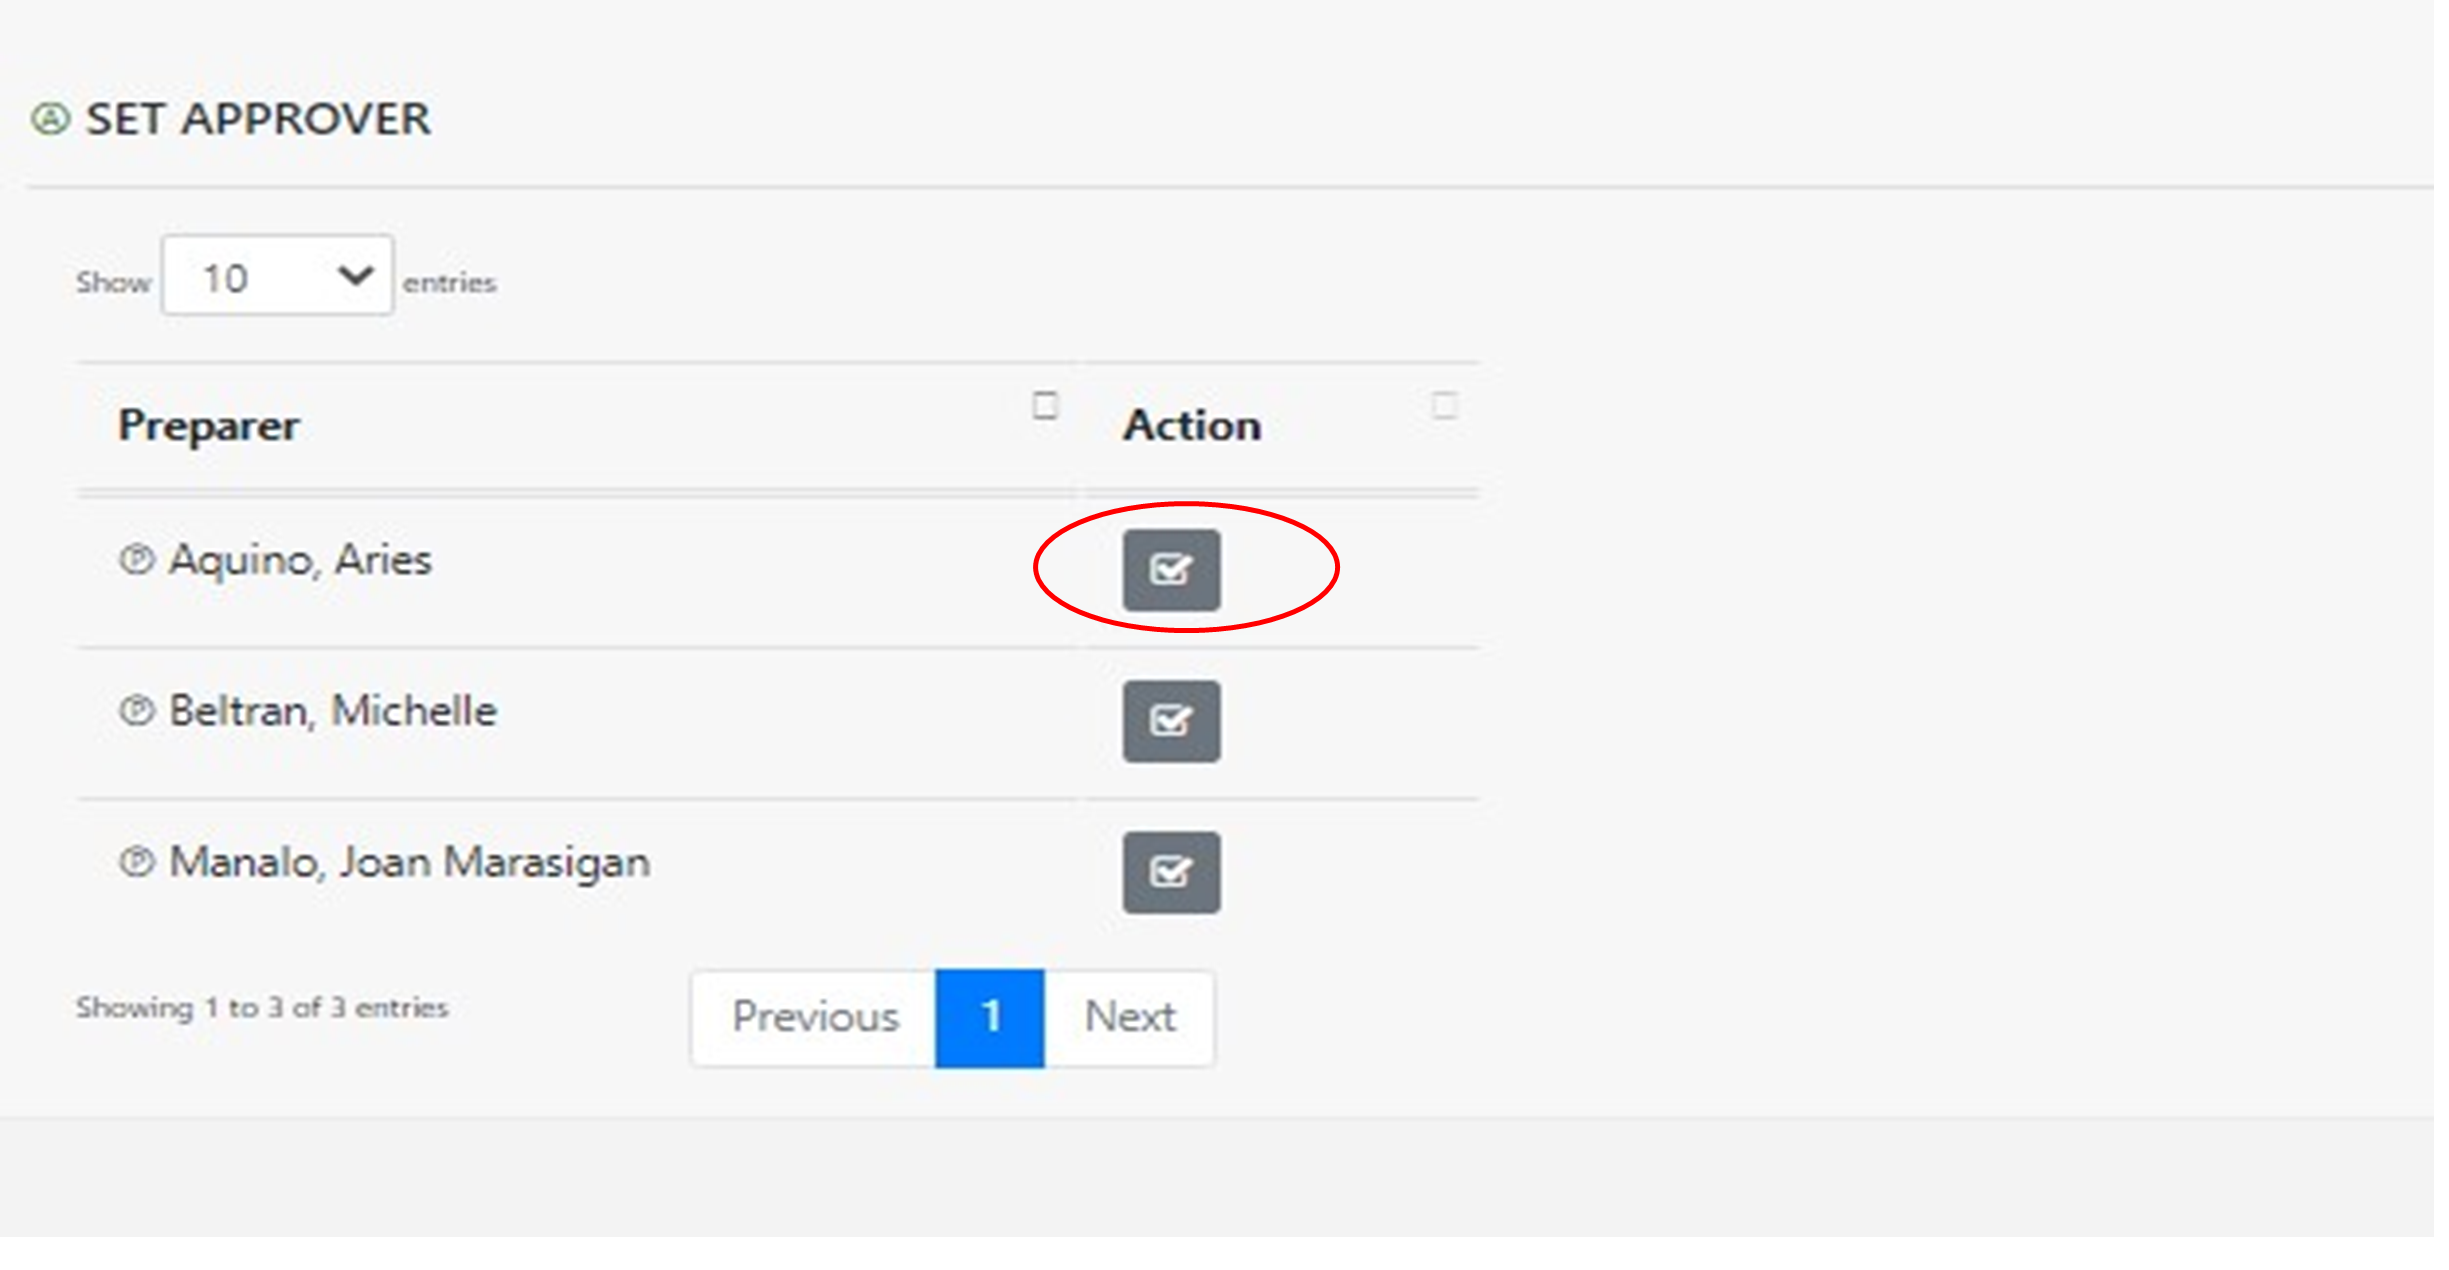
Preparer were already set up in USER. To set approver for the module, click the check mark button under Action Column.
To select approver, click the add button under Action Column then it will appear on the Assigned Approver.
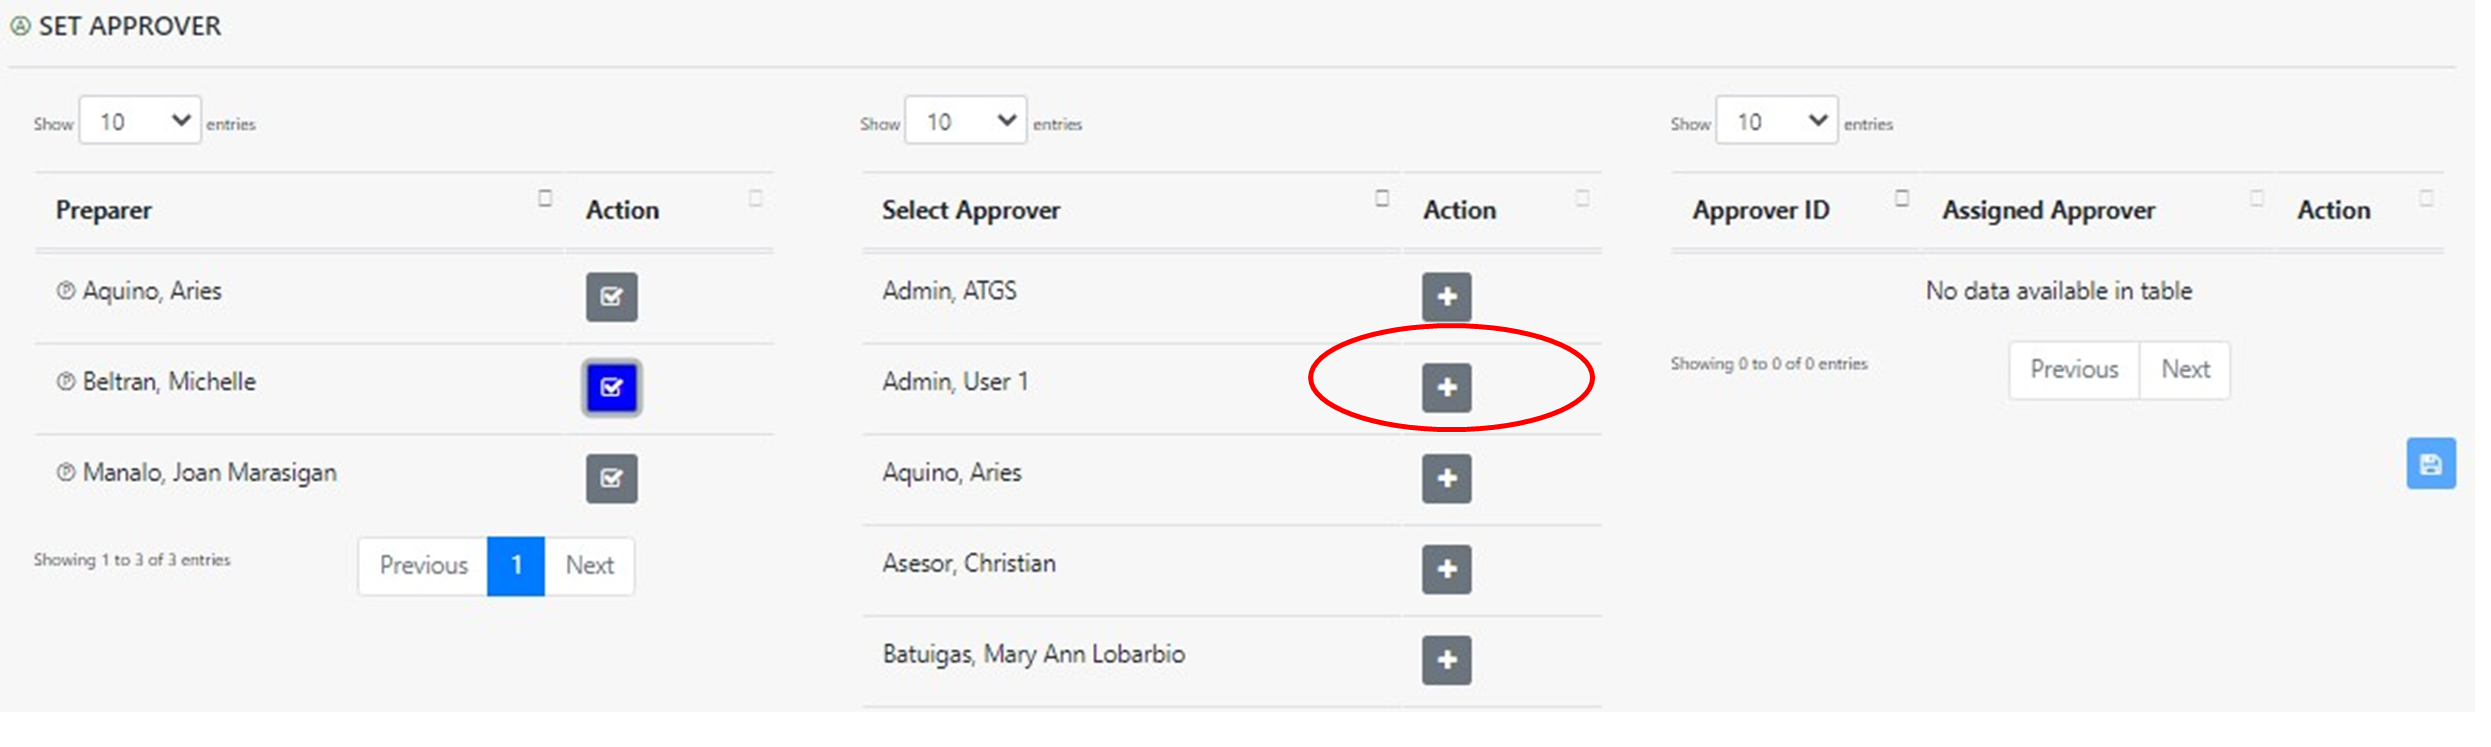
To SAVE, click the save button under action column.
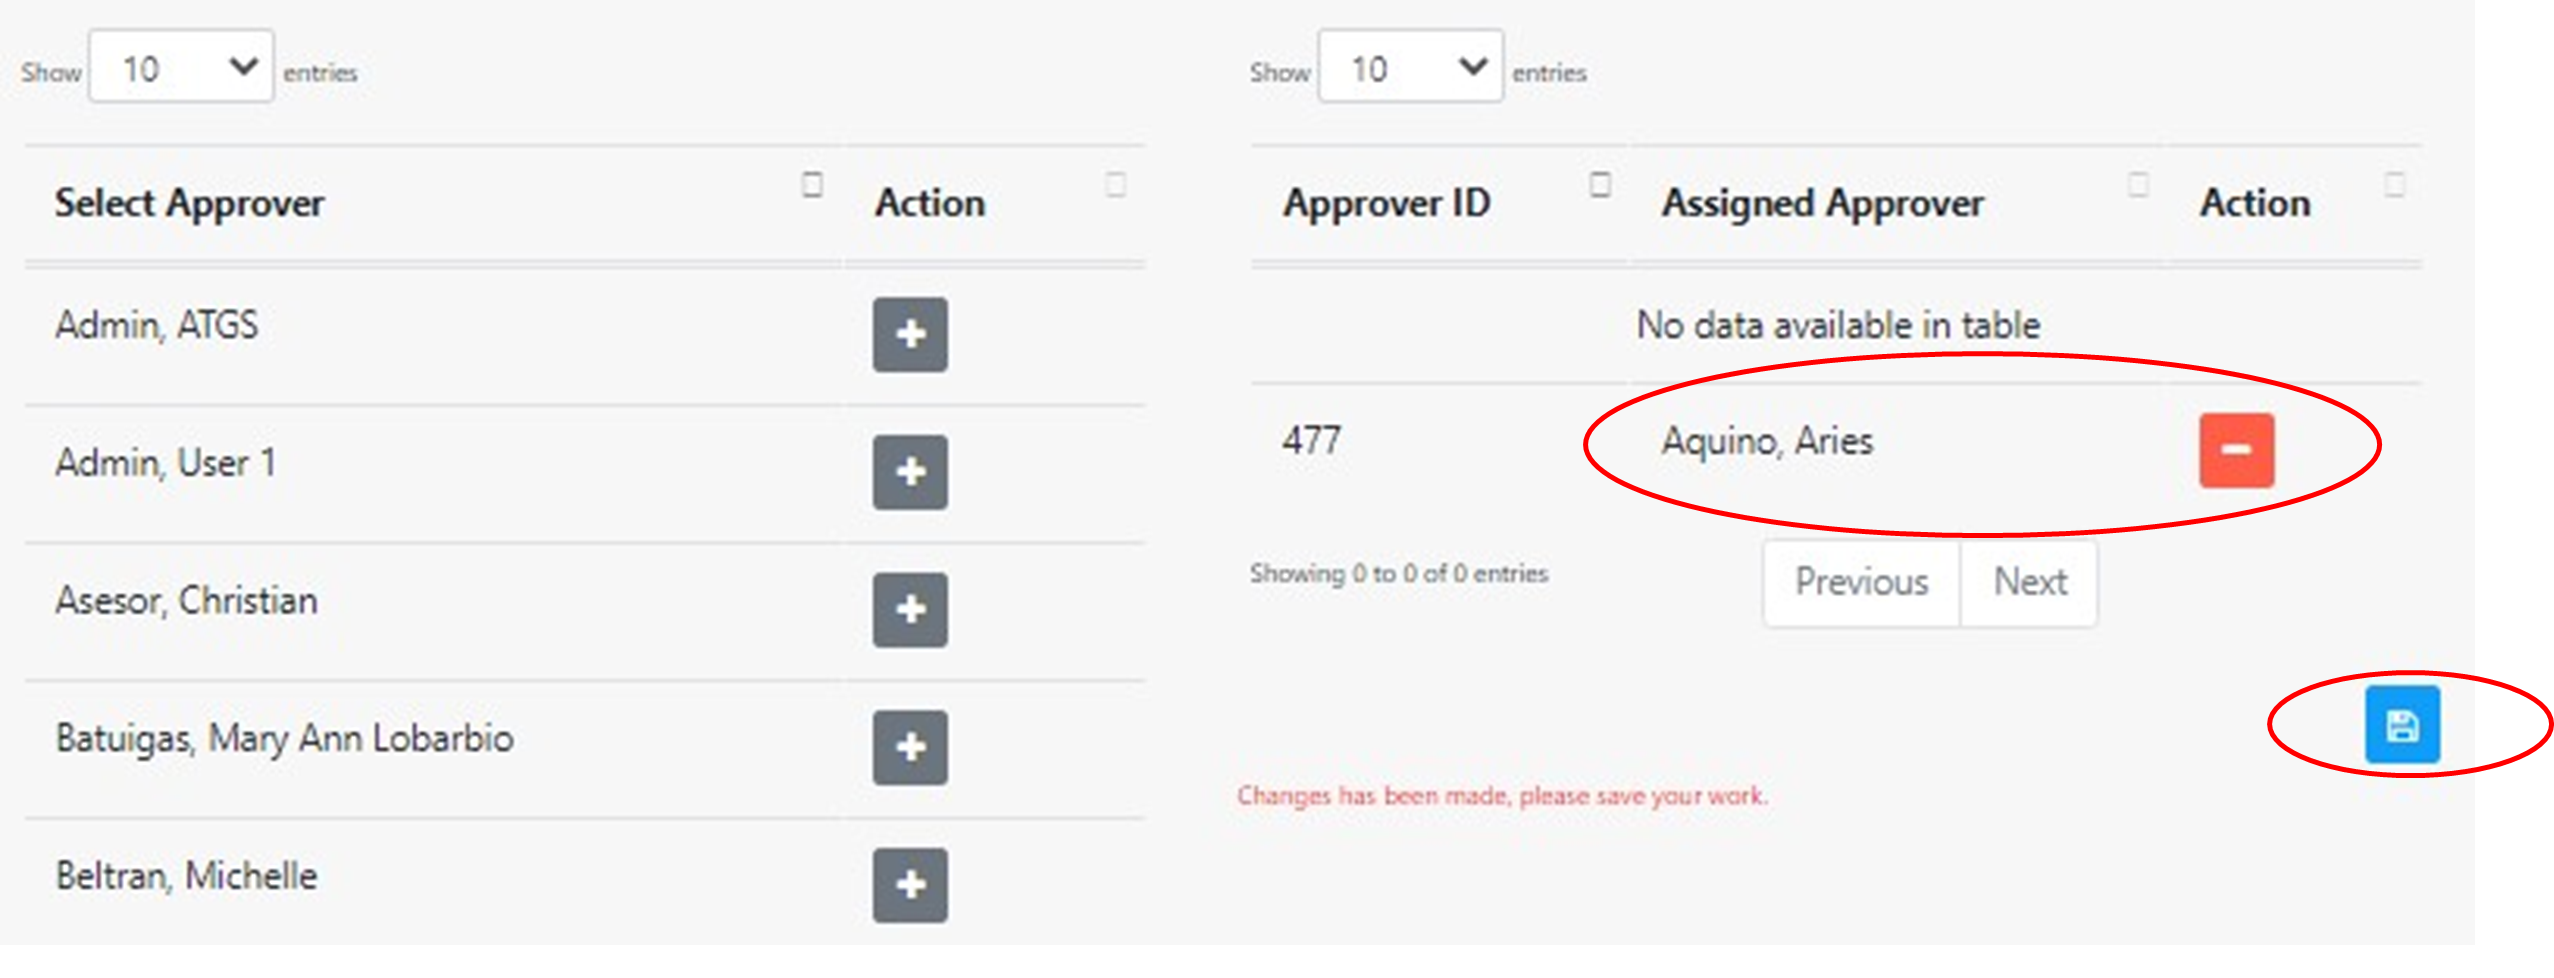
To SAVE Checker and Approver, click save button at the end of the screen.
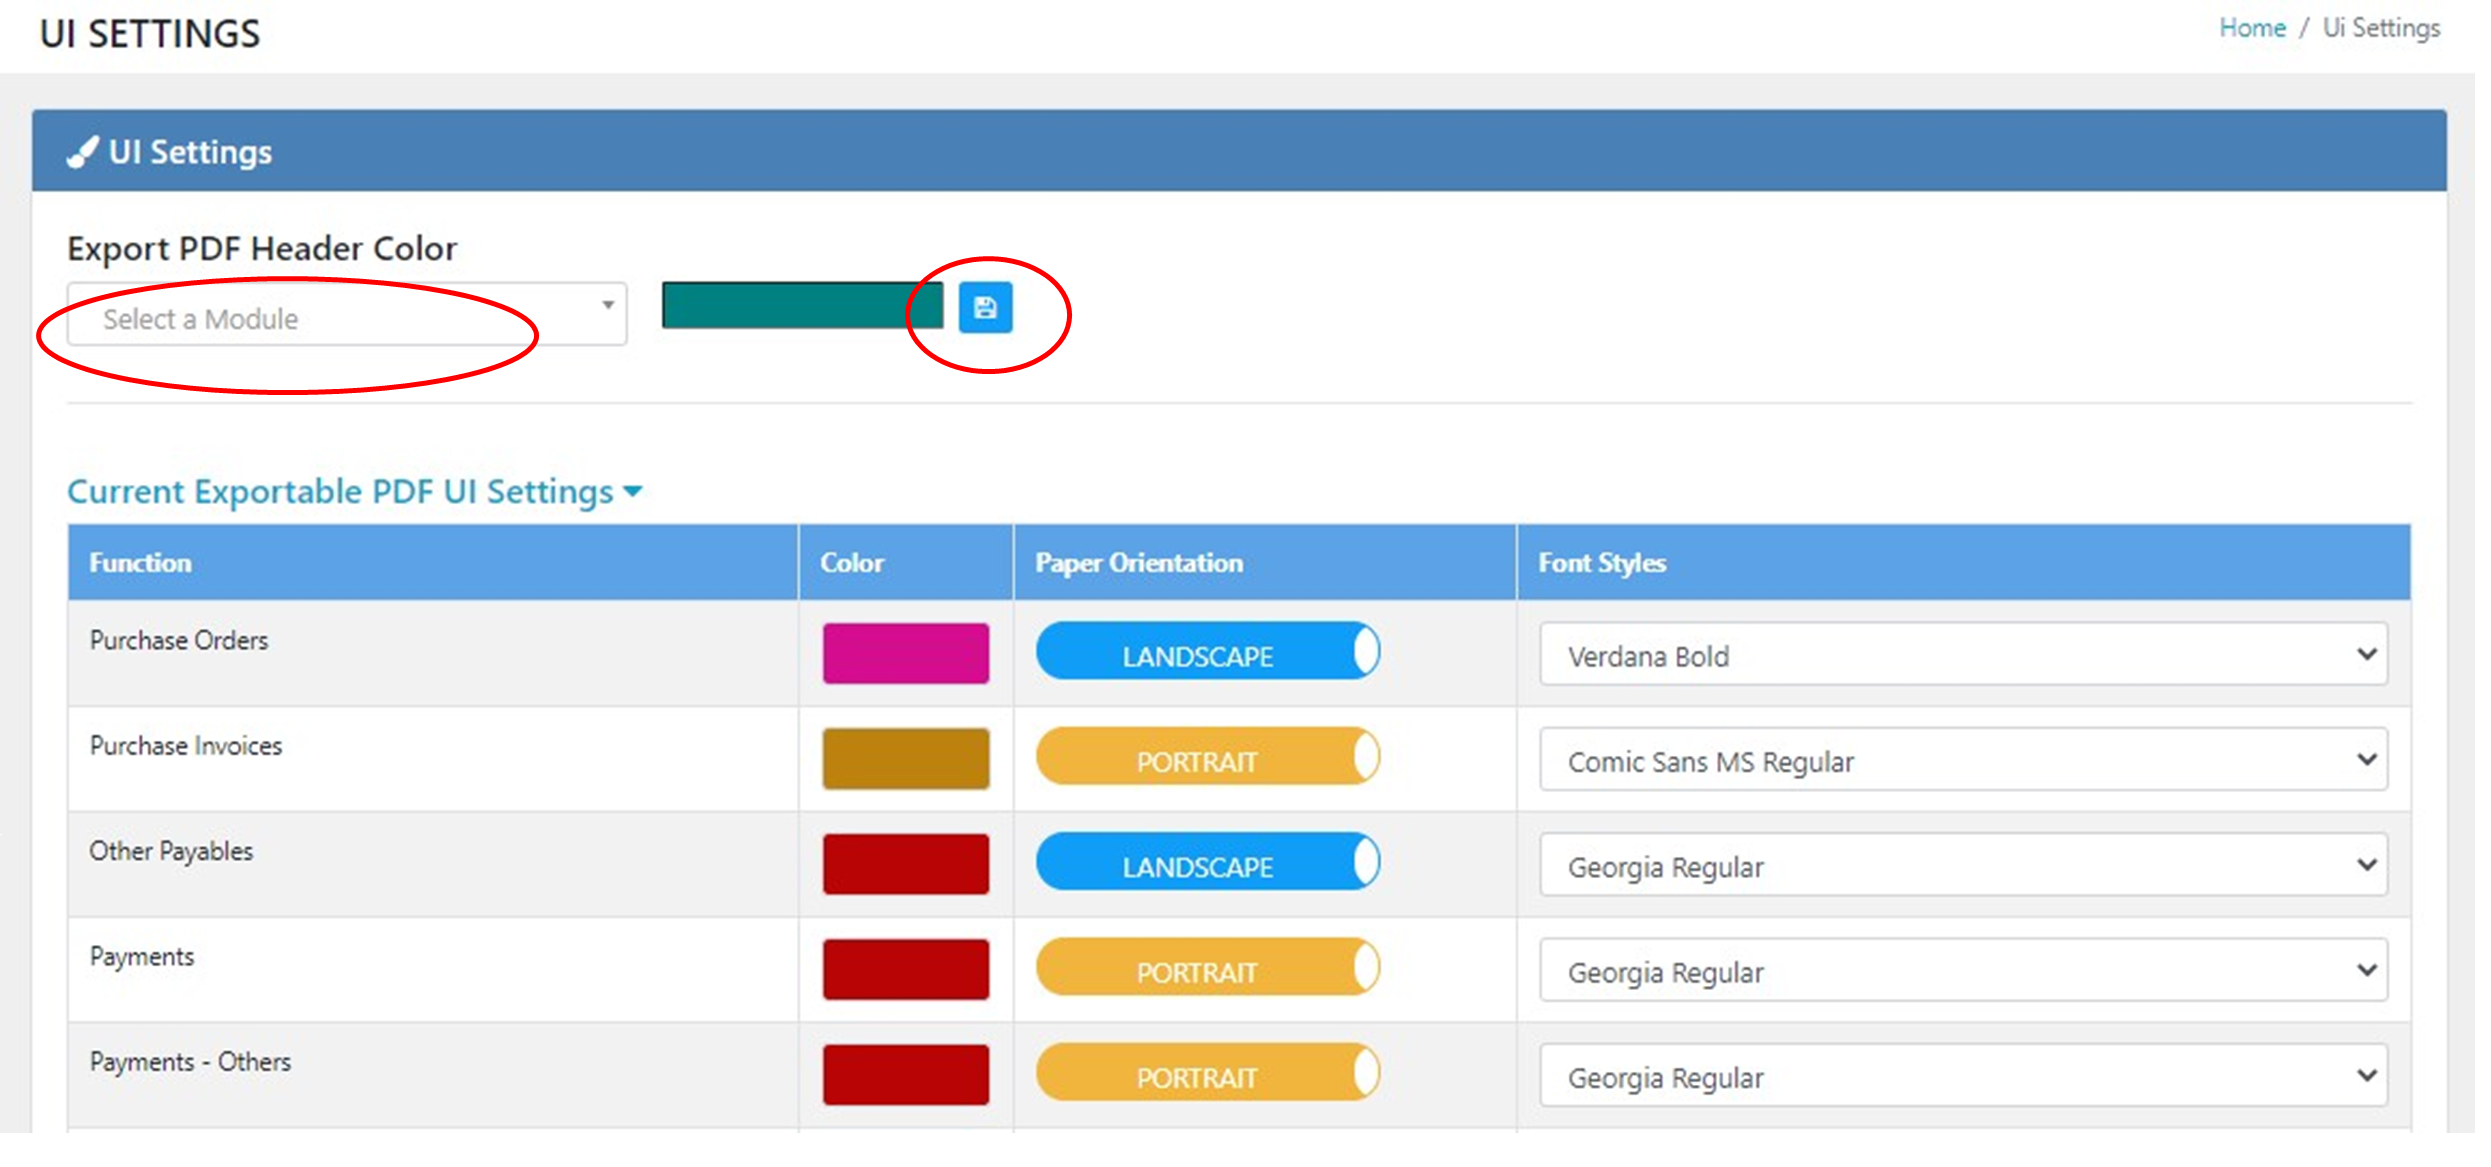
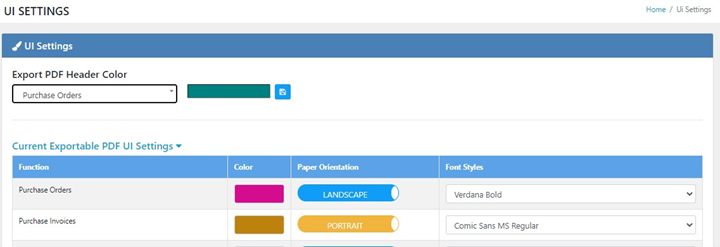
UI Settings
Select Module that you want to change in color, paper orientation and font style.