Configurations
Video Tutorial
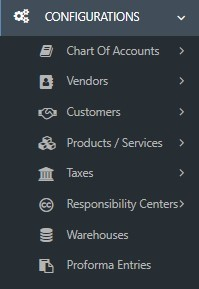
Chart of Accounts
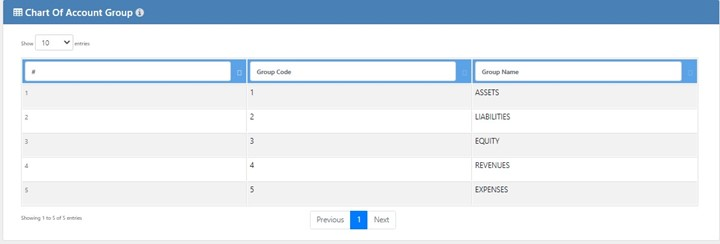
Group
Click group under chart of accounts configuration. Default Chart of Accounts (Assets, Liabilities, Equity, Revenues & Expenses)
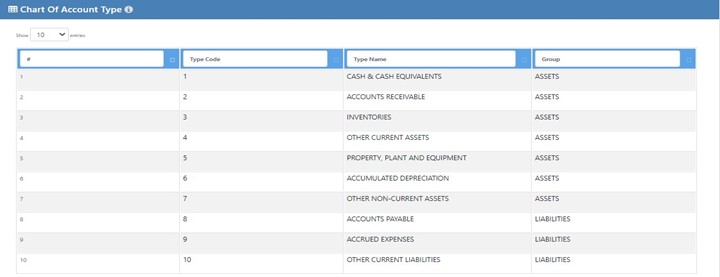
Type
Click type under chart of accounts configuration.
List
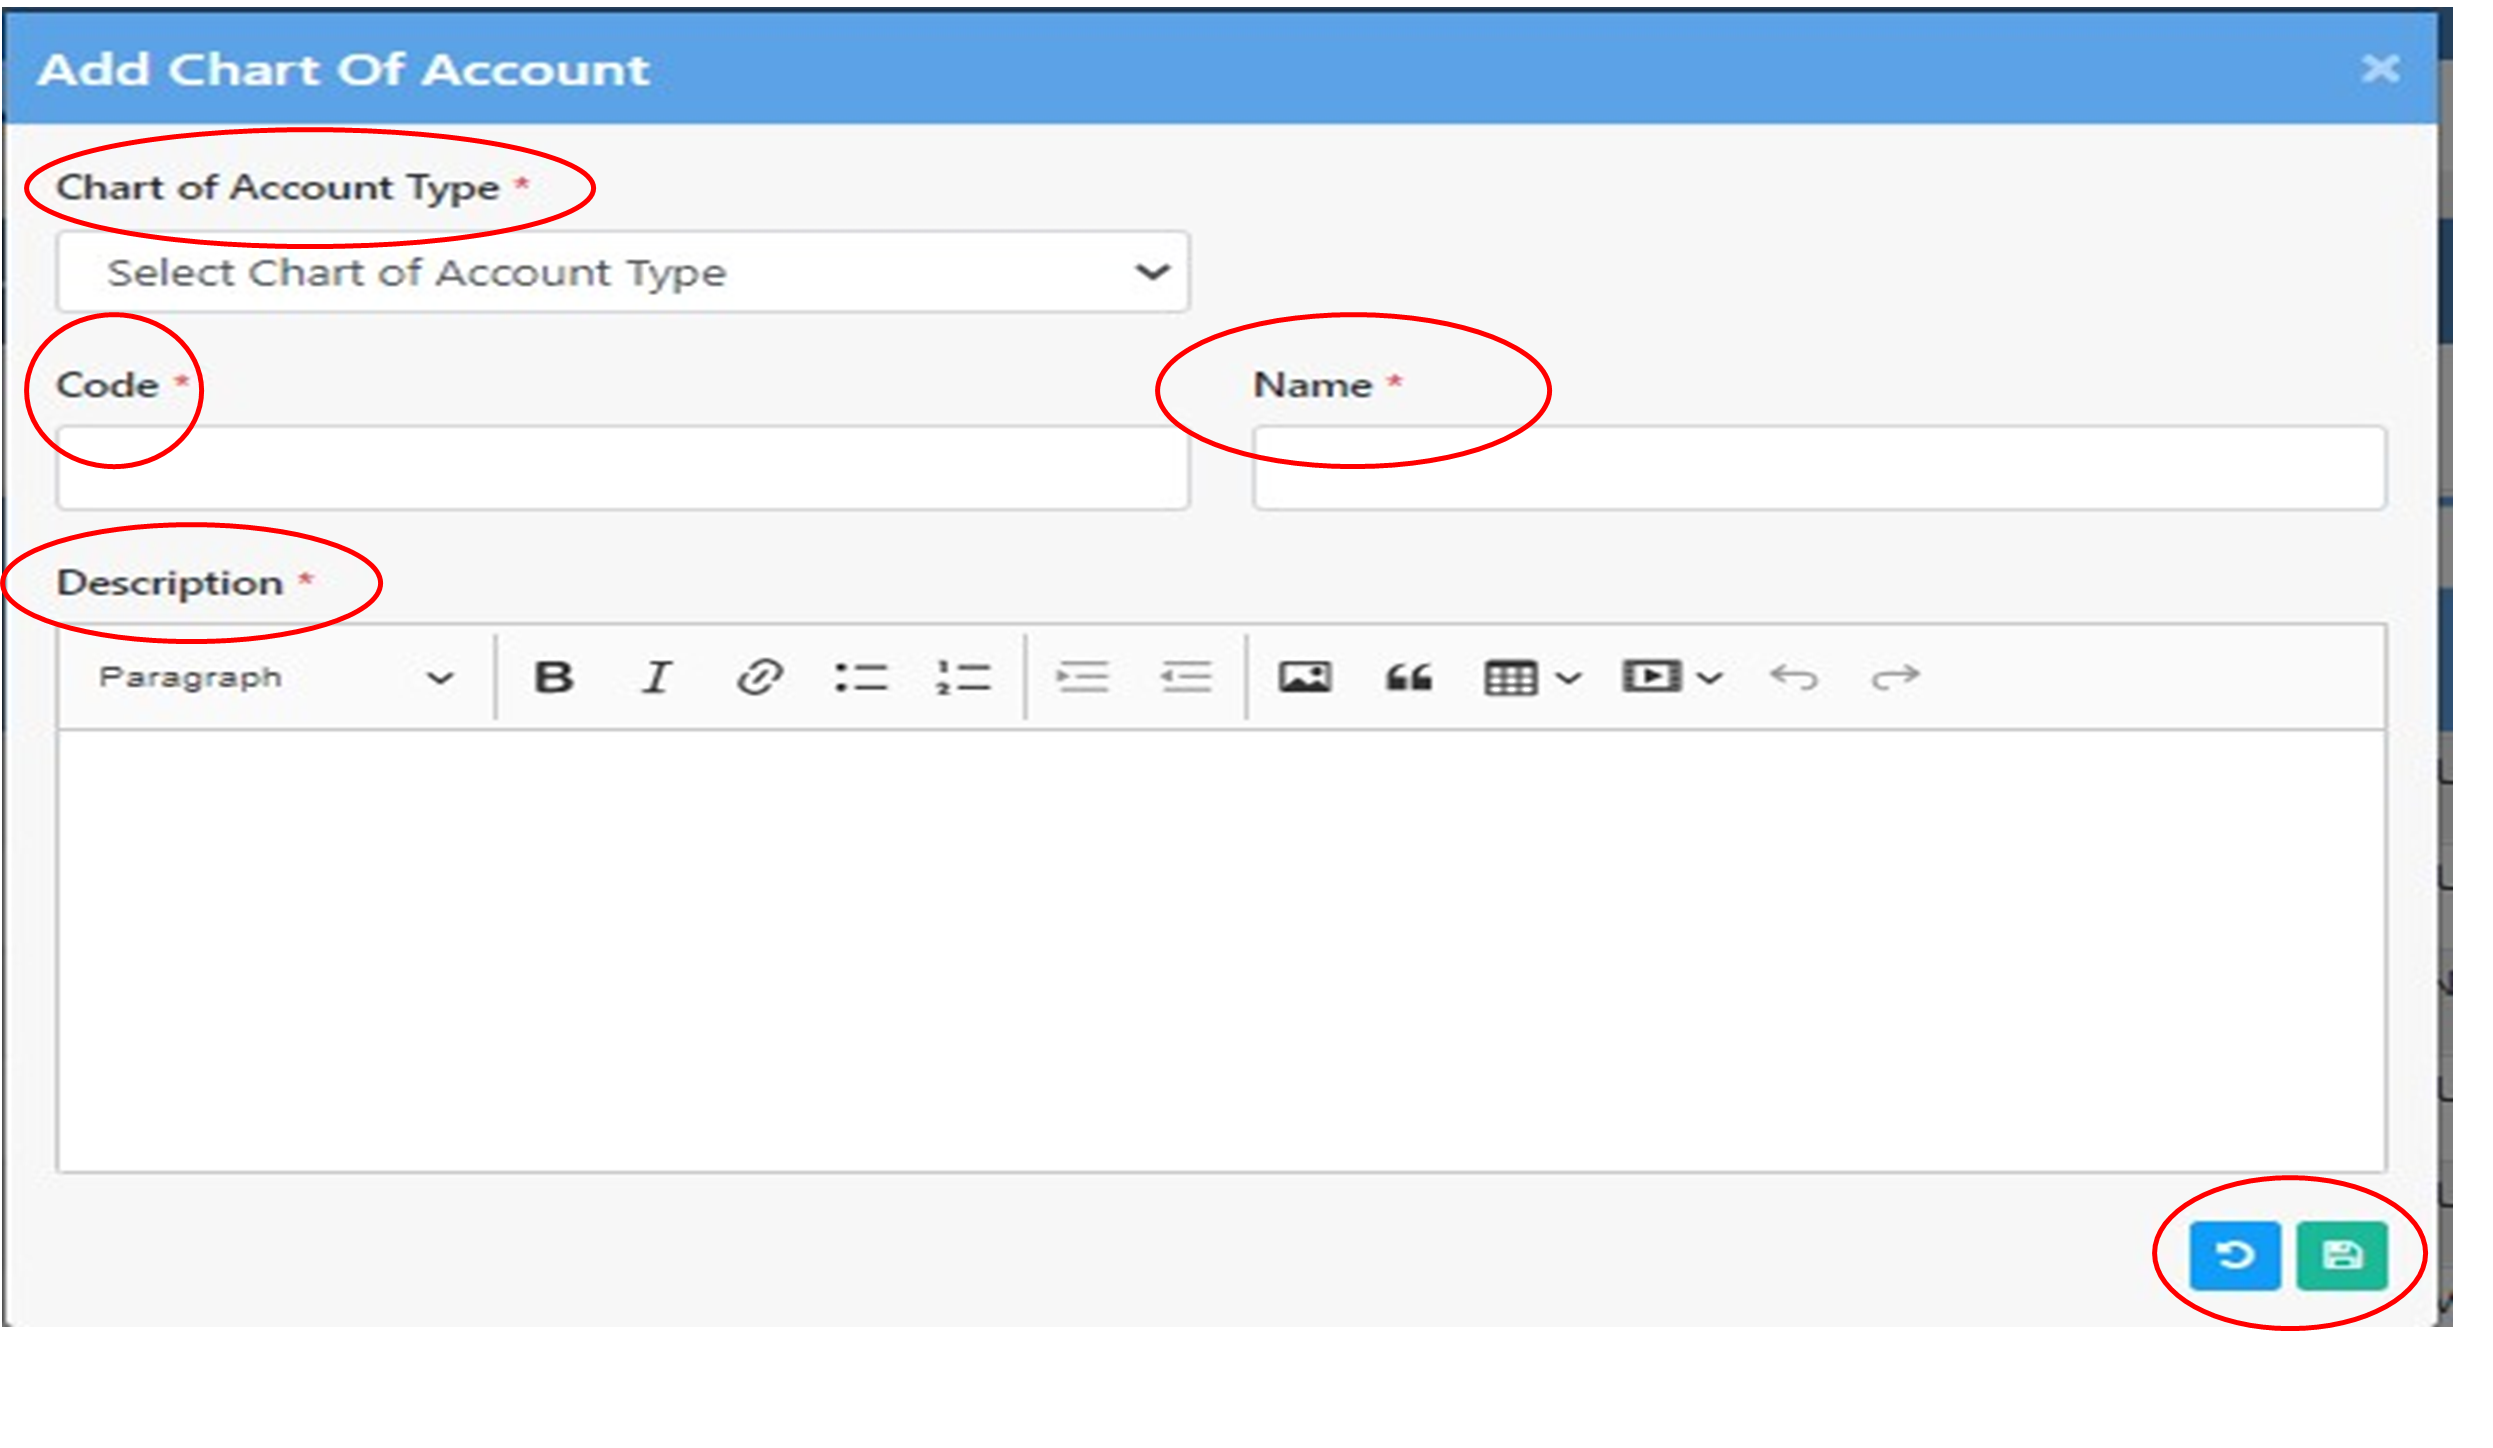
Click list under chart of accounts configuration. In list we can edit and add chart of accounts. Just click the add button at the upper rightmost part of the screen.
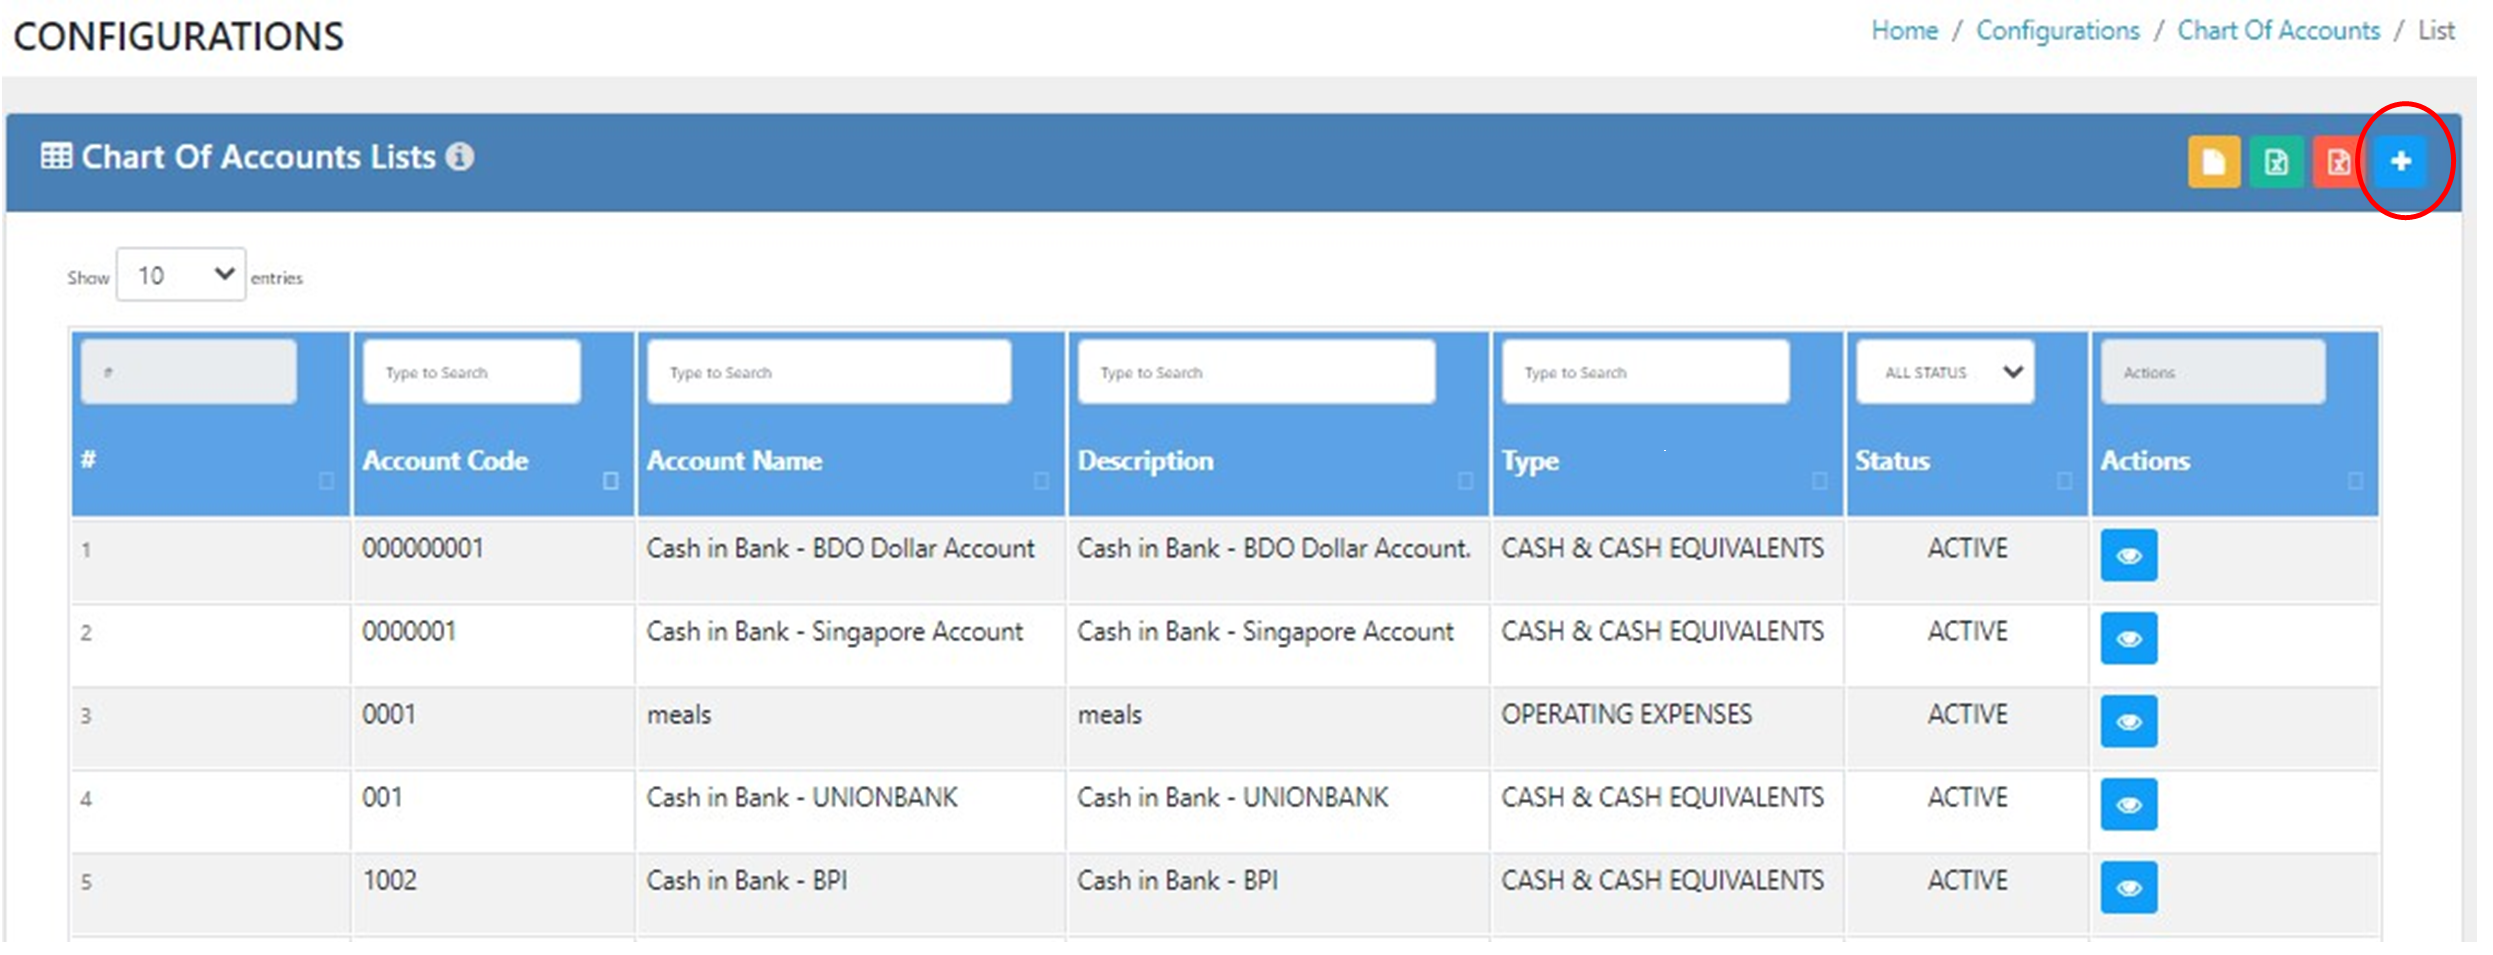
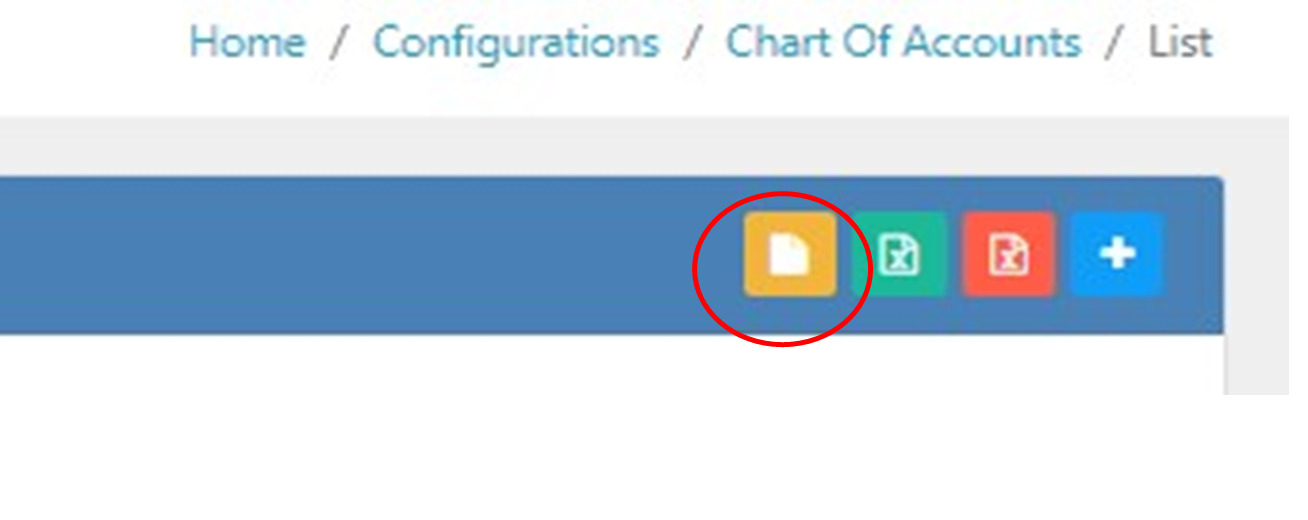
We can import chart of accounts in AccuBooks by downloading template, edit the template and make list of charts of accounts. By clicking the orange button.
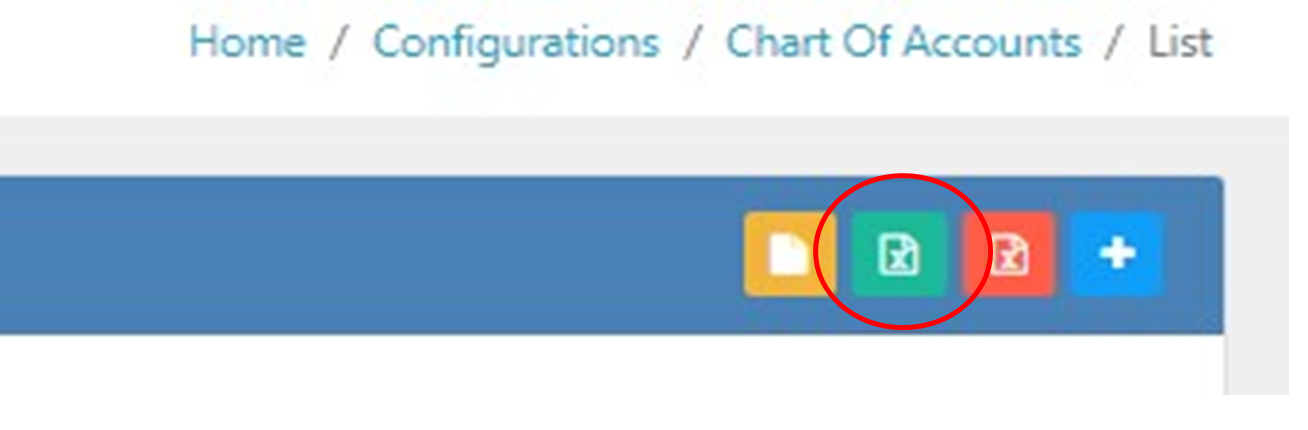
Then we can import the download or edited template by clicking the green button.
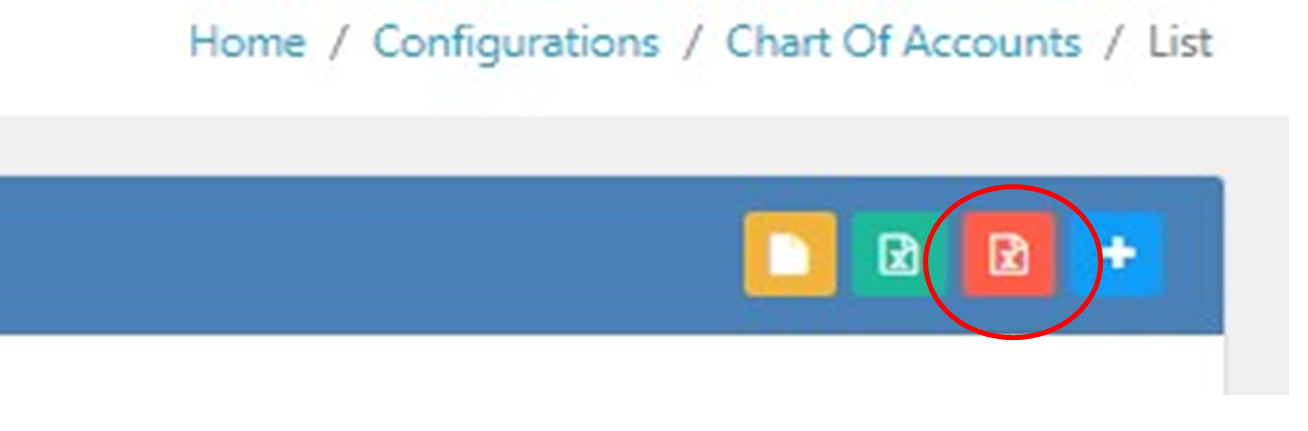
We can also export CSV for soft copy of chart of account list. By clicking the red button.
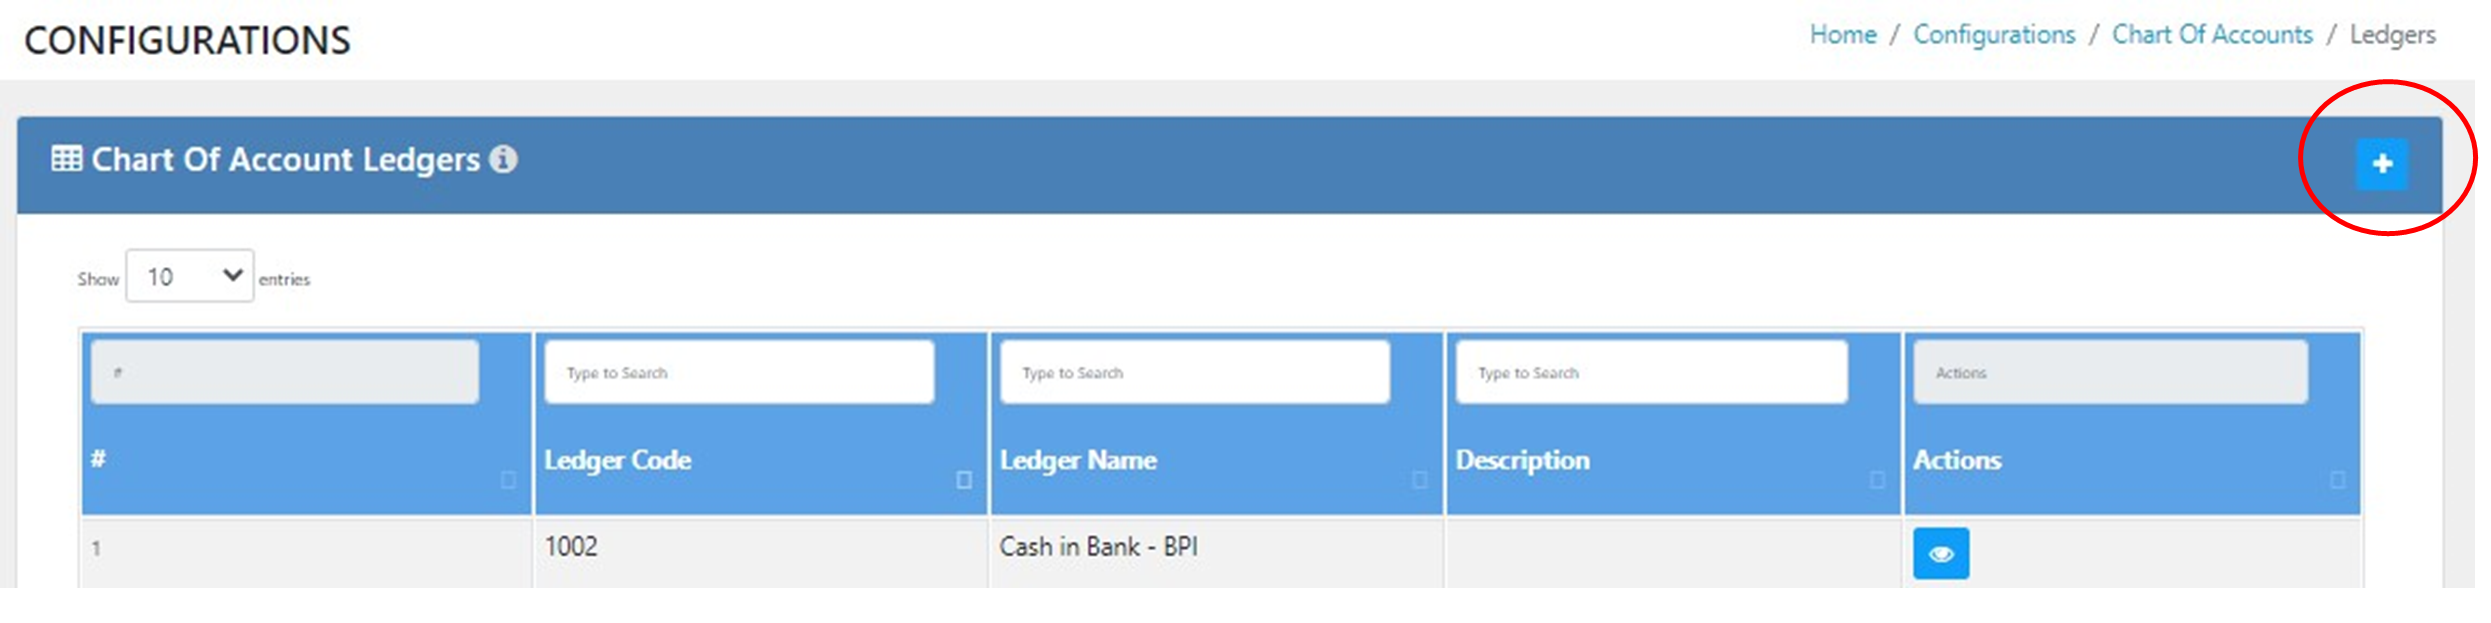
Ledgers
Sub listing of chart of accounts or related accounts to chart of accounts. To add, click the add button at the upper rightmost part of the screen.
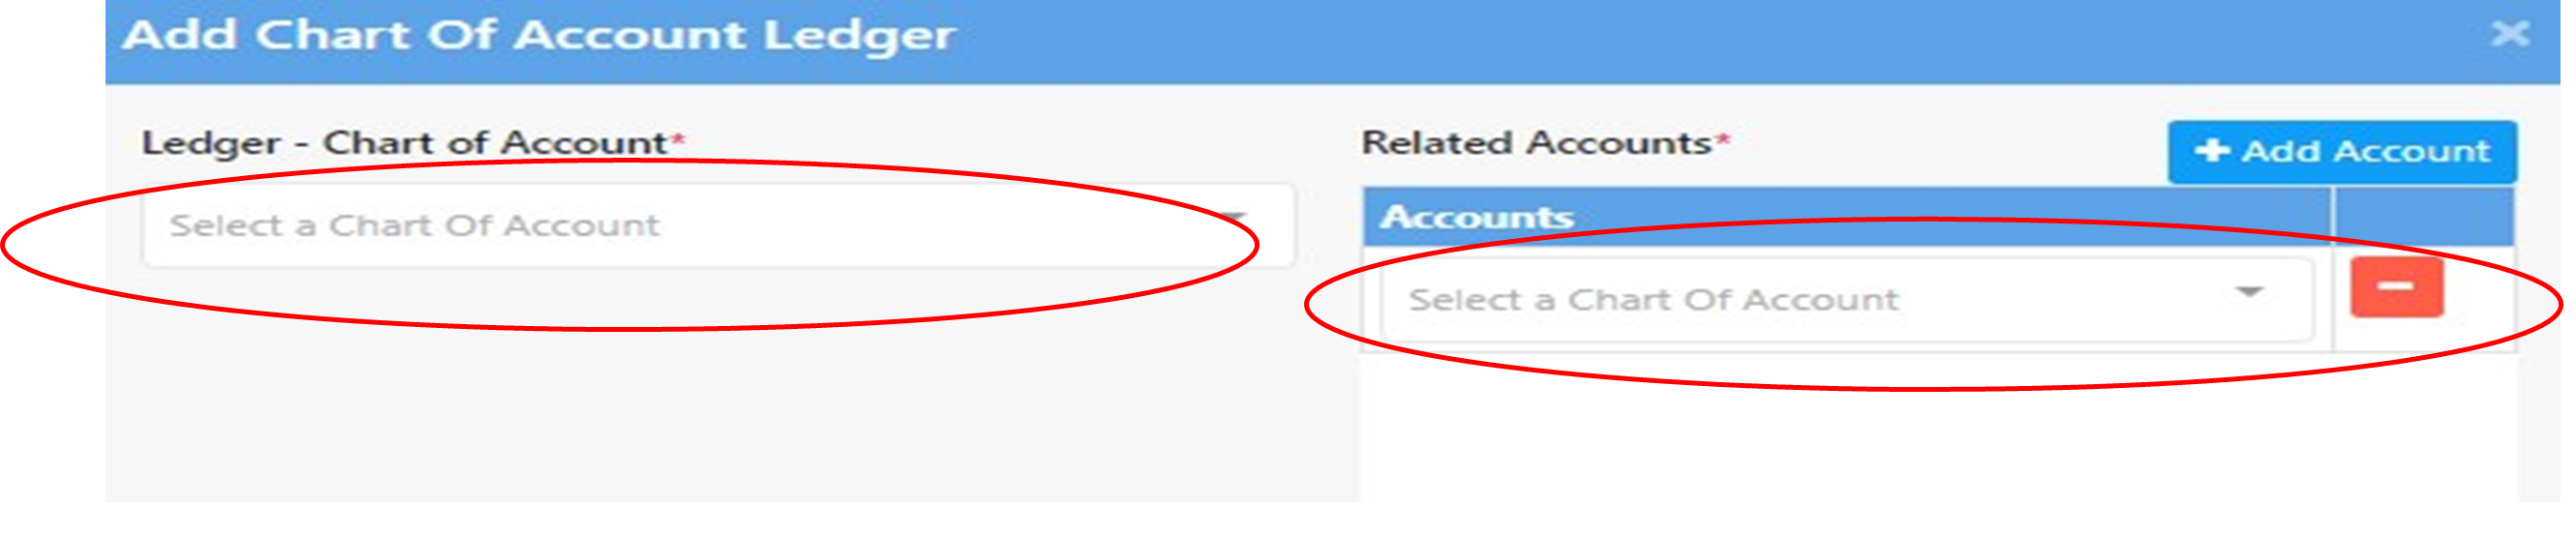
Fill up the required data
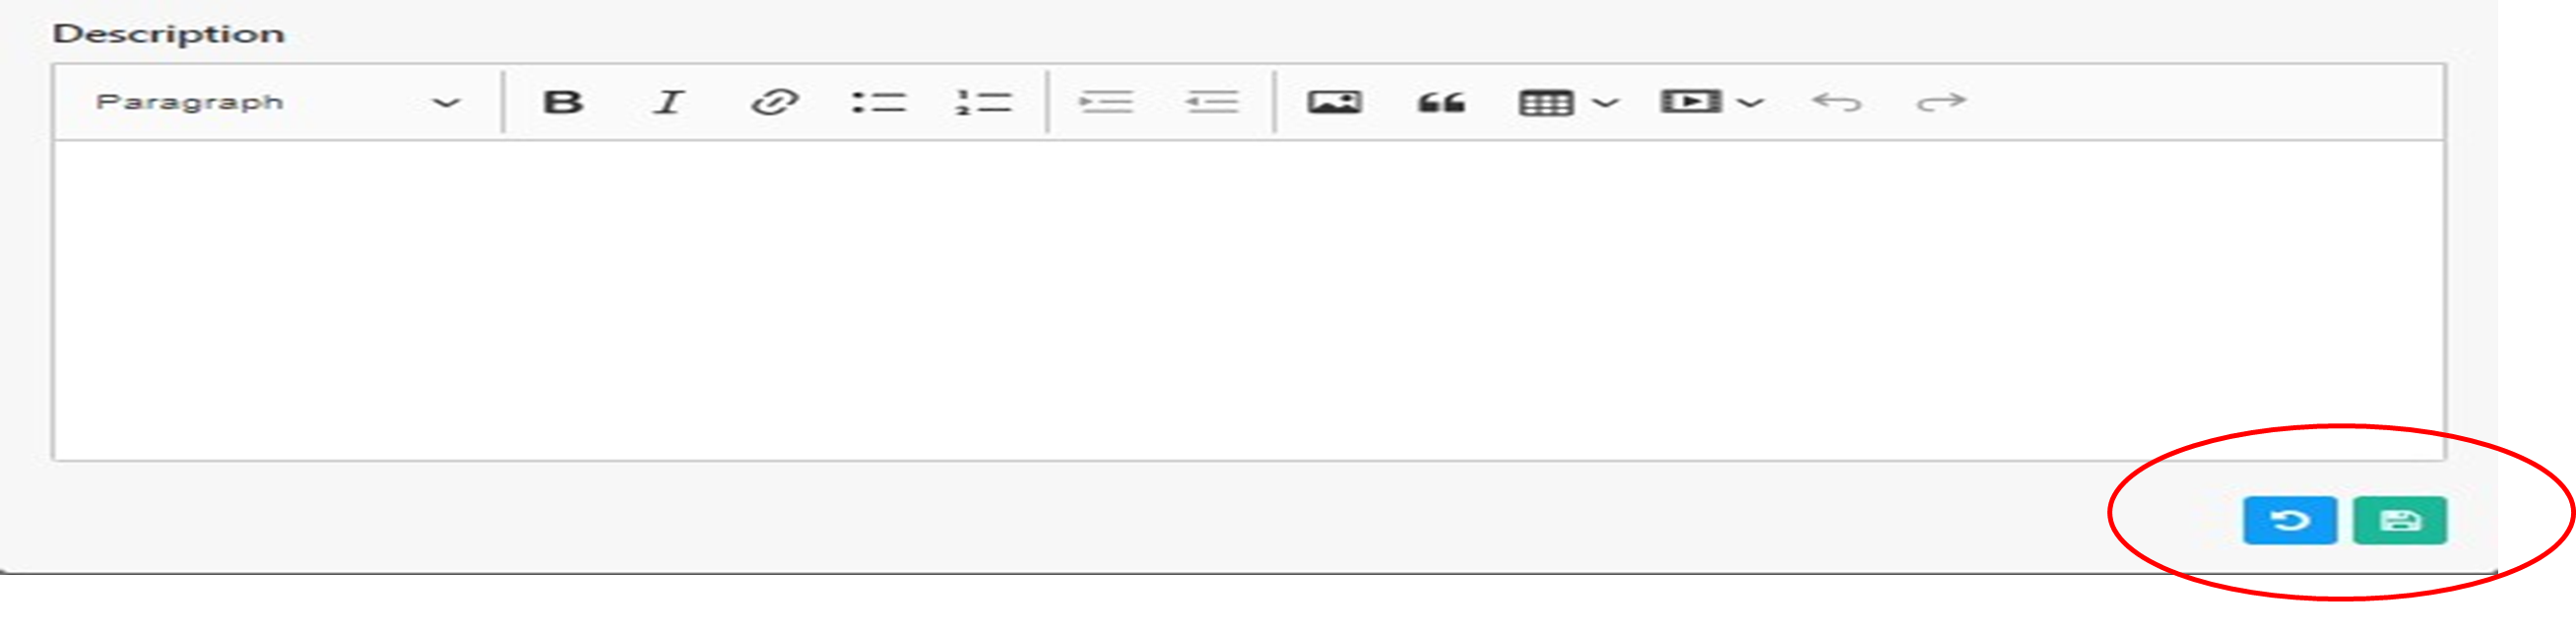
Choose chart of accounts that has related accounts. Related accounts should be inputted at the right side of the screen. At the end part you can input description into Chart of Accounts Ledger.
To view chart of accounts ledger. Click the view button below Action column.

After viewing the chart of accounts ledger. For edit, click the edit button and for delete just click the delete button.

Vendors
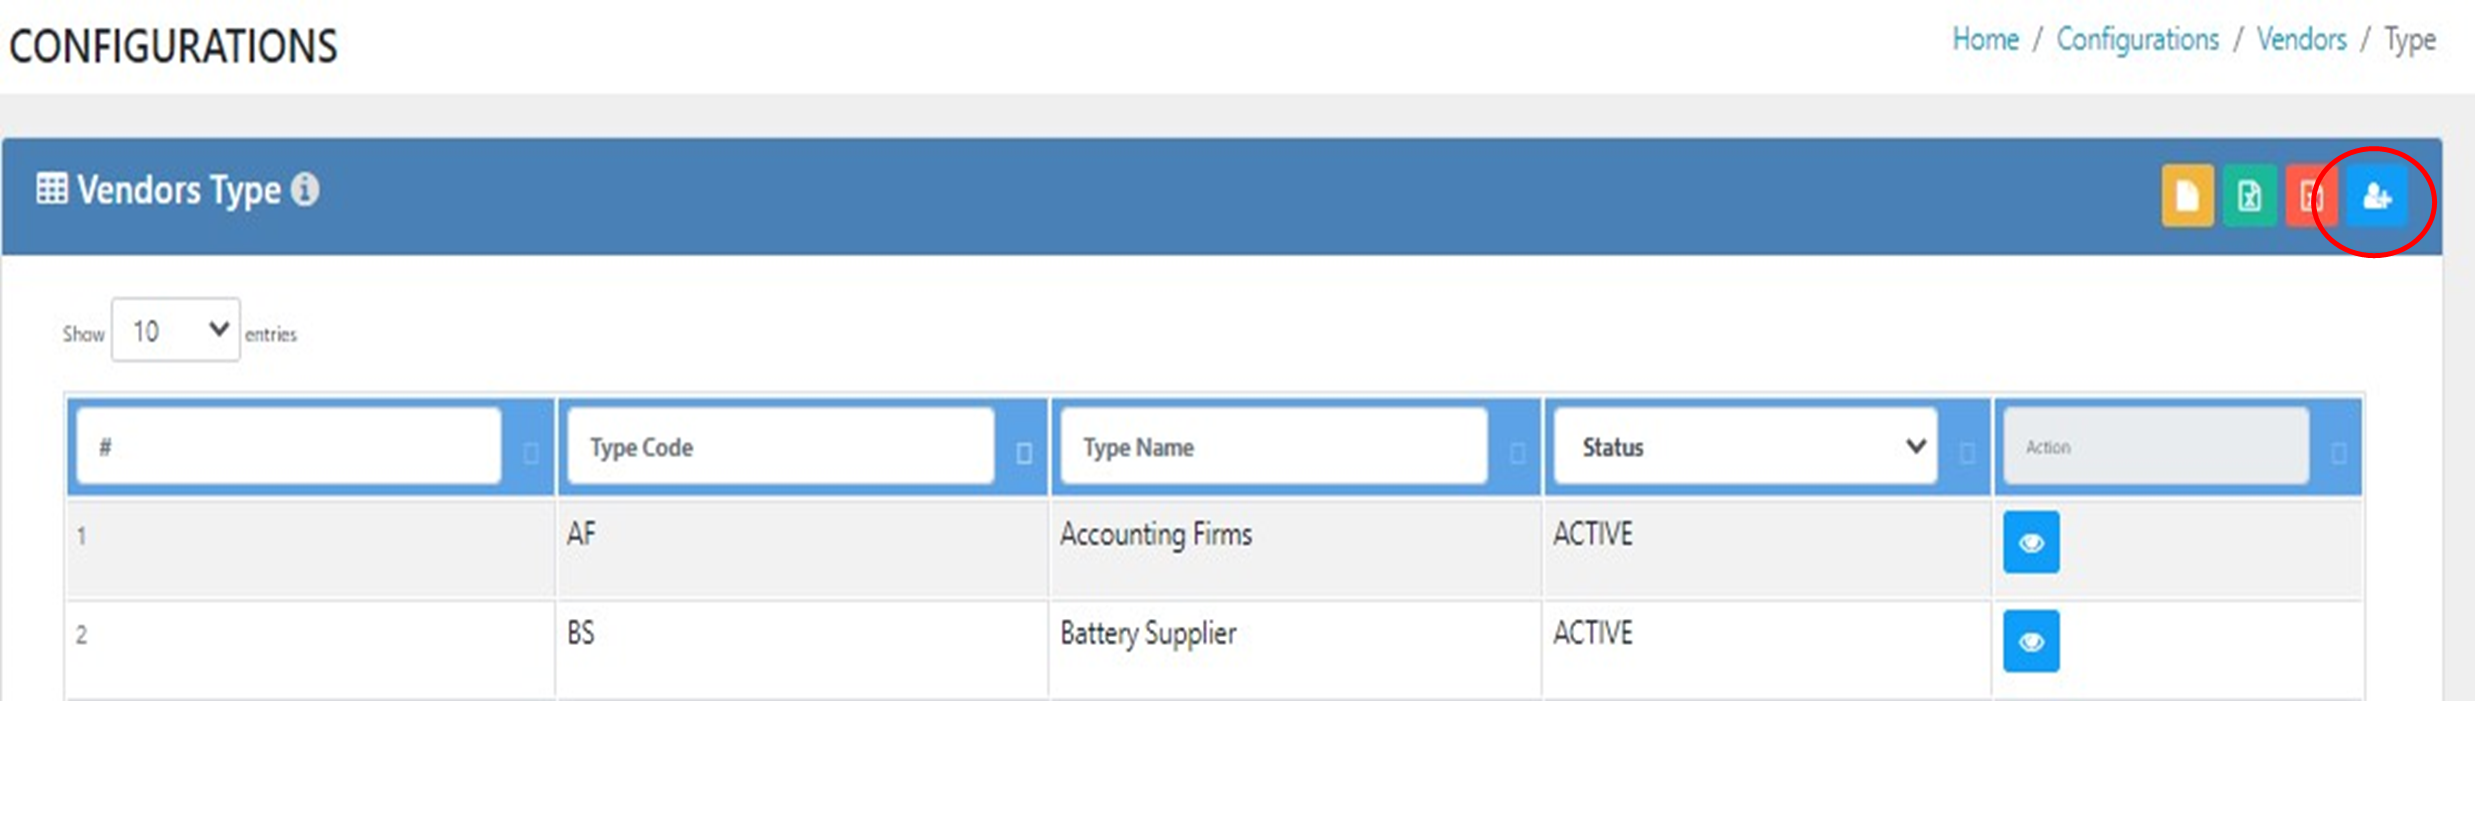
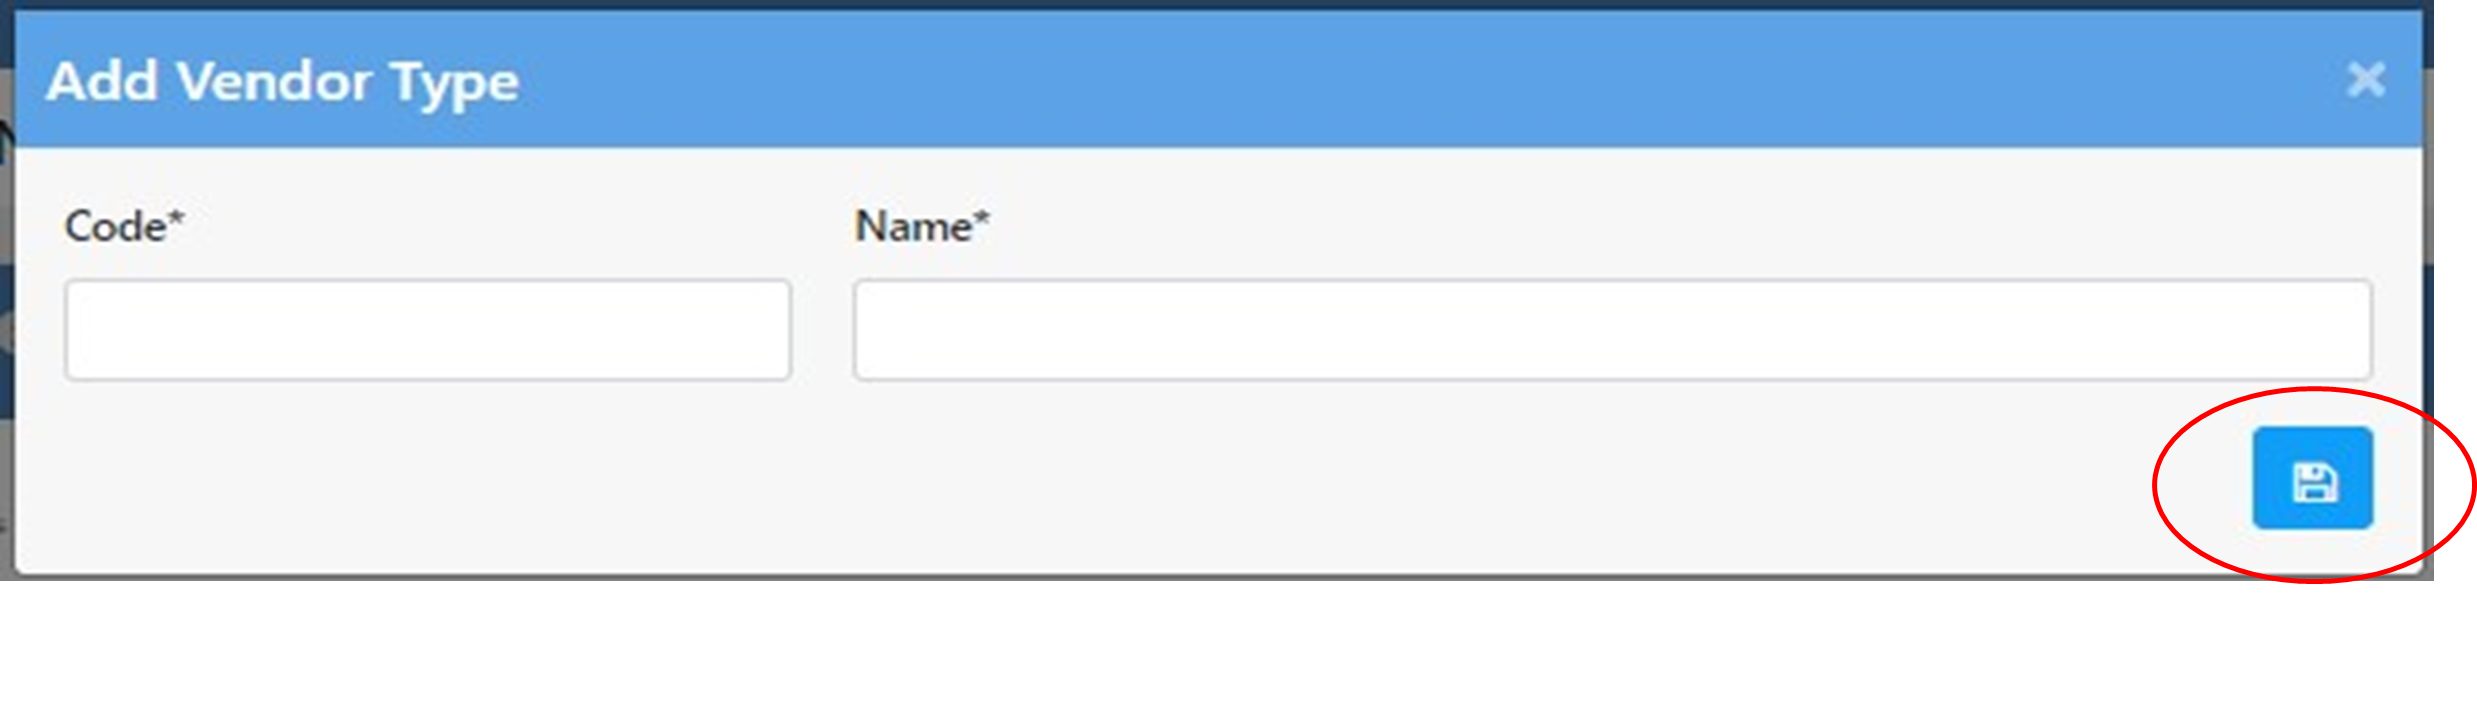
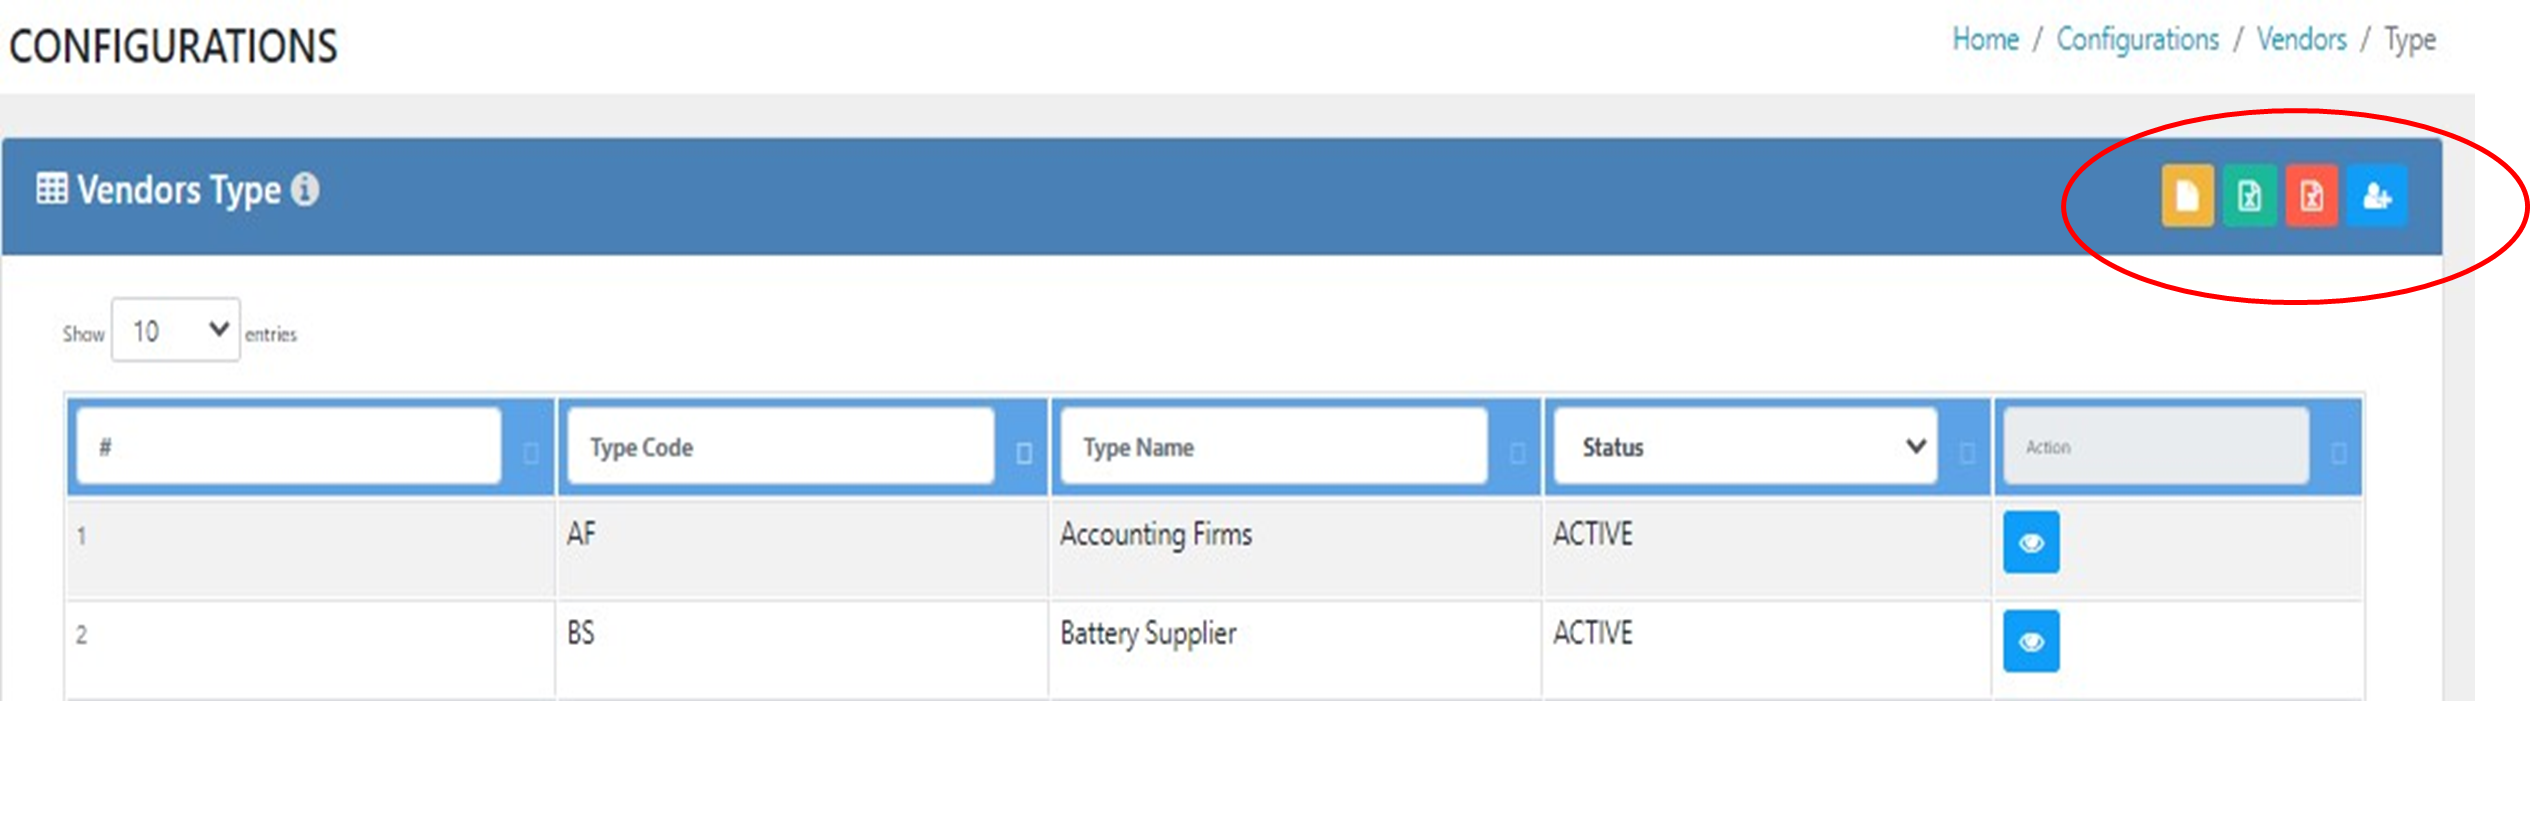
Vendor Type
To add vendor type click the add button at the upper rightmost part of the screen. To save, click the save button
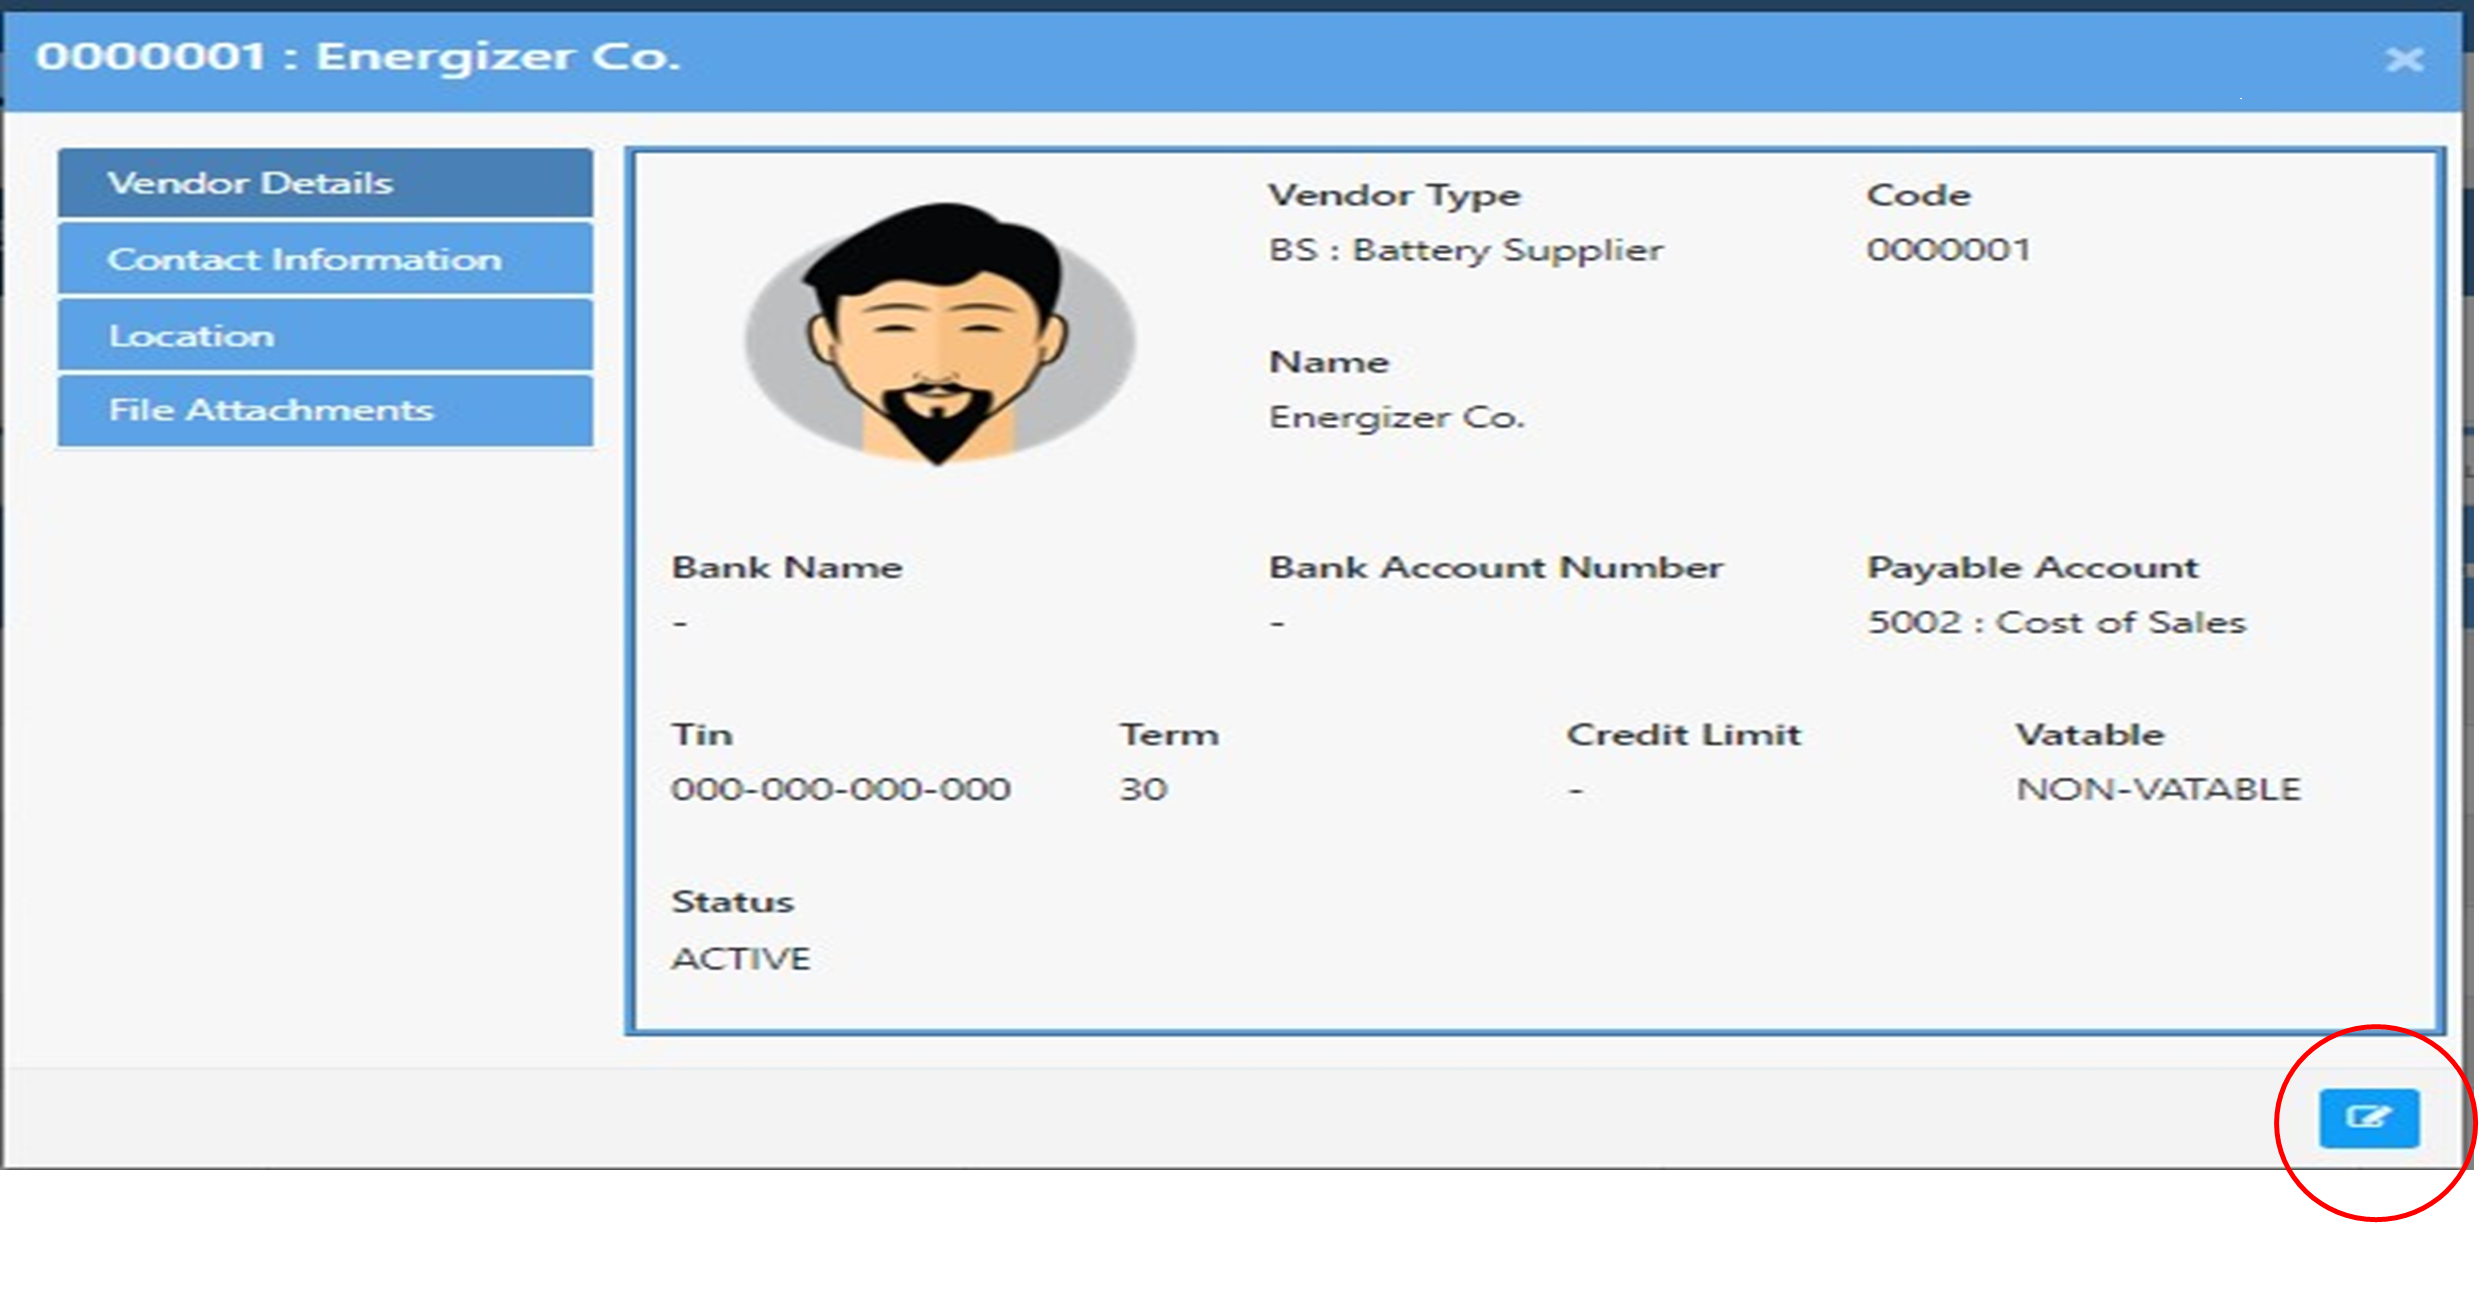
To edit, click the view button below action column. Then click the edit button then save and update.
To download template, click the orange button
To import CSV or edited type of vendor, click the green button.
To export CSV or soft copy of vendor type, click the red button.
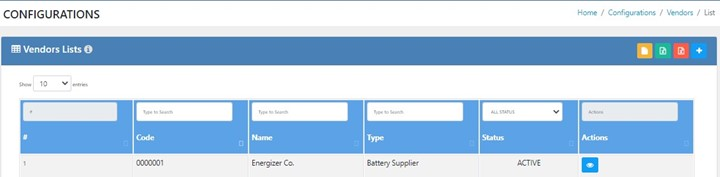
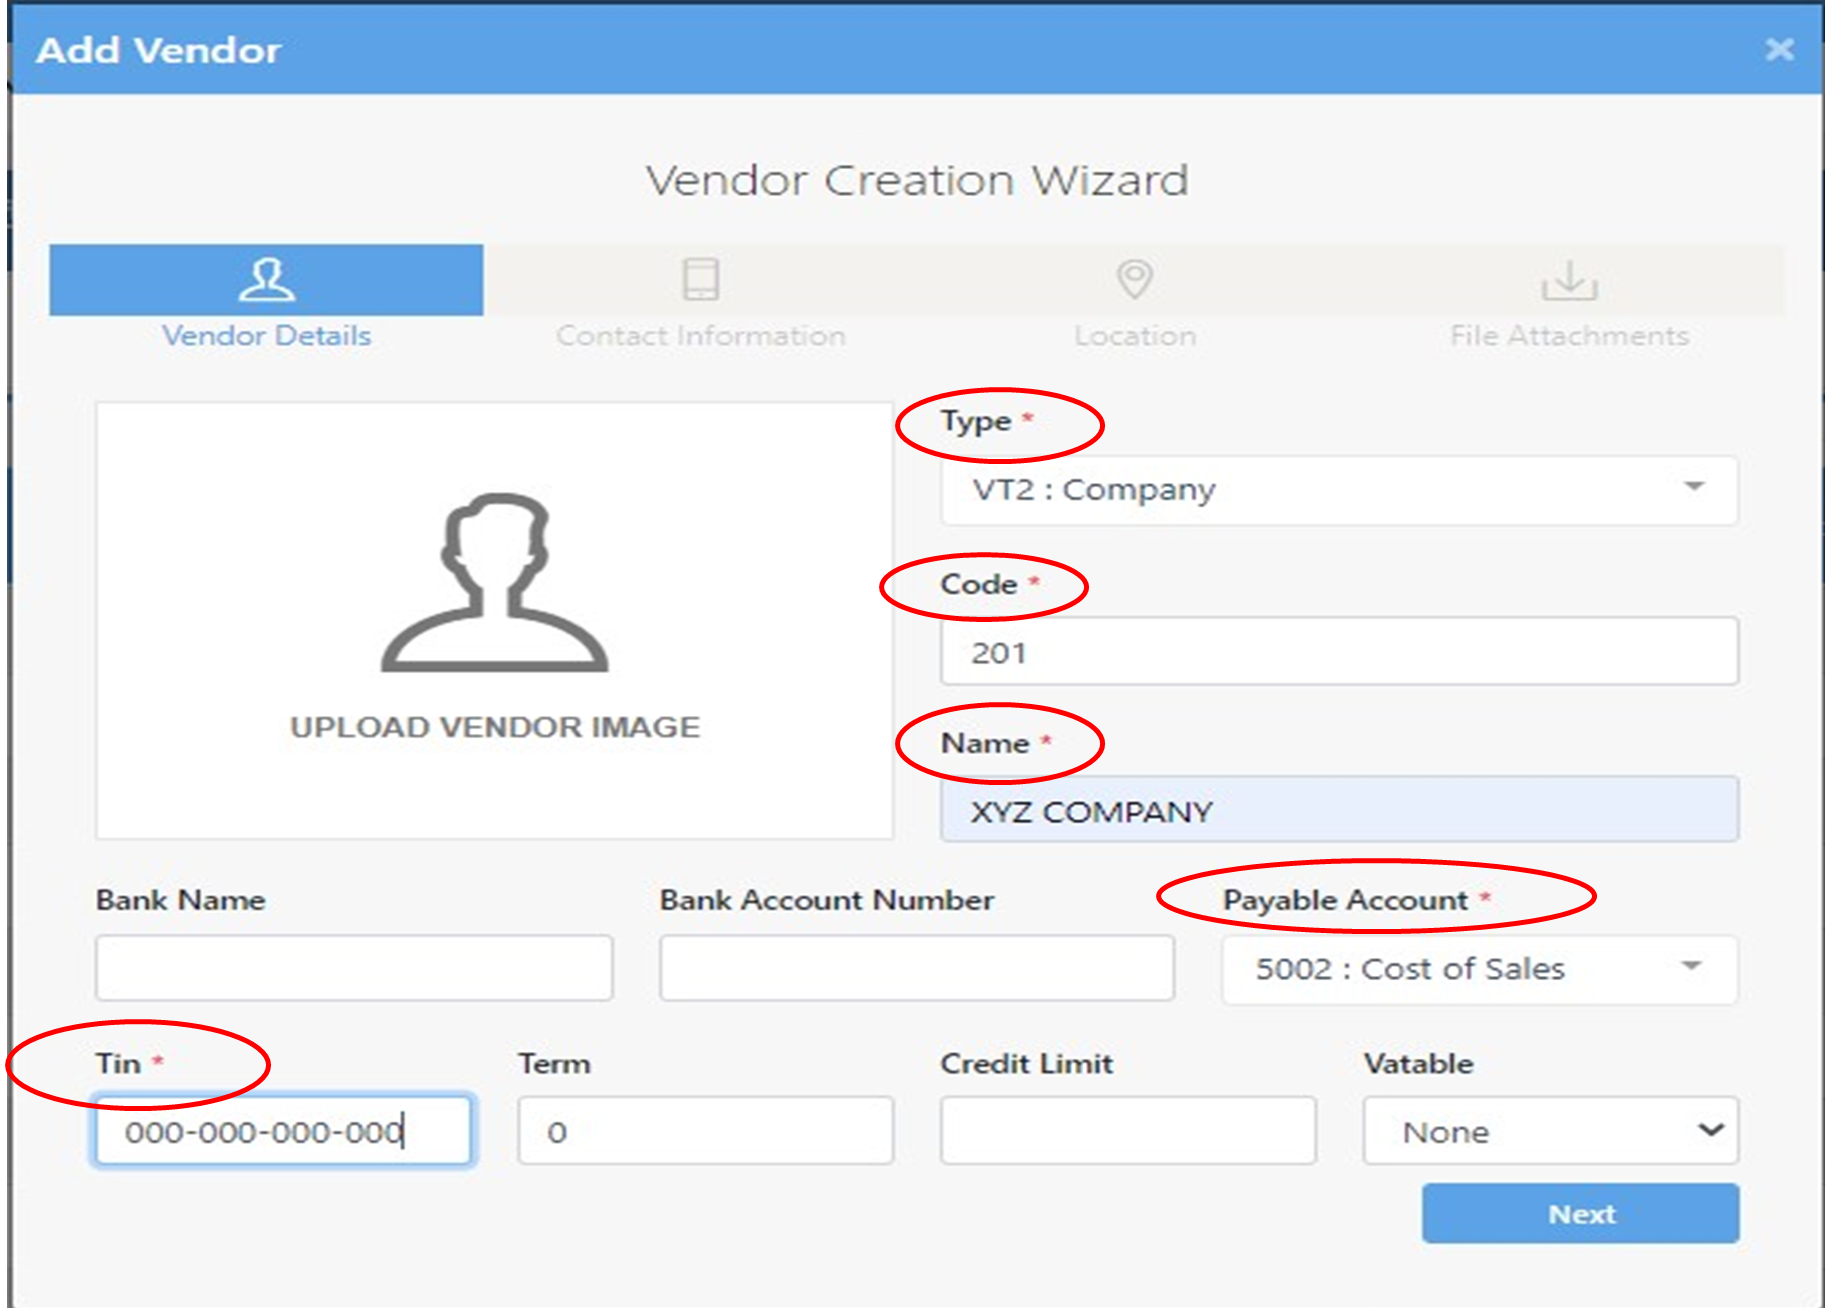
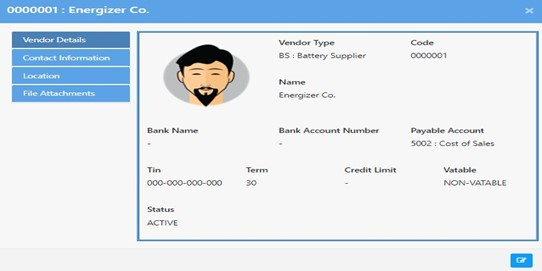
Vendor List
To add vendor list click the add button at the uppermost part of the screen.
- Type — type of vendor whether individual, company and sole proprietorship.
- Code — selected code
- Name- name of the company
- Payable Account — proper chart of accounts
- TIN — for BIR purposes.
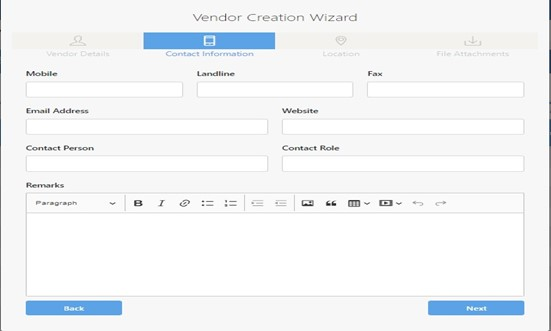
Input Contact Information: Mobile, Landline, Fax, Email Address, Website, Contact Person, Contact Role, and Remarks. Then click next for Location.
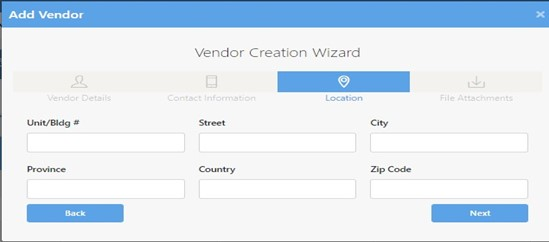
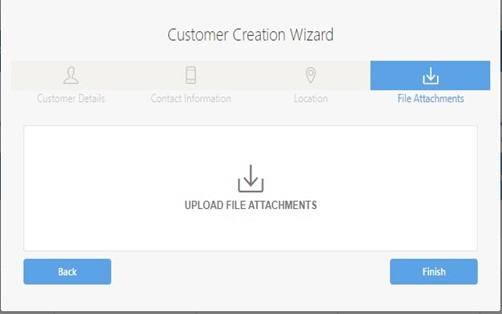
Location: Unit/ Bldg. Street, City, Province, Country, and Zip code. Then click next for file attachments.
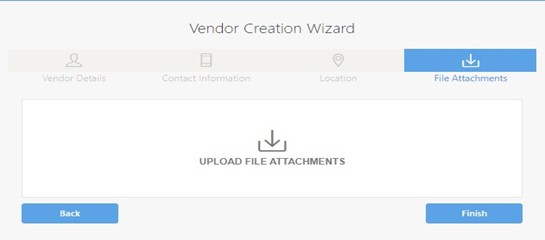
File Attachments – for documentation purposes you can attached files for references.
To edit, click the view button below action column. Then click the edit button then save and update.
Customers
Customer Type
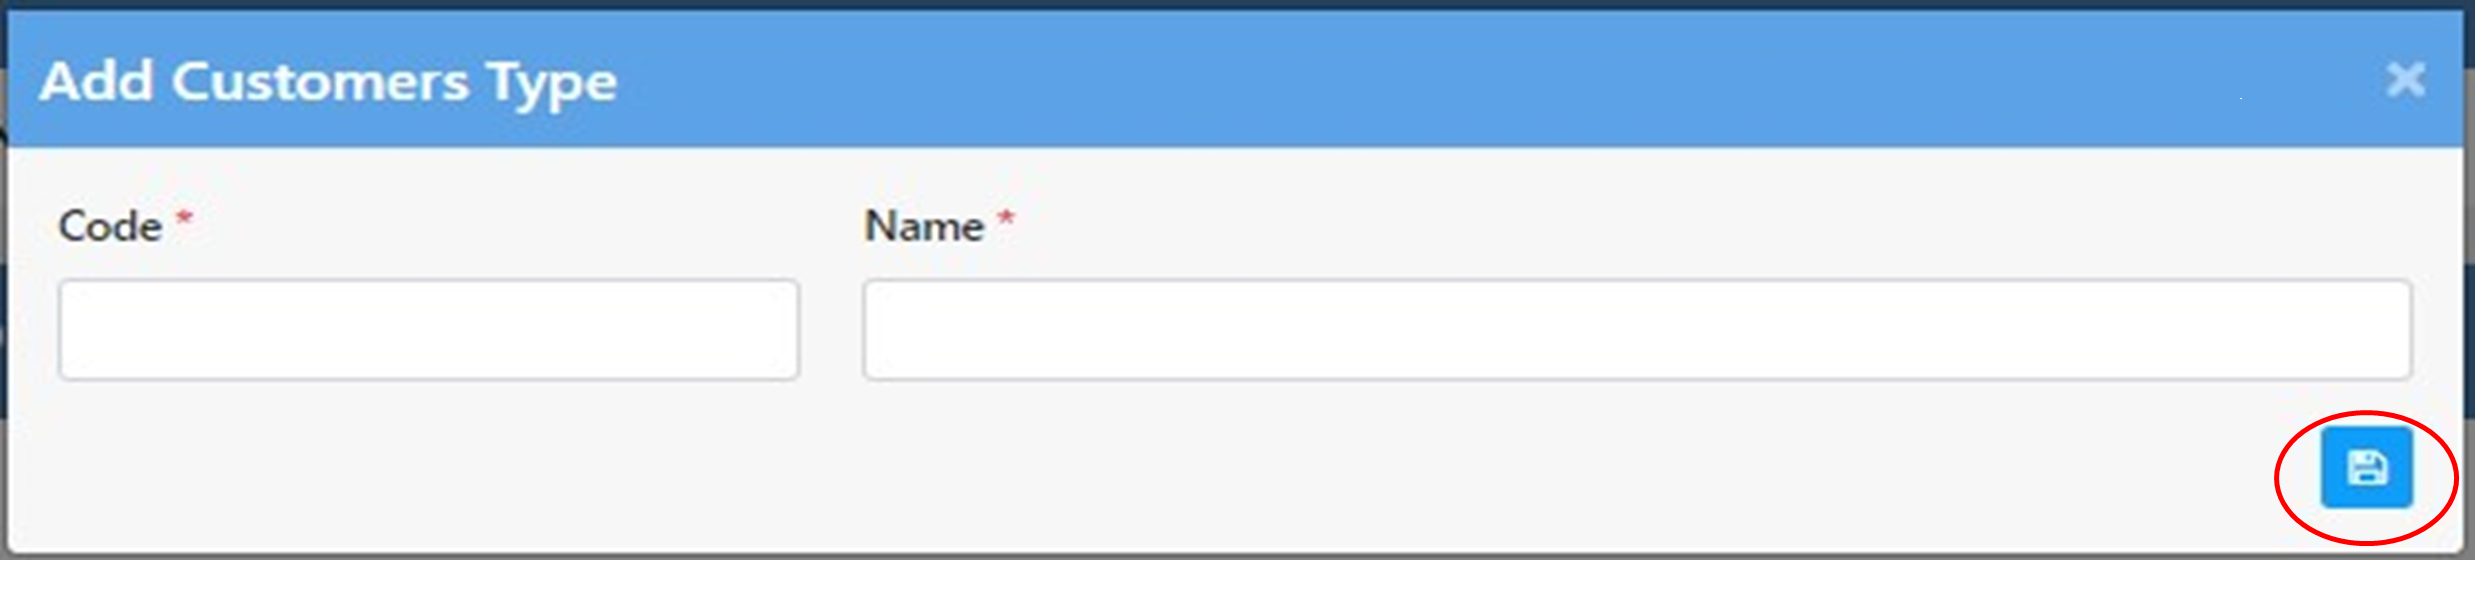
To add customer type click the add button at the upper rightmost part of the screen.
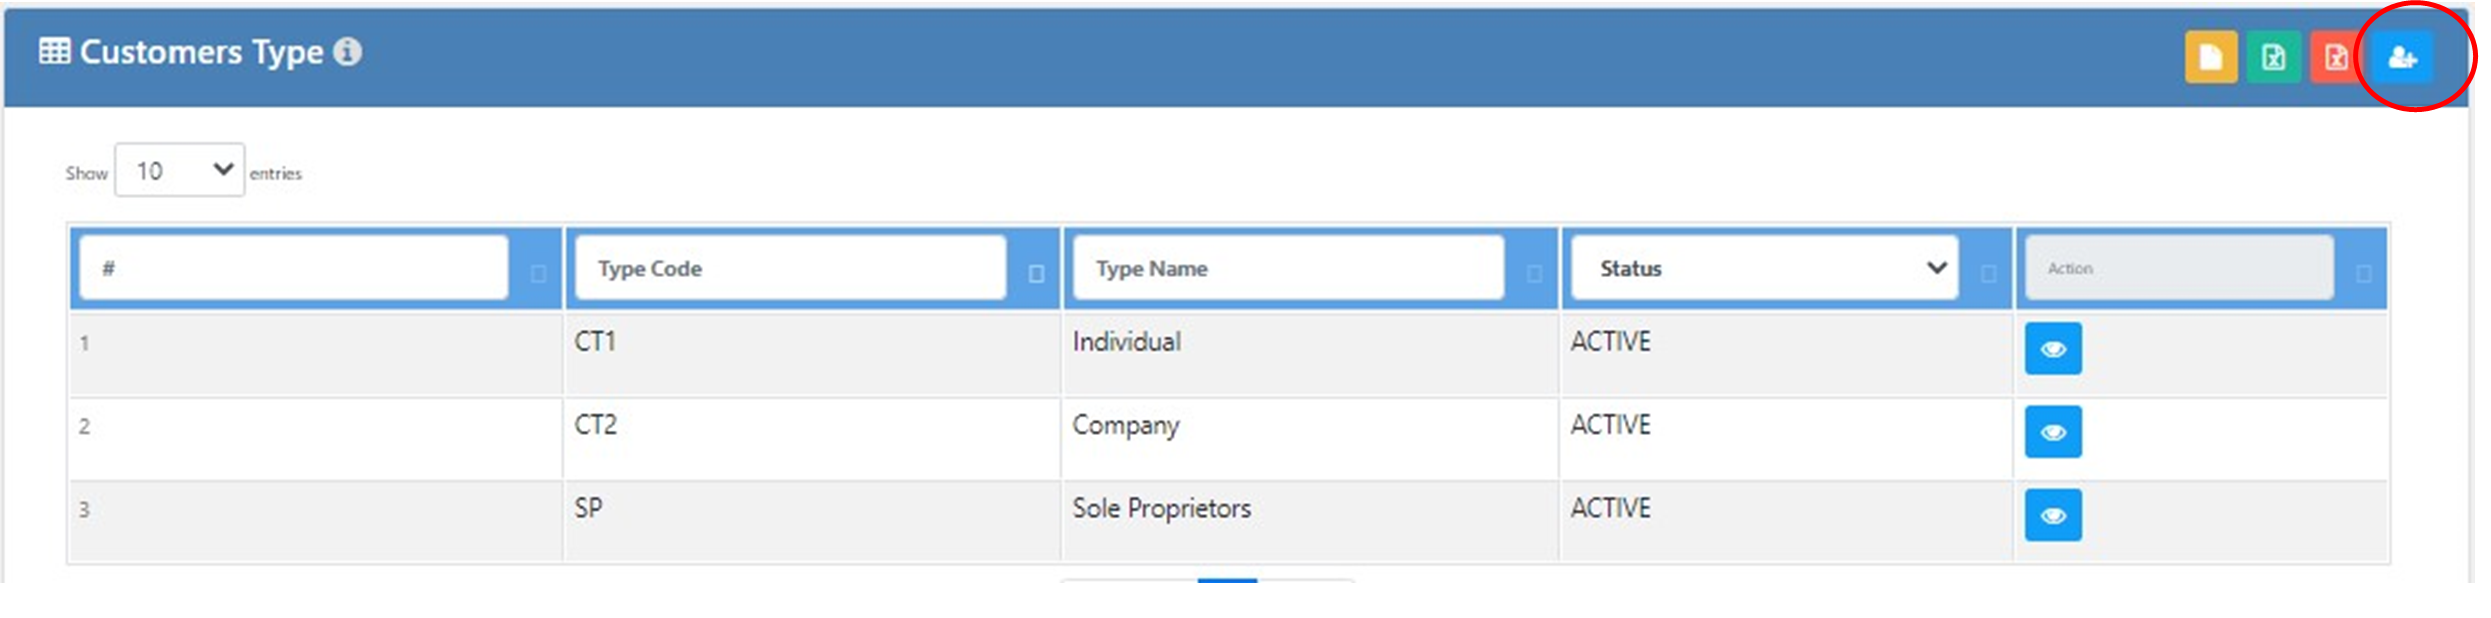
To save, click the save button.
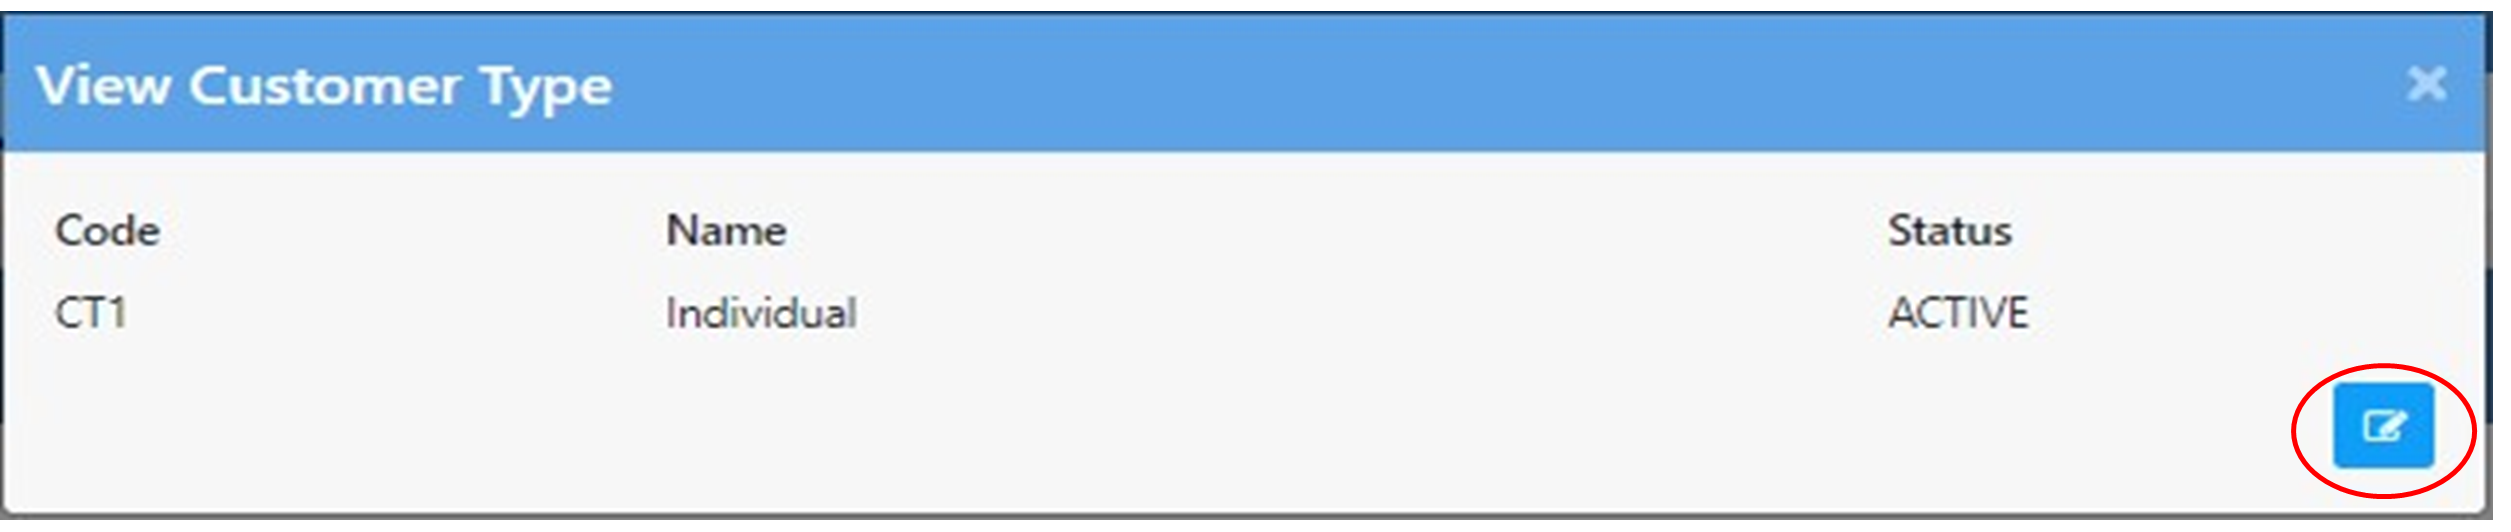
To edit, click the view button below action column. Then click the edit button then save and update.
To download template, click the orange button
To import CSV or edited type of vendor, click the green button.
To export CSV or soft copy of vendor type, click the red button.

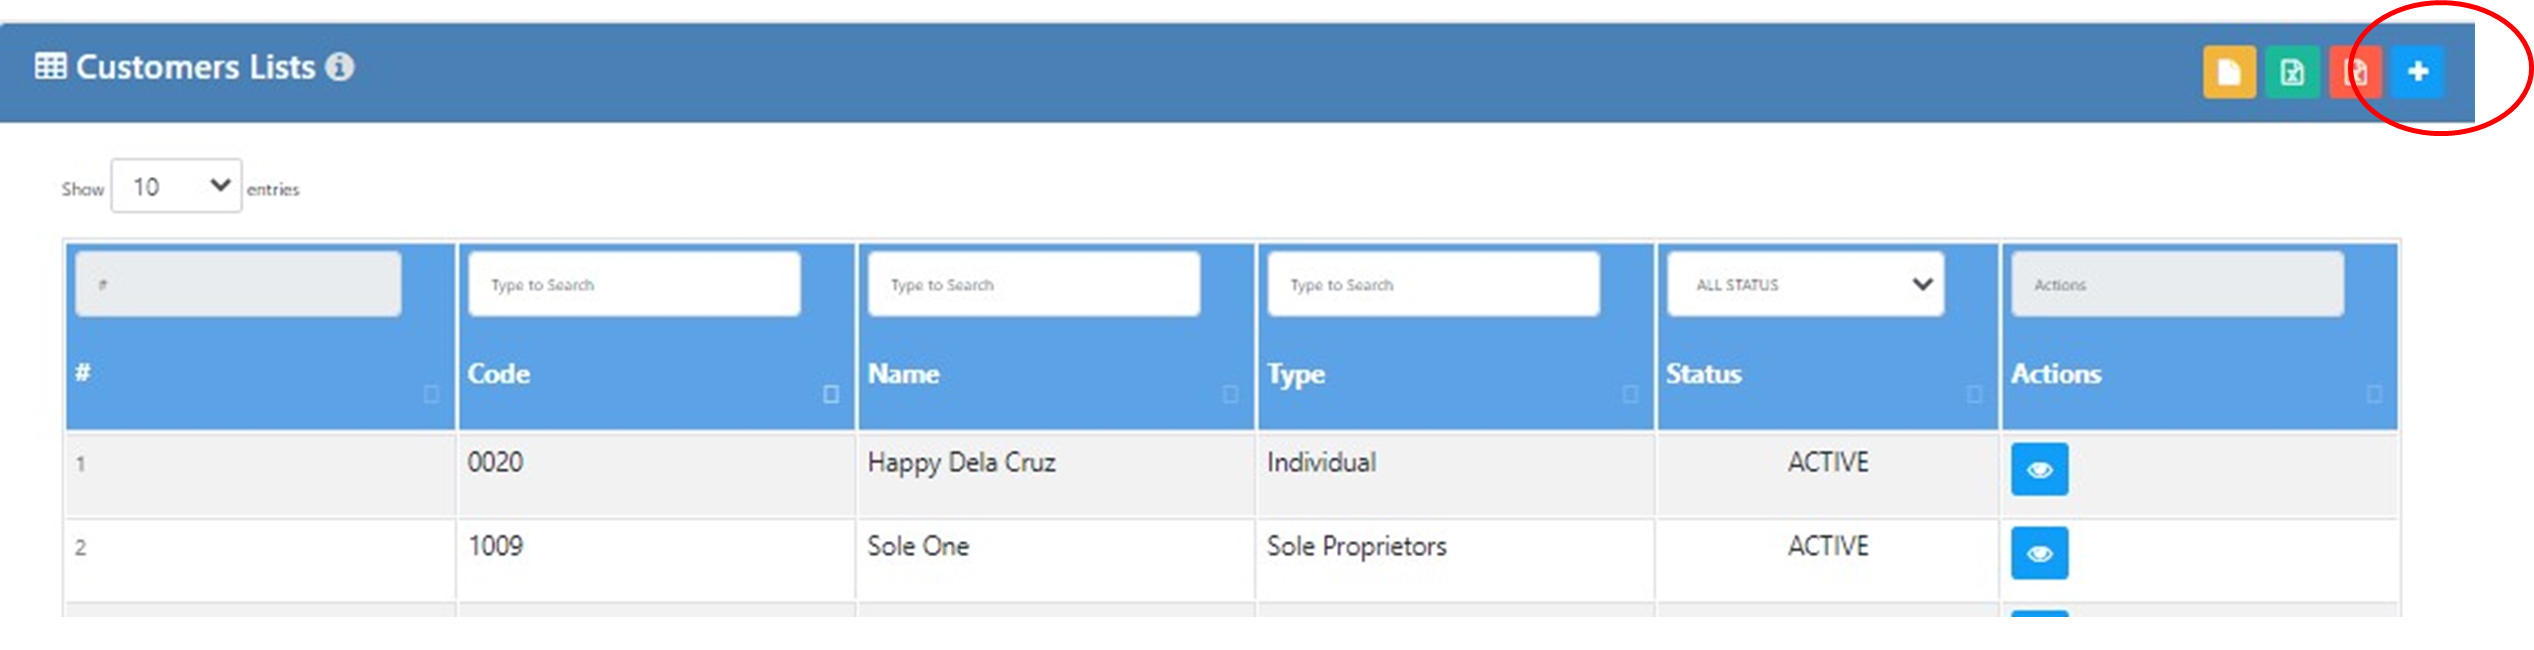
Customer Lists
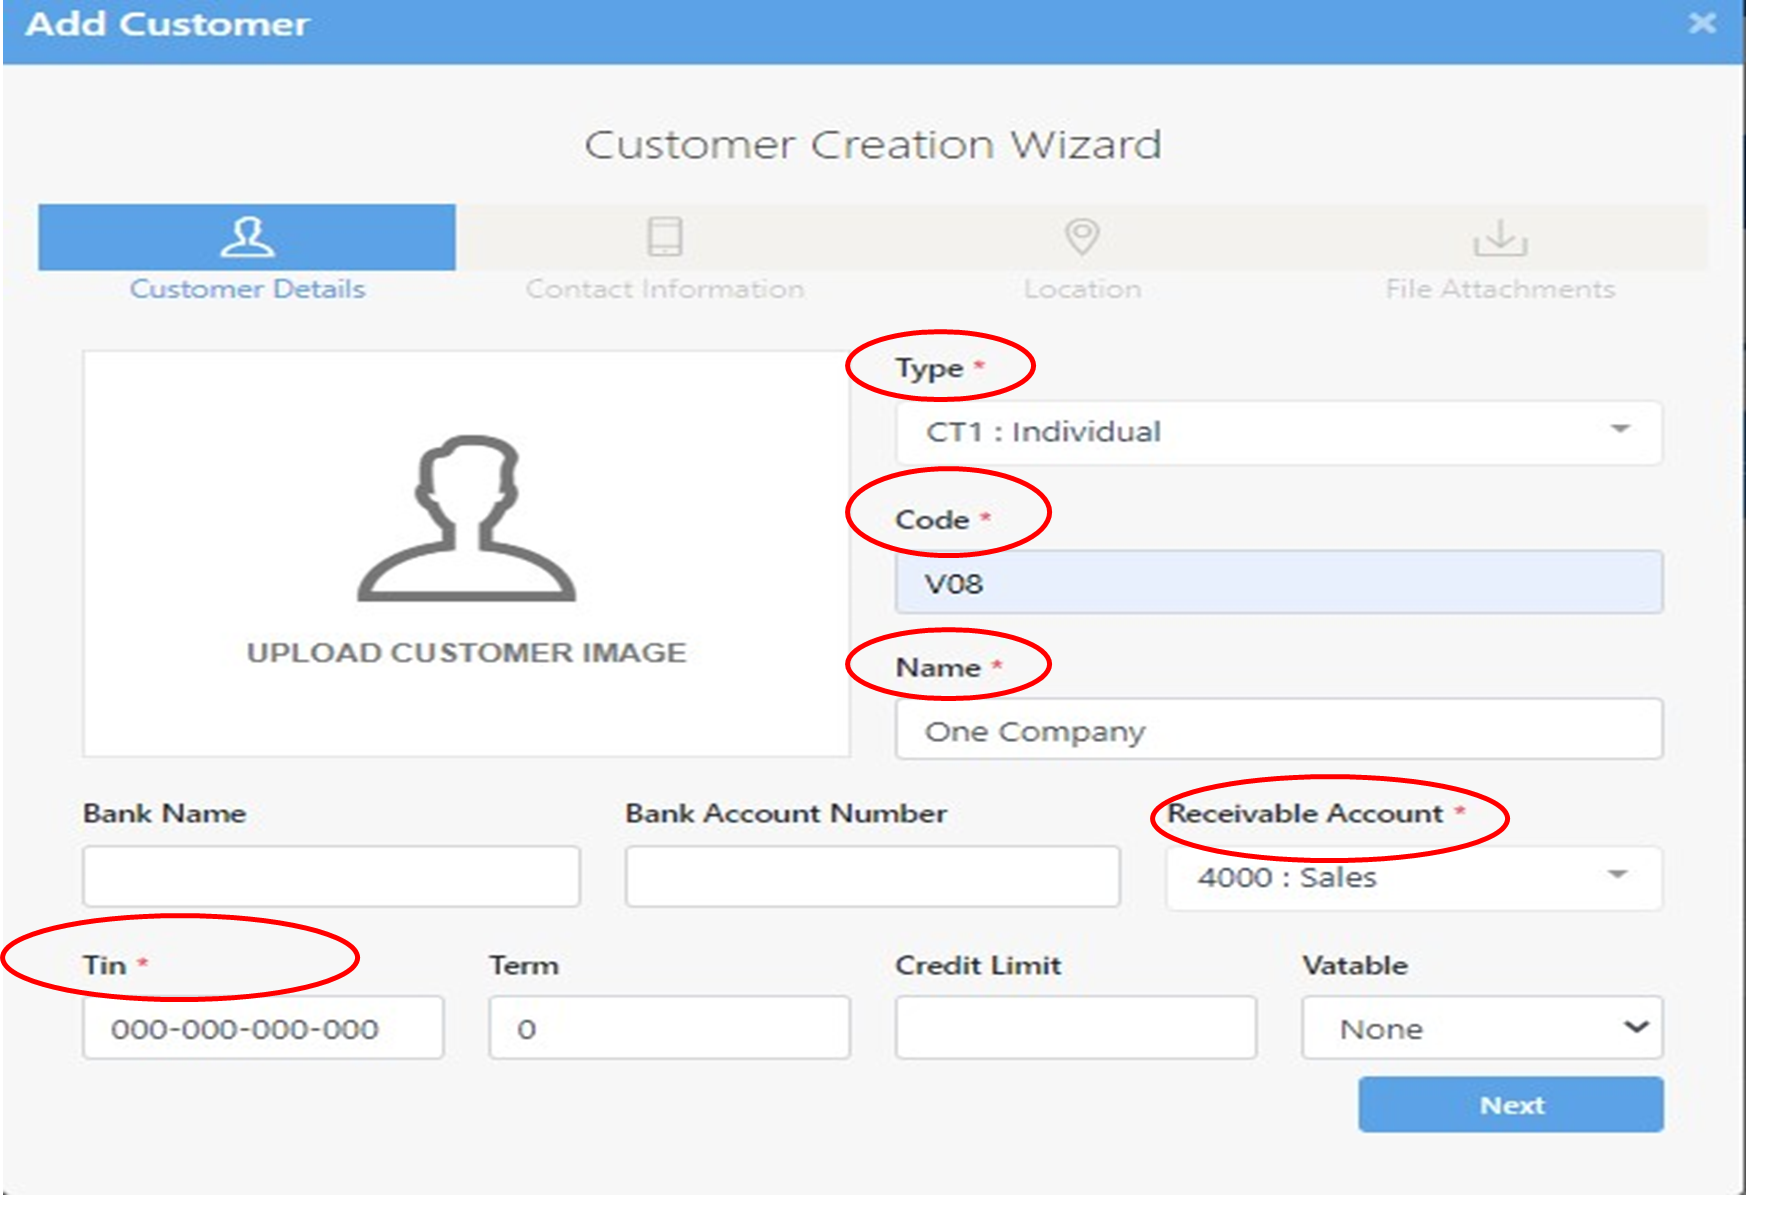
To add customer list click the add button at the uppermost part of the screen.
Fill up the required information, specifically the information with asteries.
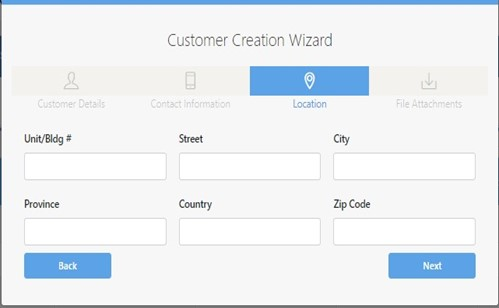
Location: Unit/ Bldg. Street, City, Province, Country, and Zip code. Then click next for file attachments.
File Attachments – for documentation purposes you can attached files for references.
To edit, click the view button below action column. Then click the edit button then save and update.

Product / Services
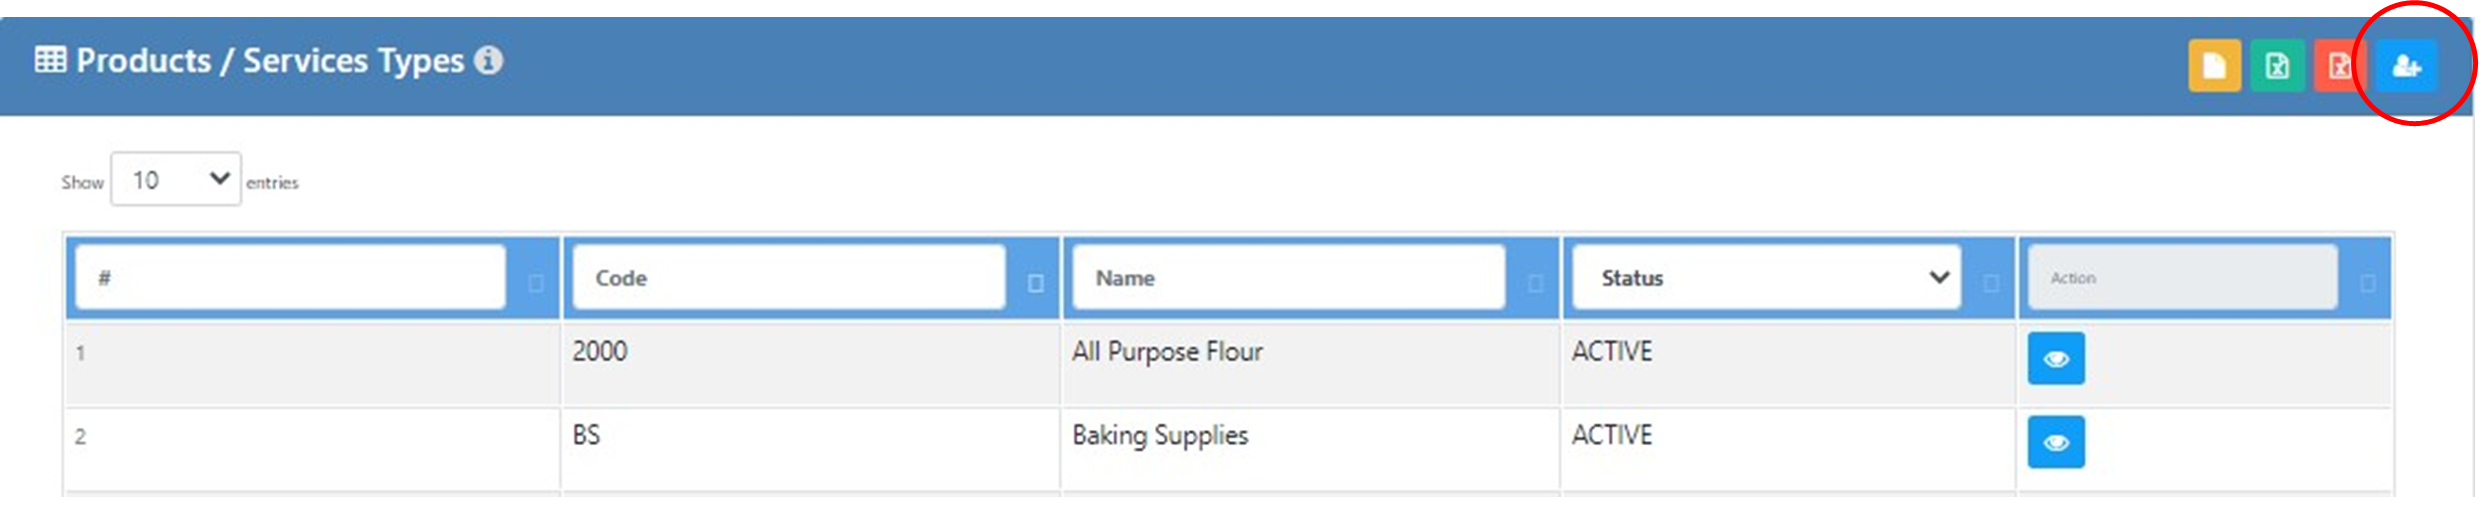
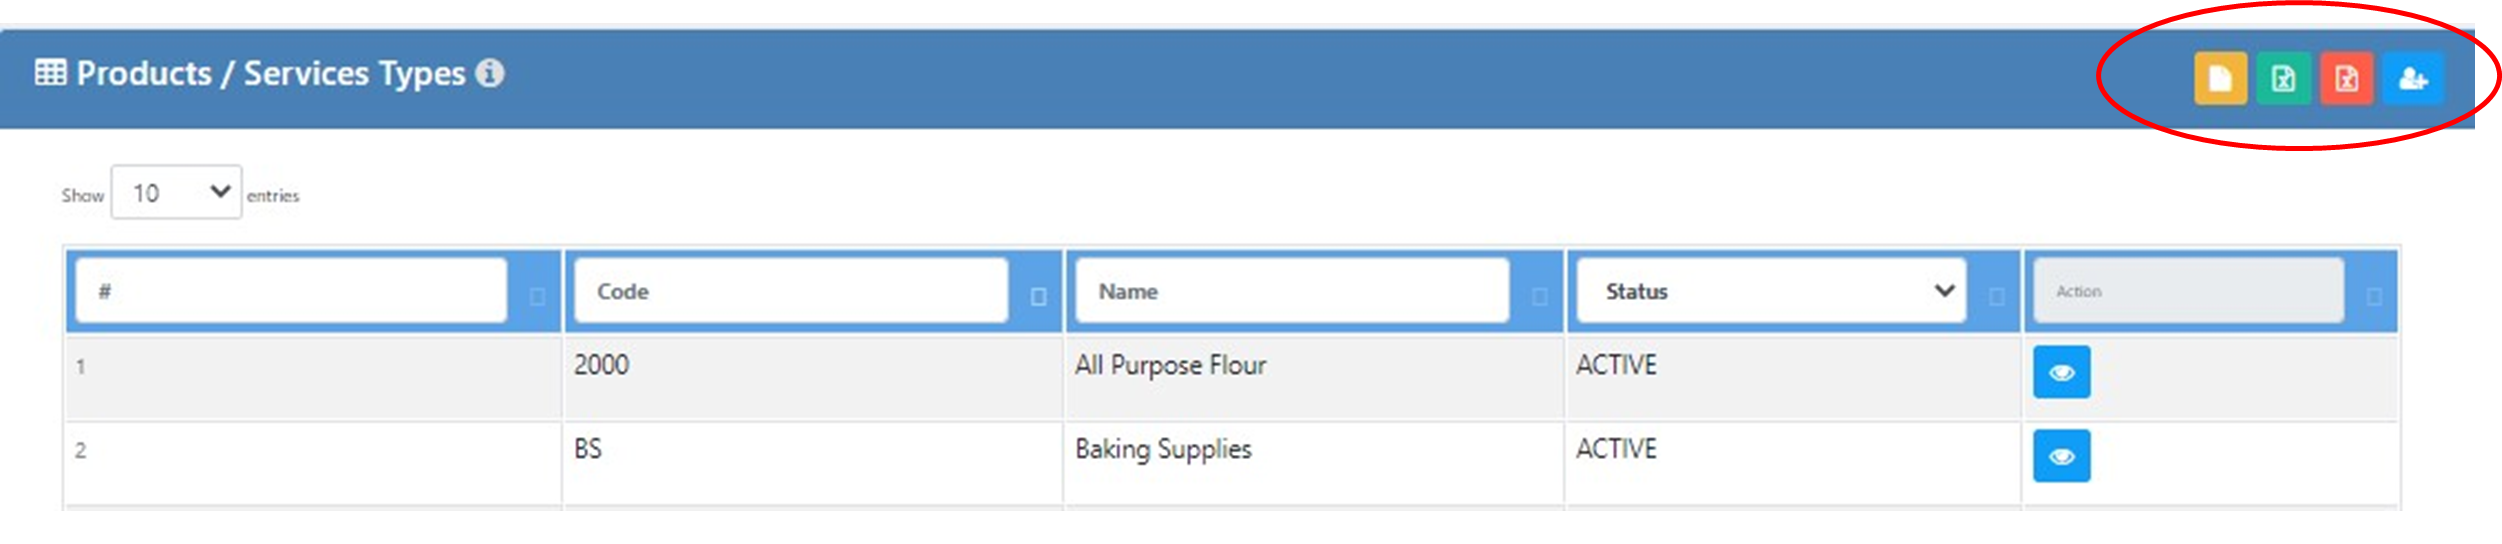
Product / Service Type
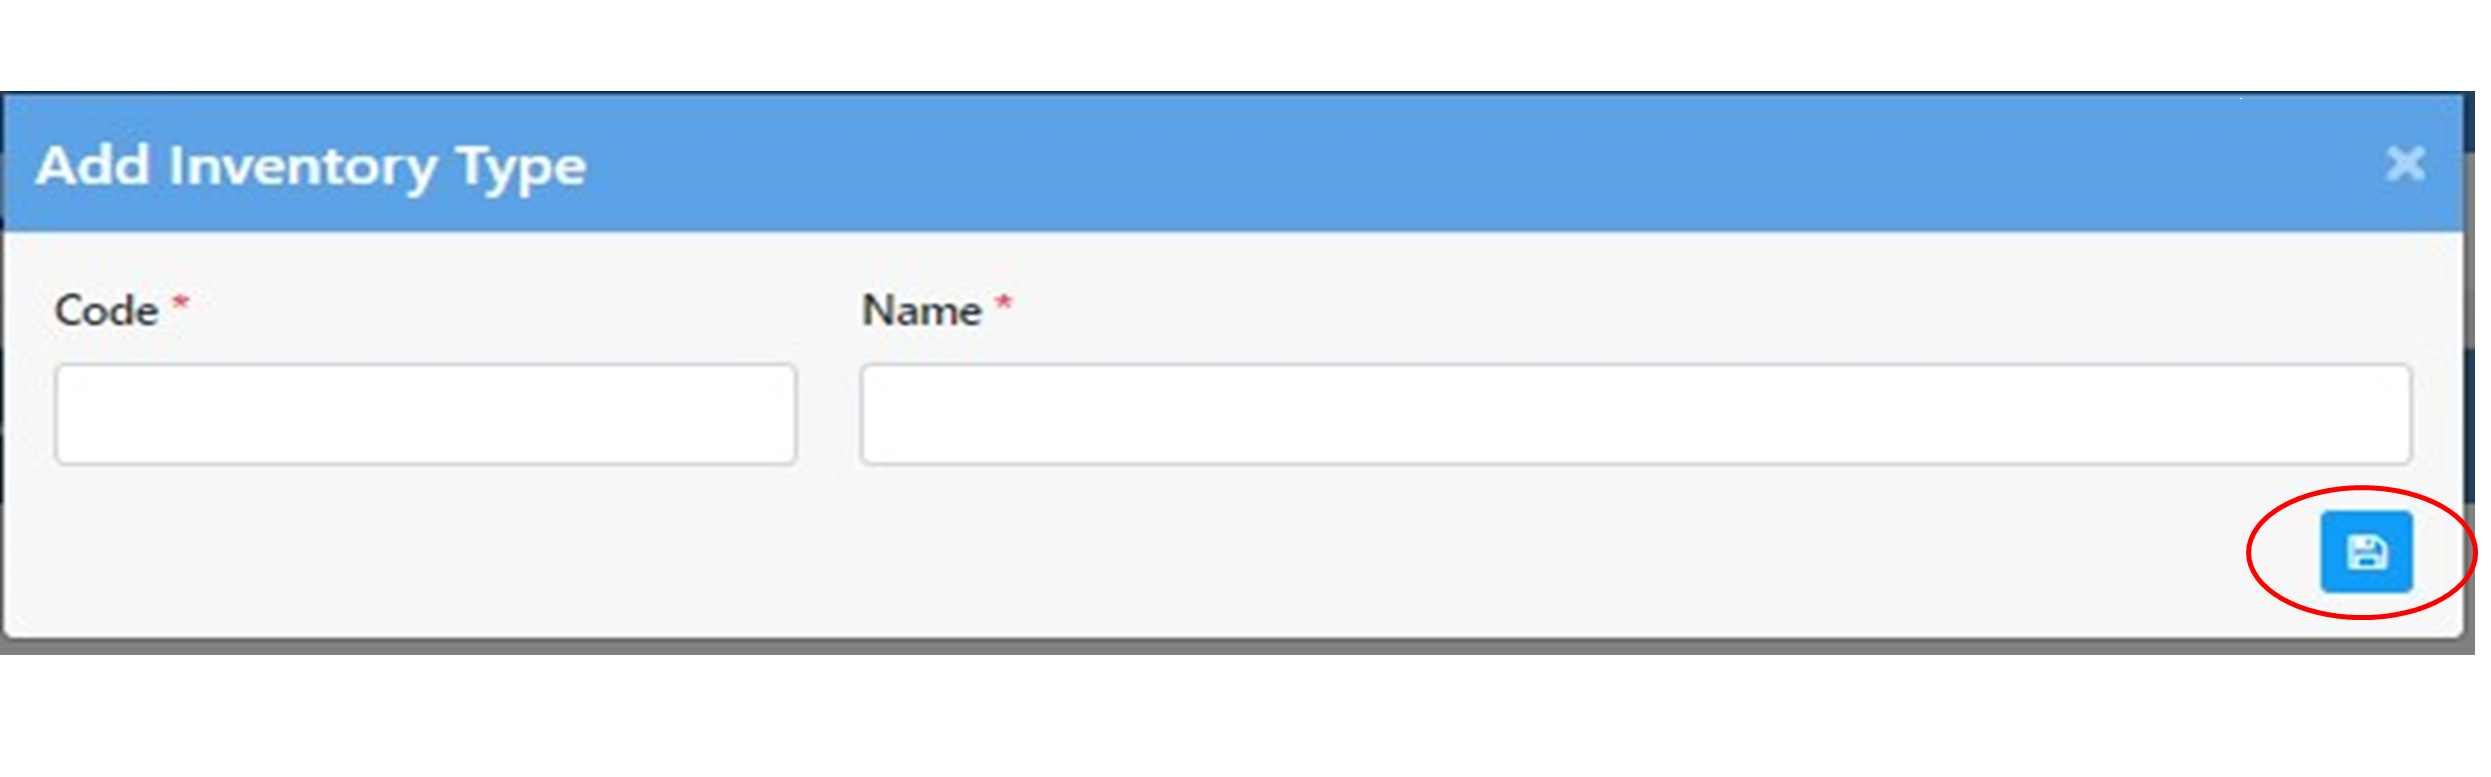
To add product or service type click the add button at the upper rightmost part of the screen.
To save, click the save button.
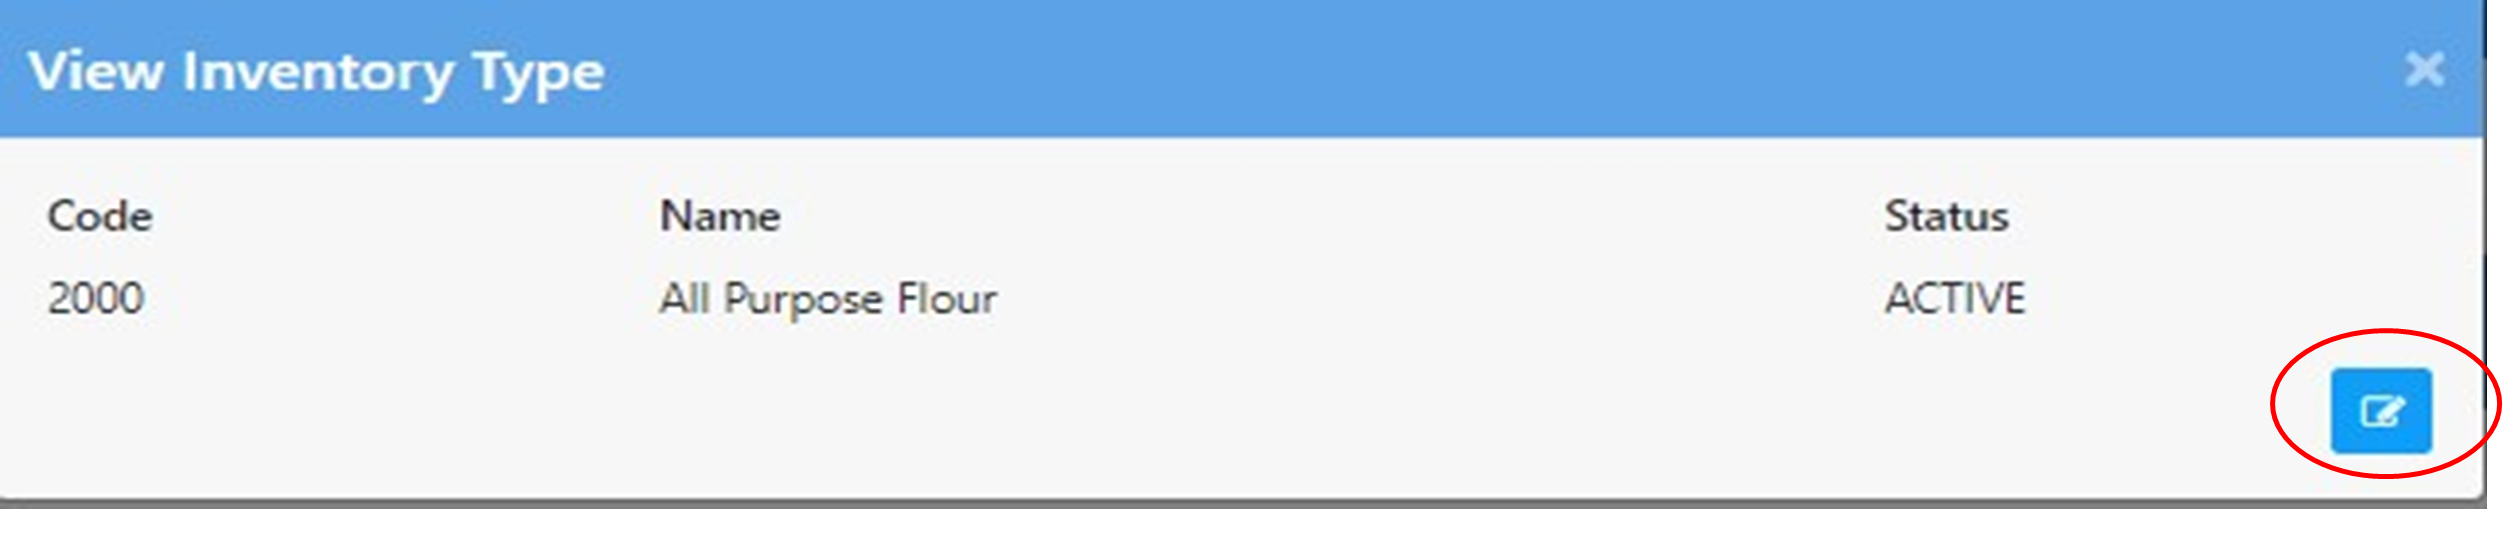
To edit, click the view button below action column. Then click the edit button then save and update.
To download template, click the orange button
To import CSV or edited type of vendor, click the green button.
To export CSV or soft copy of vendor type, click the red button.
Product / Service List
To add product or service list click the add button at the upper rightmost part of the screen.
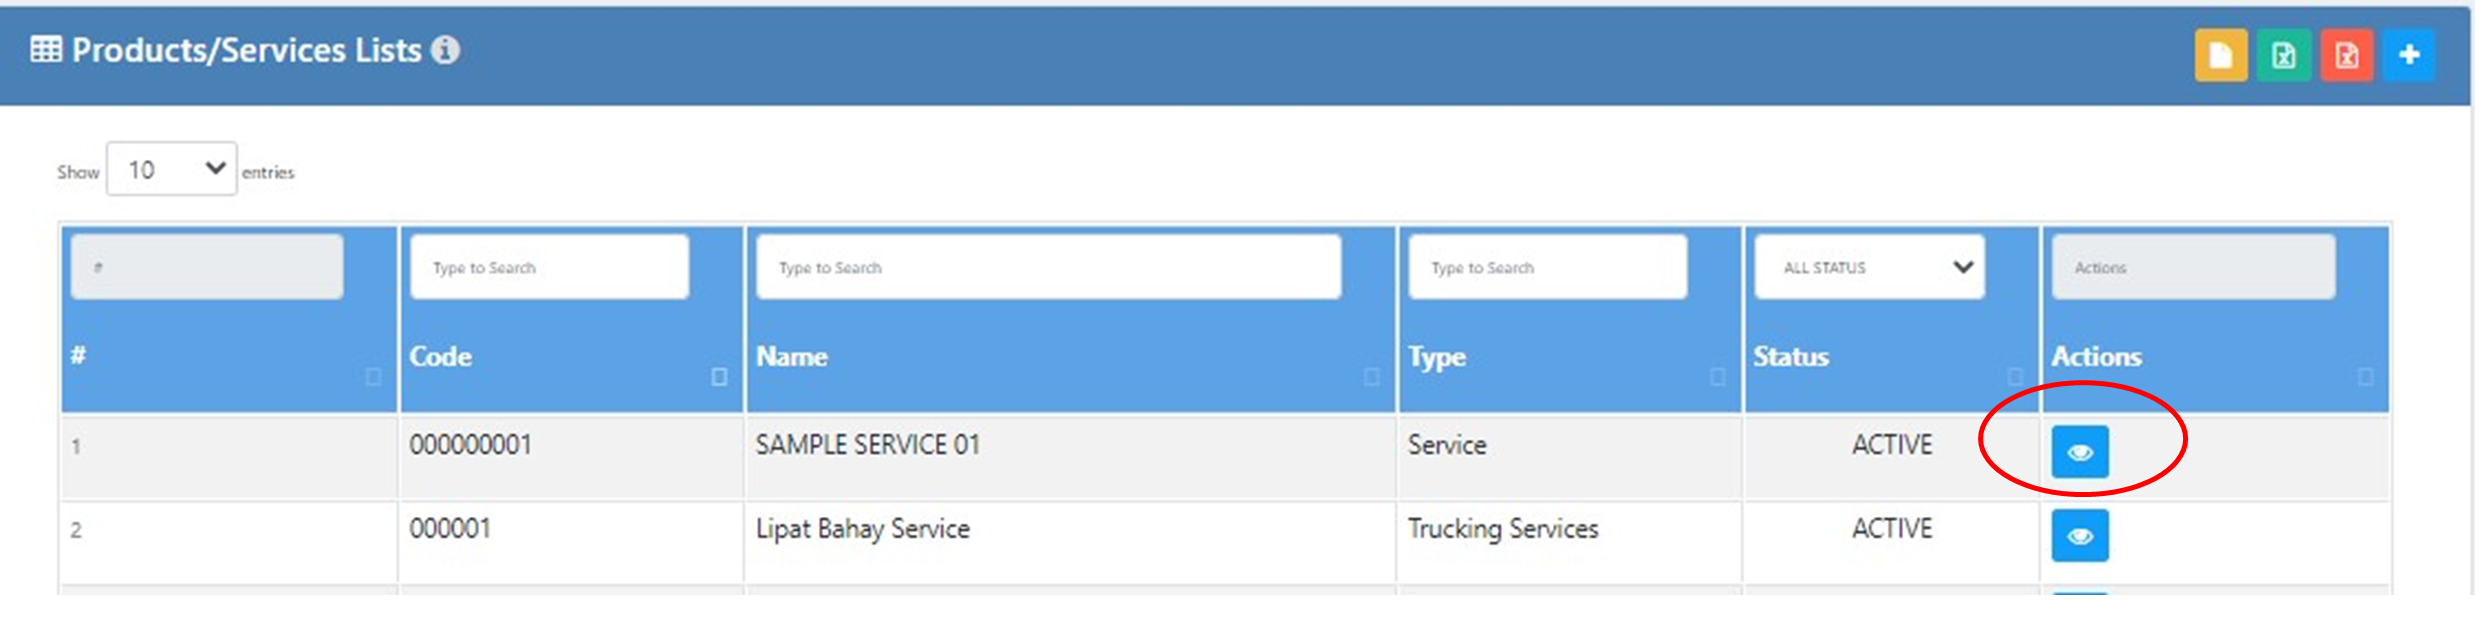
Fill up the required information, specifically the information with asteries.

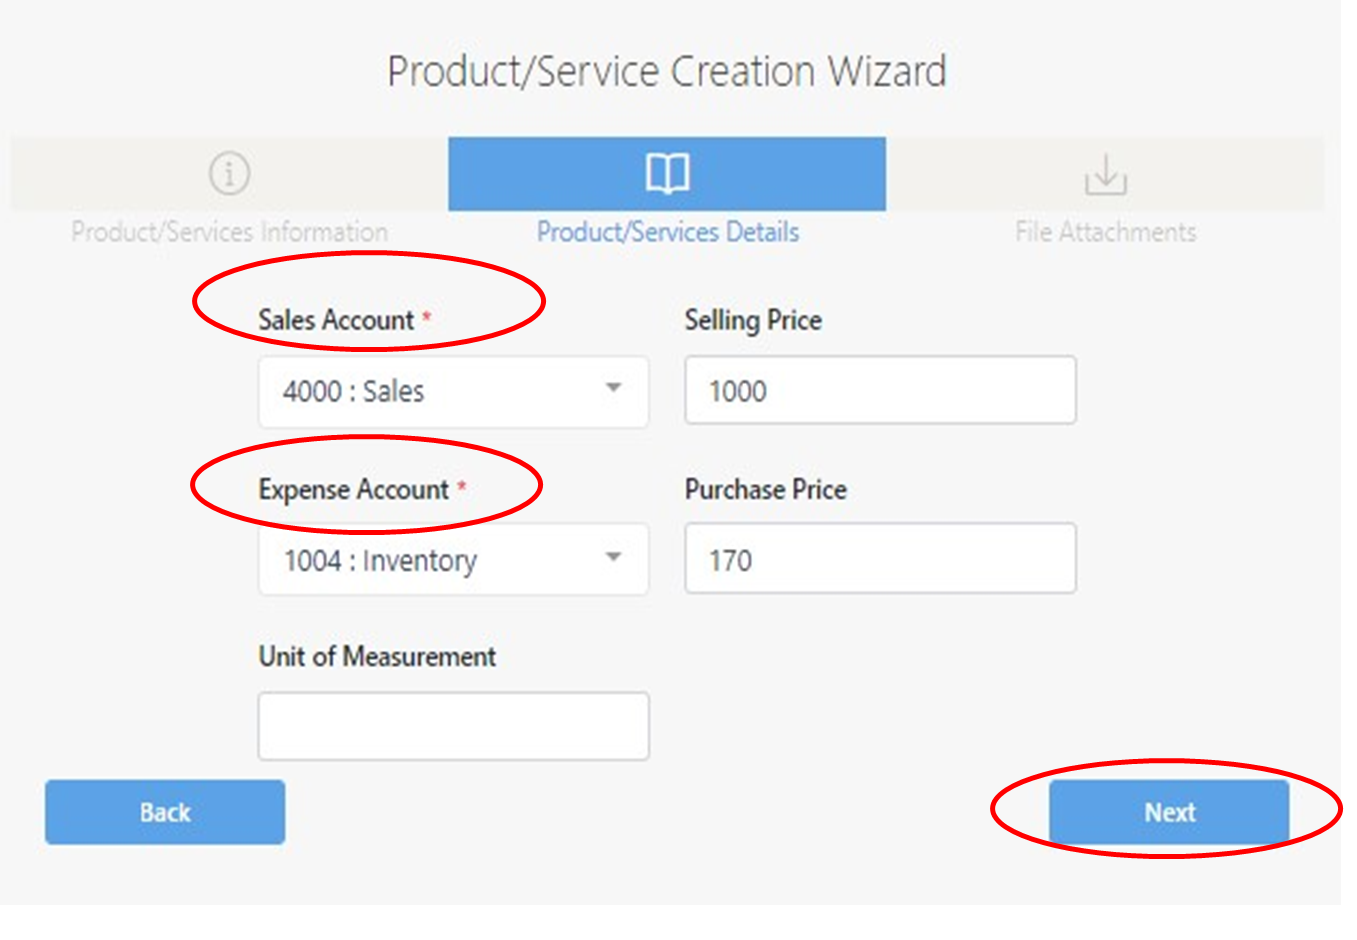
Product / Service Details – for the default selling price and purchase price, you can set up here at product and service details.
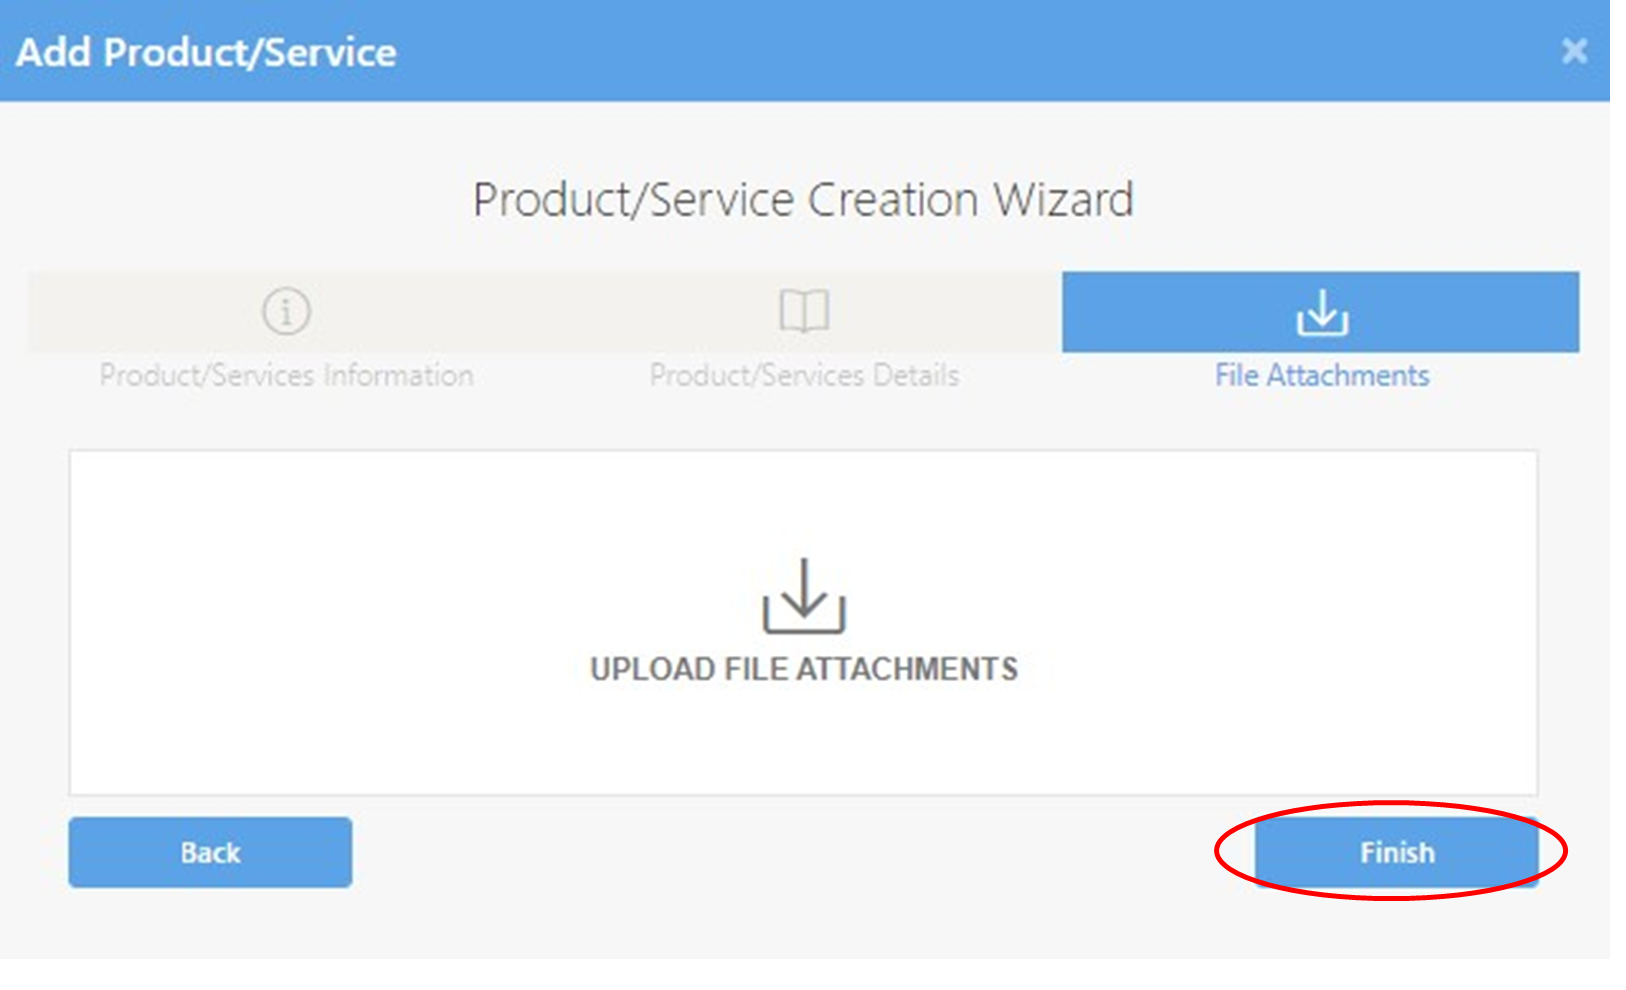
File Attachments – for documentation purposes you can attached files for references.
To edit, click the view button below action column. Then click the edit button then save and update.

Taxes
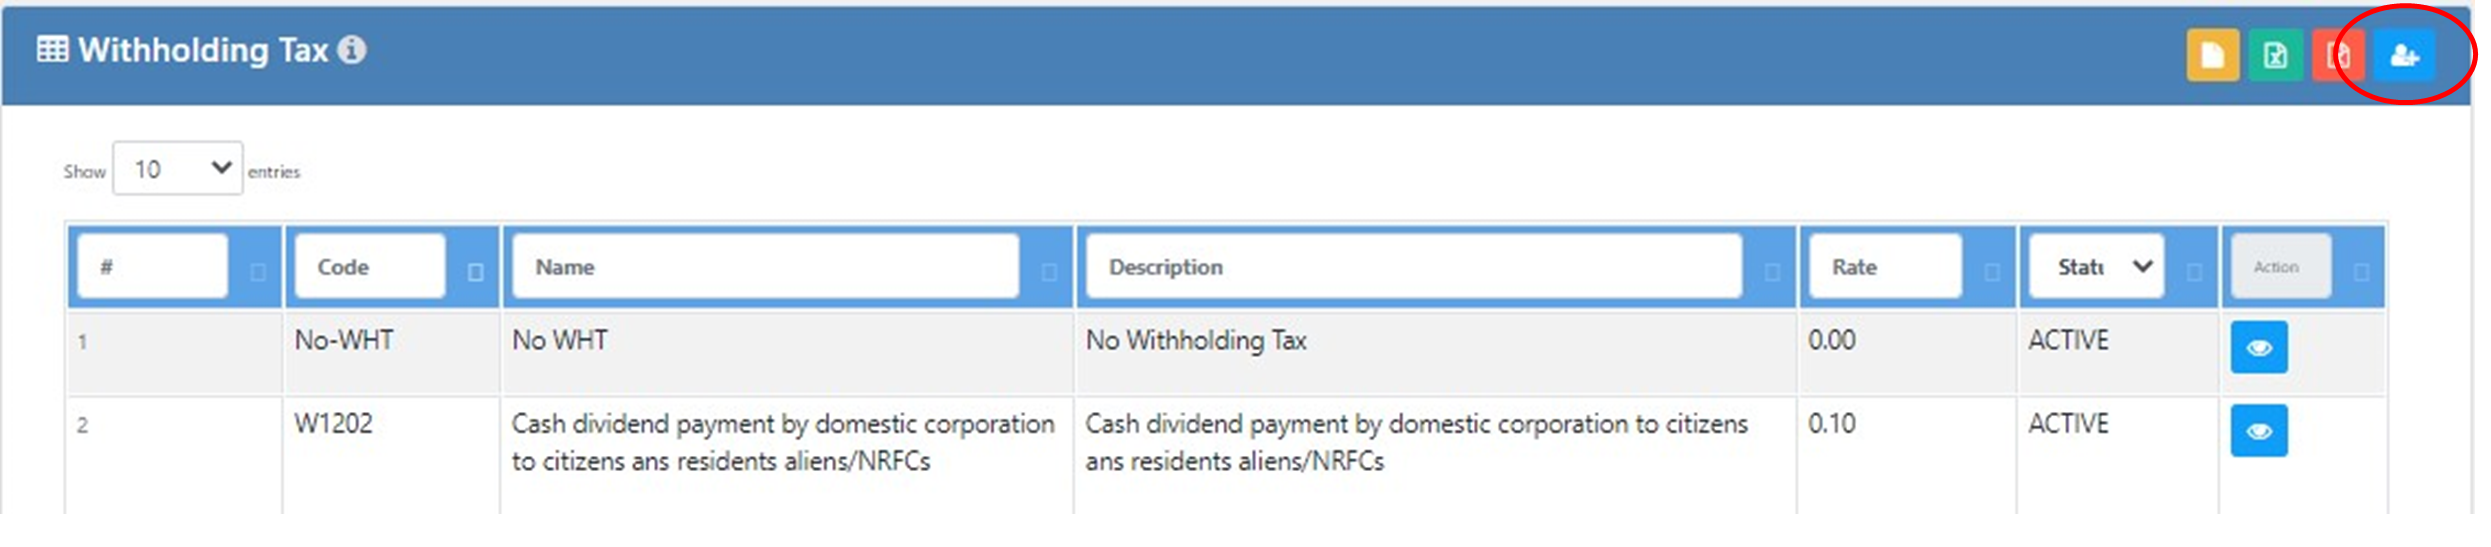
Withholding Taxes
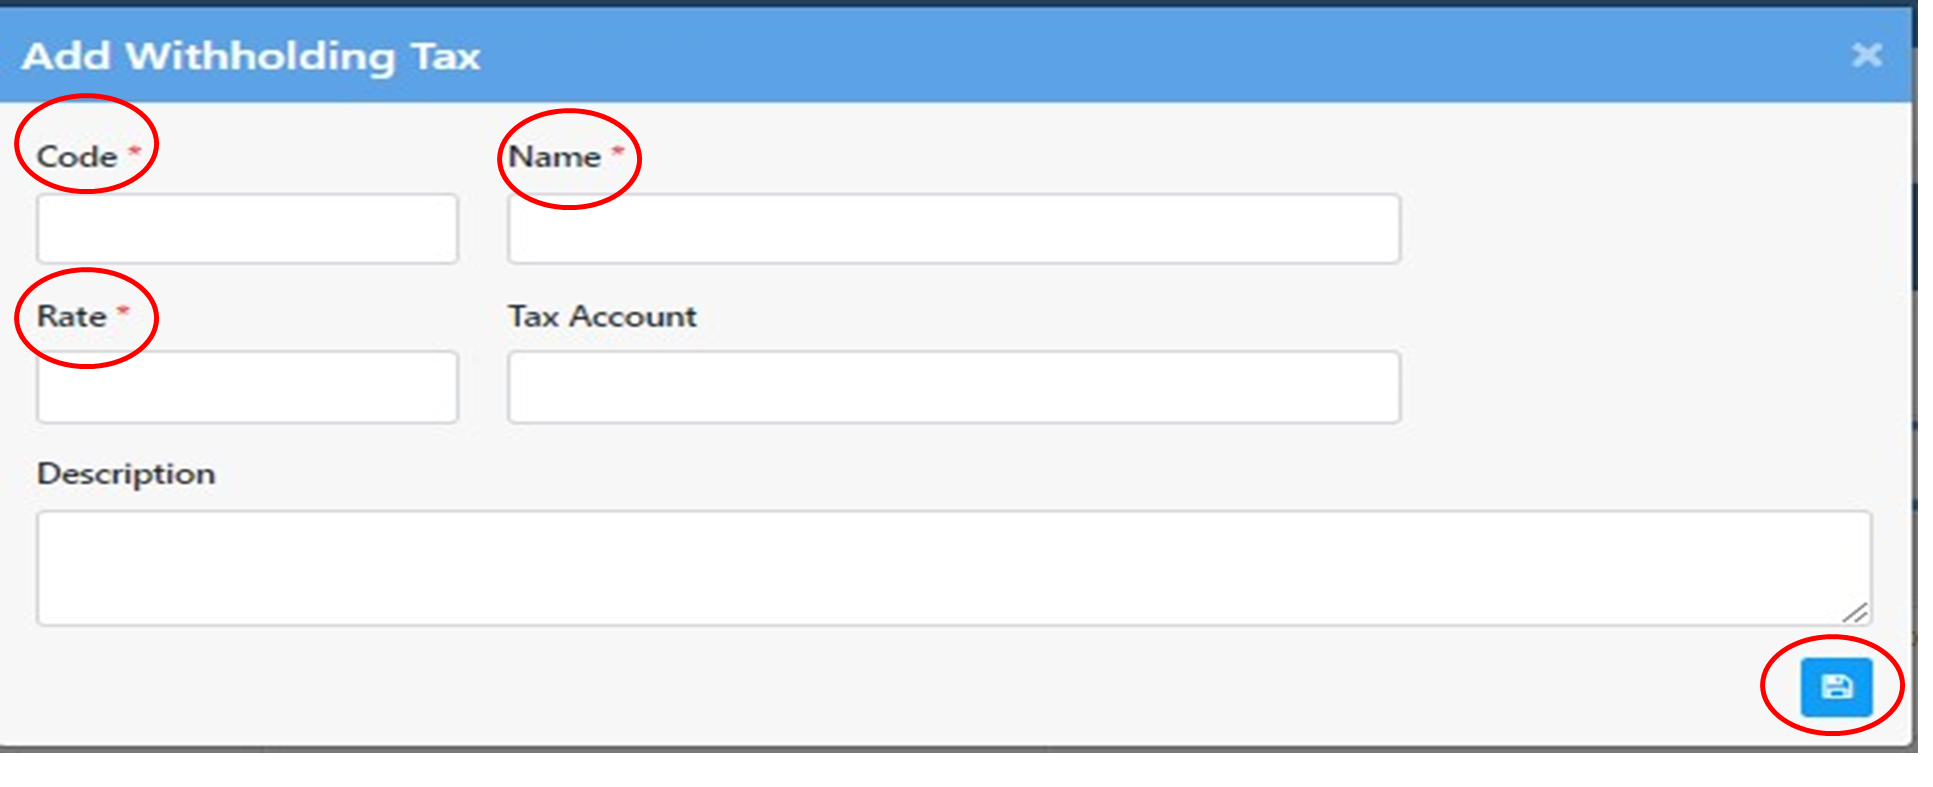
To add withholding taxes, click the add button at the upper topmost part of the screen.
Fill up the required information, specifically the information with asteries. Then save, click save button at the lower part of the screen.
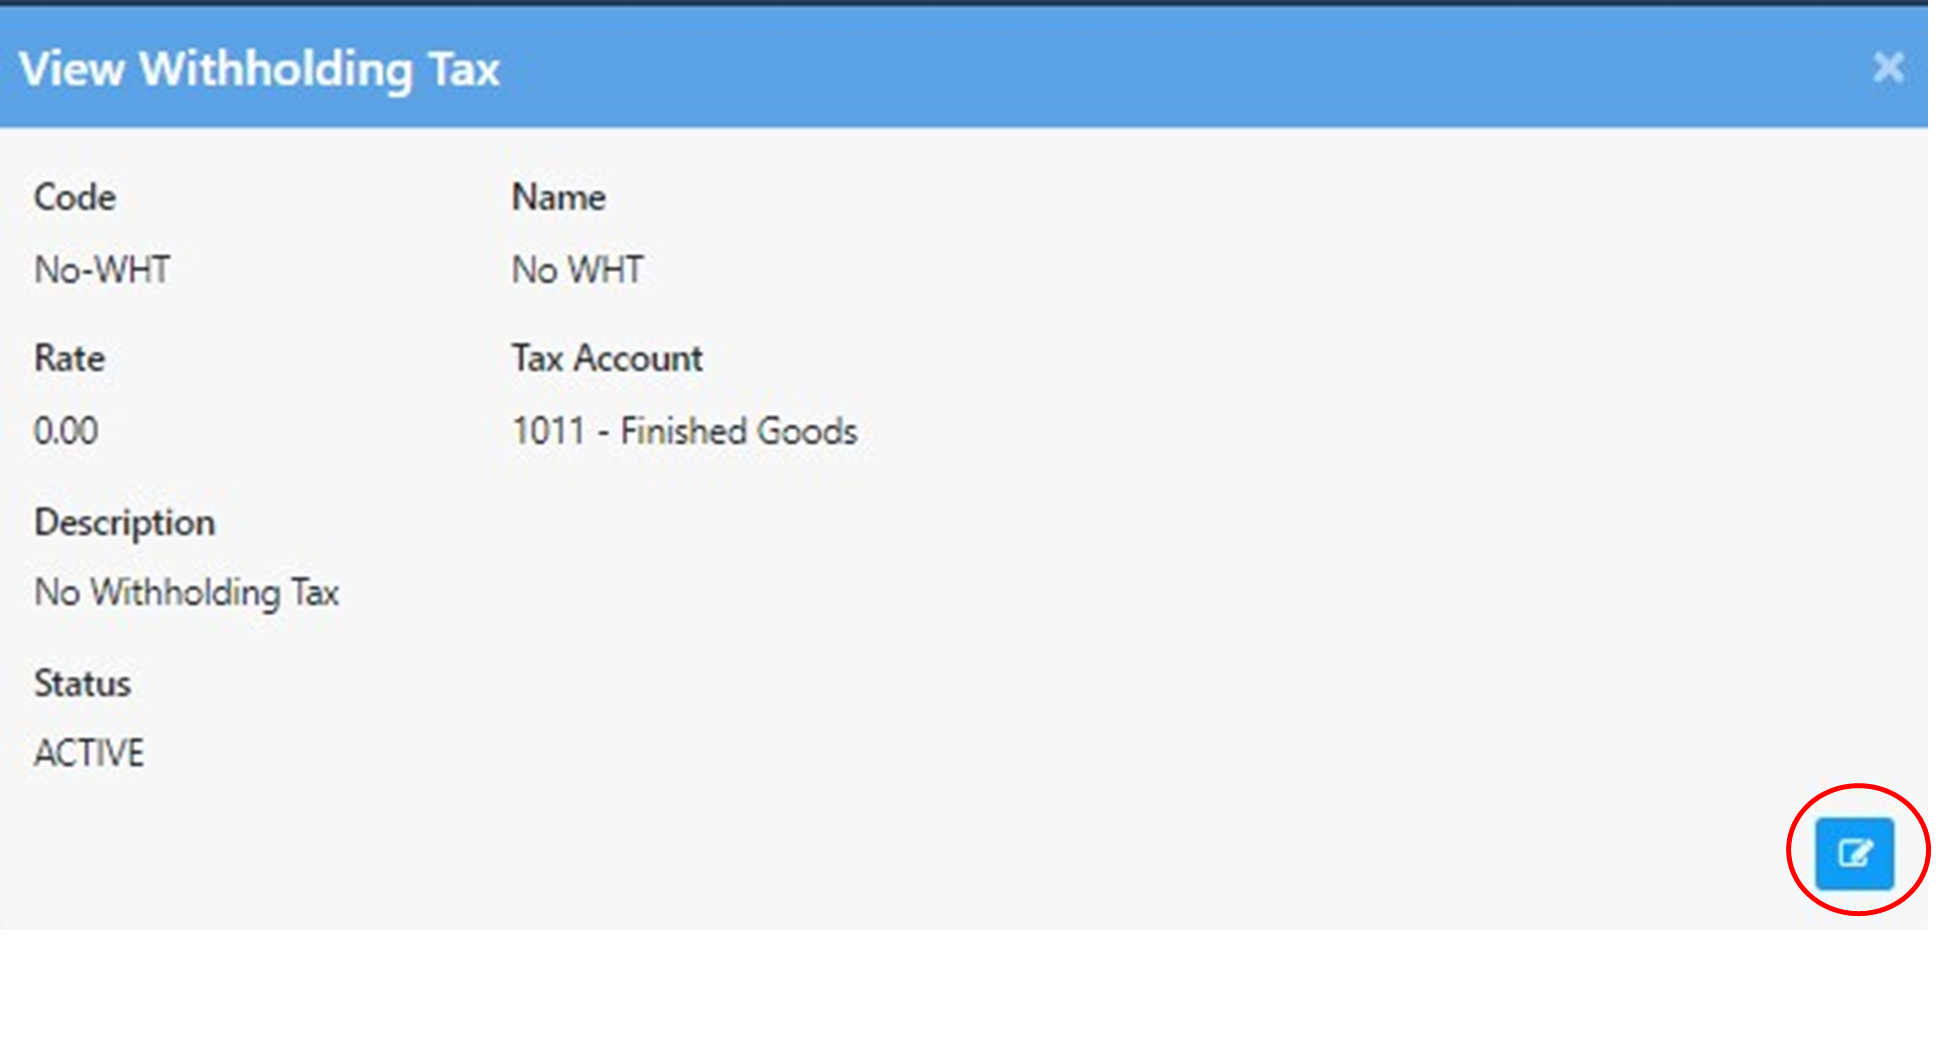
To edit, click the view button below action column. Then click the edit button then save and update.
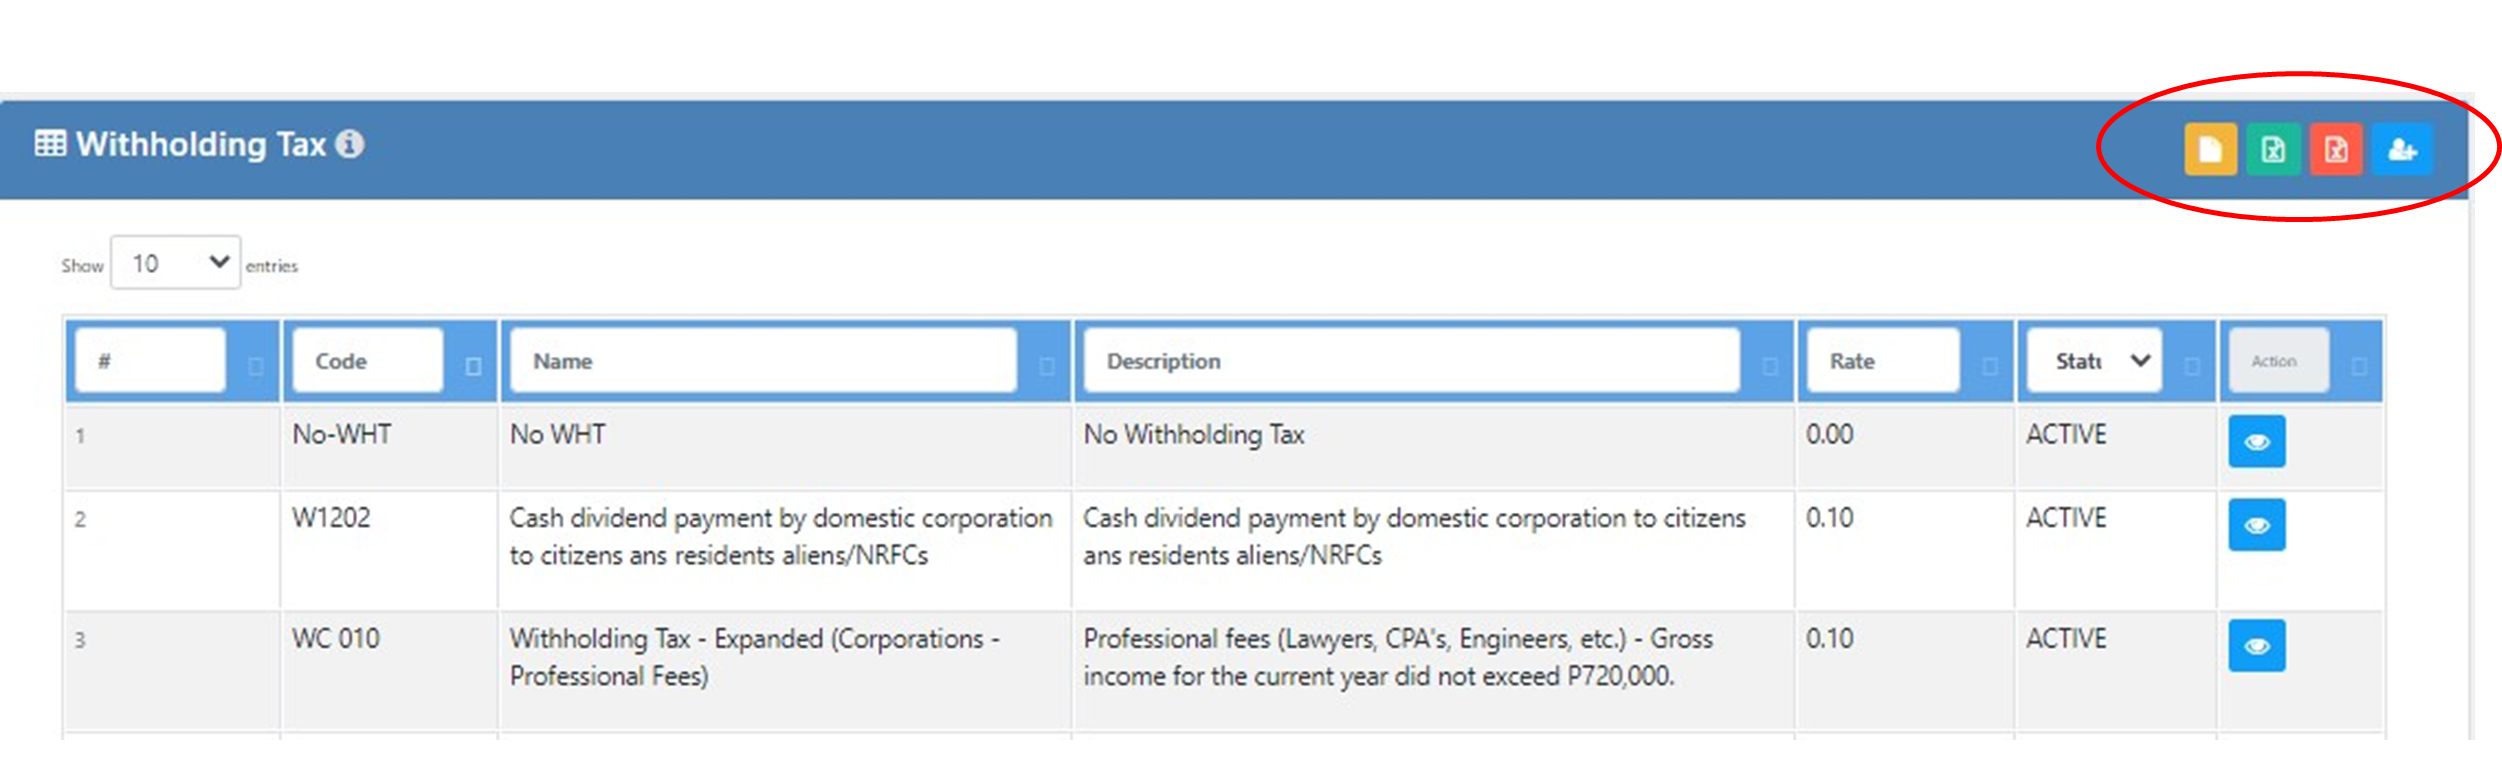
To download template, click the orange button
To import CSV or edited type of vendor, click the green button.
To export CSV or soft copy of vendor type, click the red button.
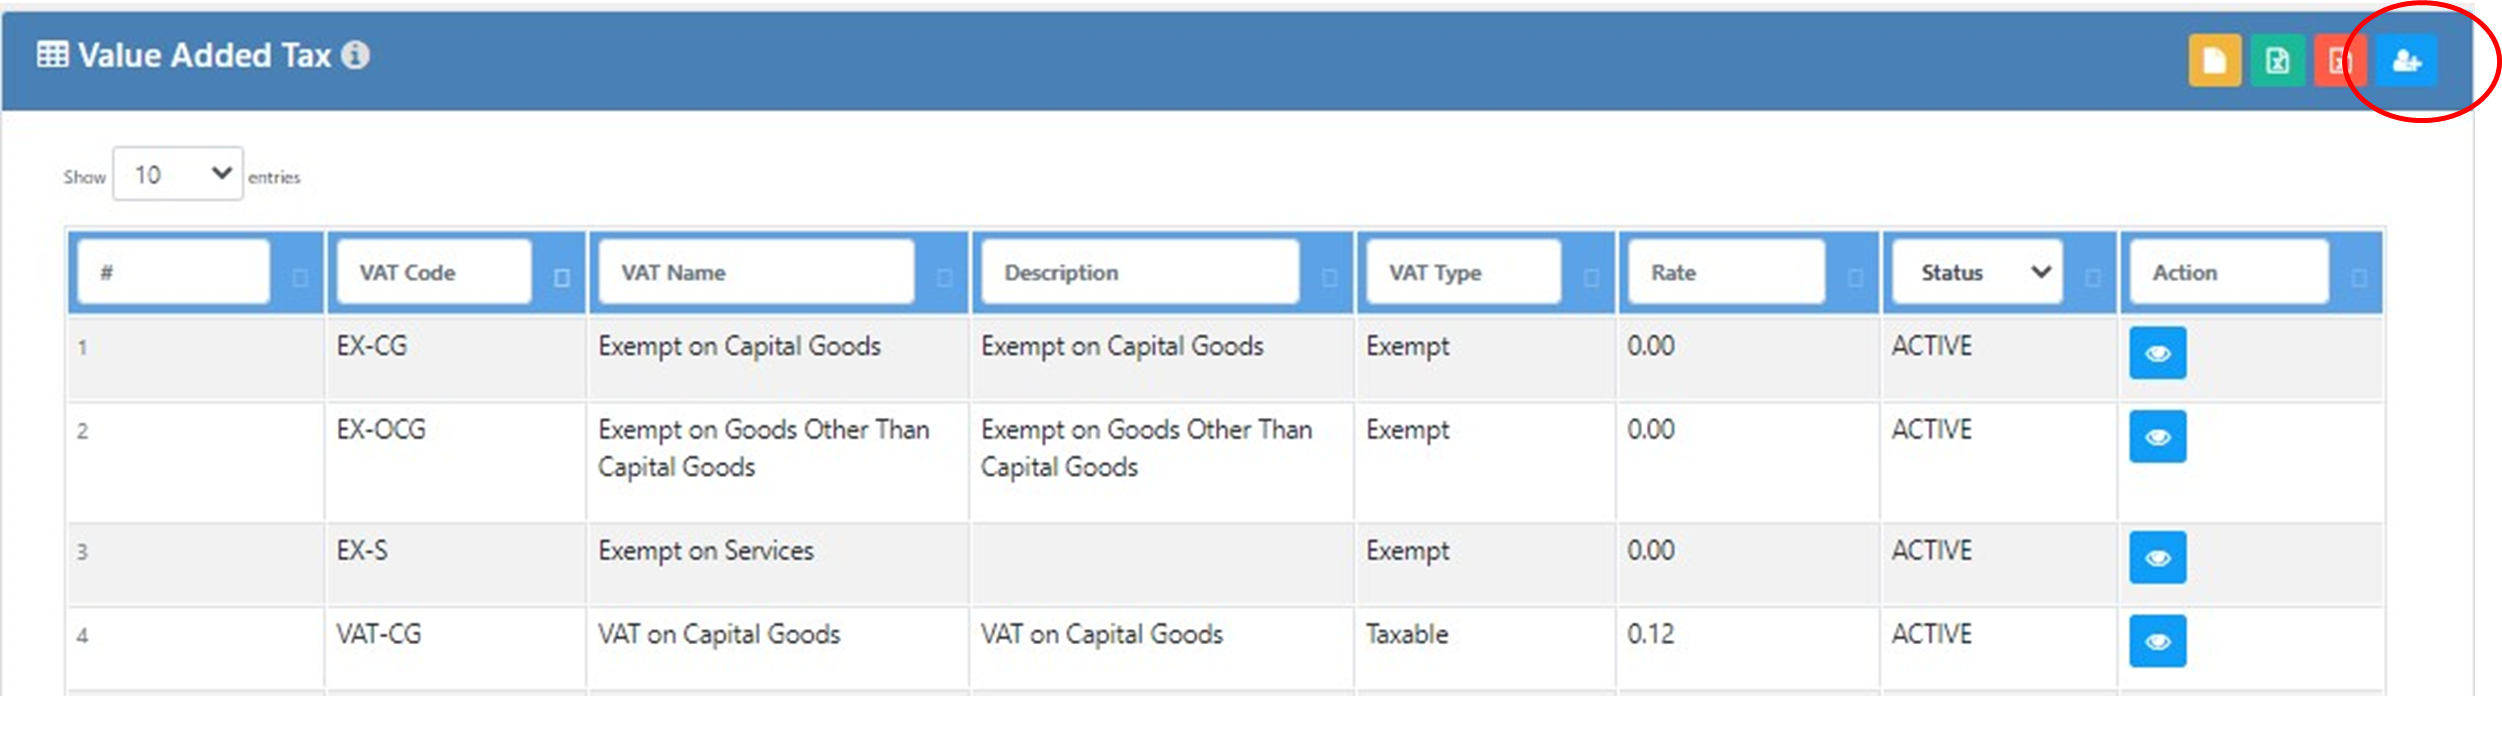
Value Added Tax
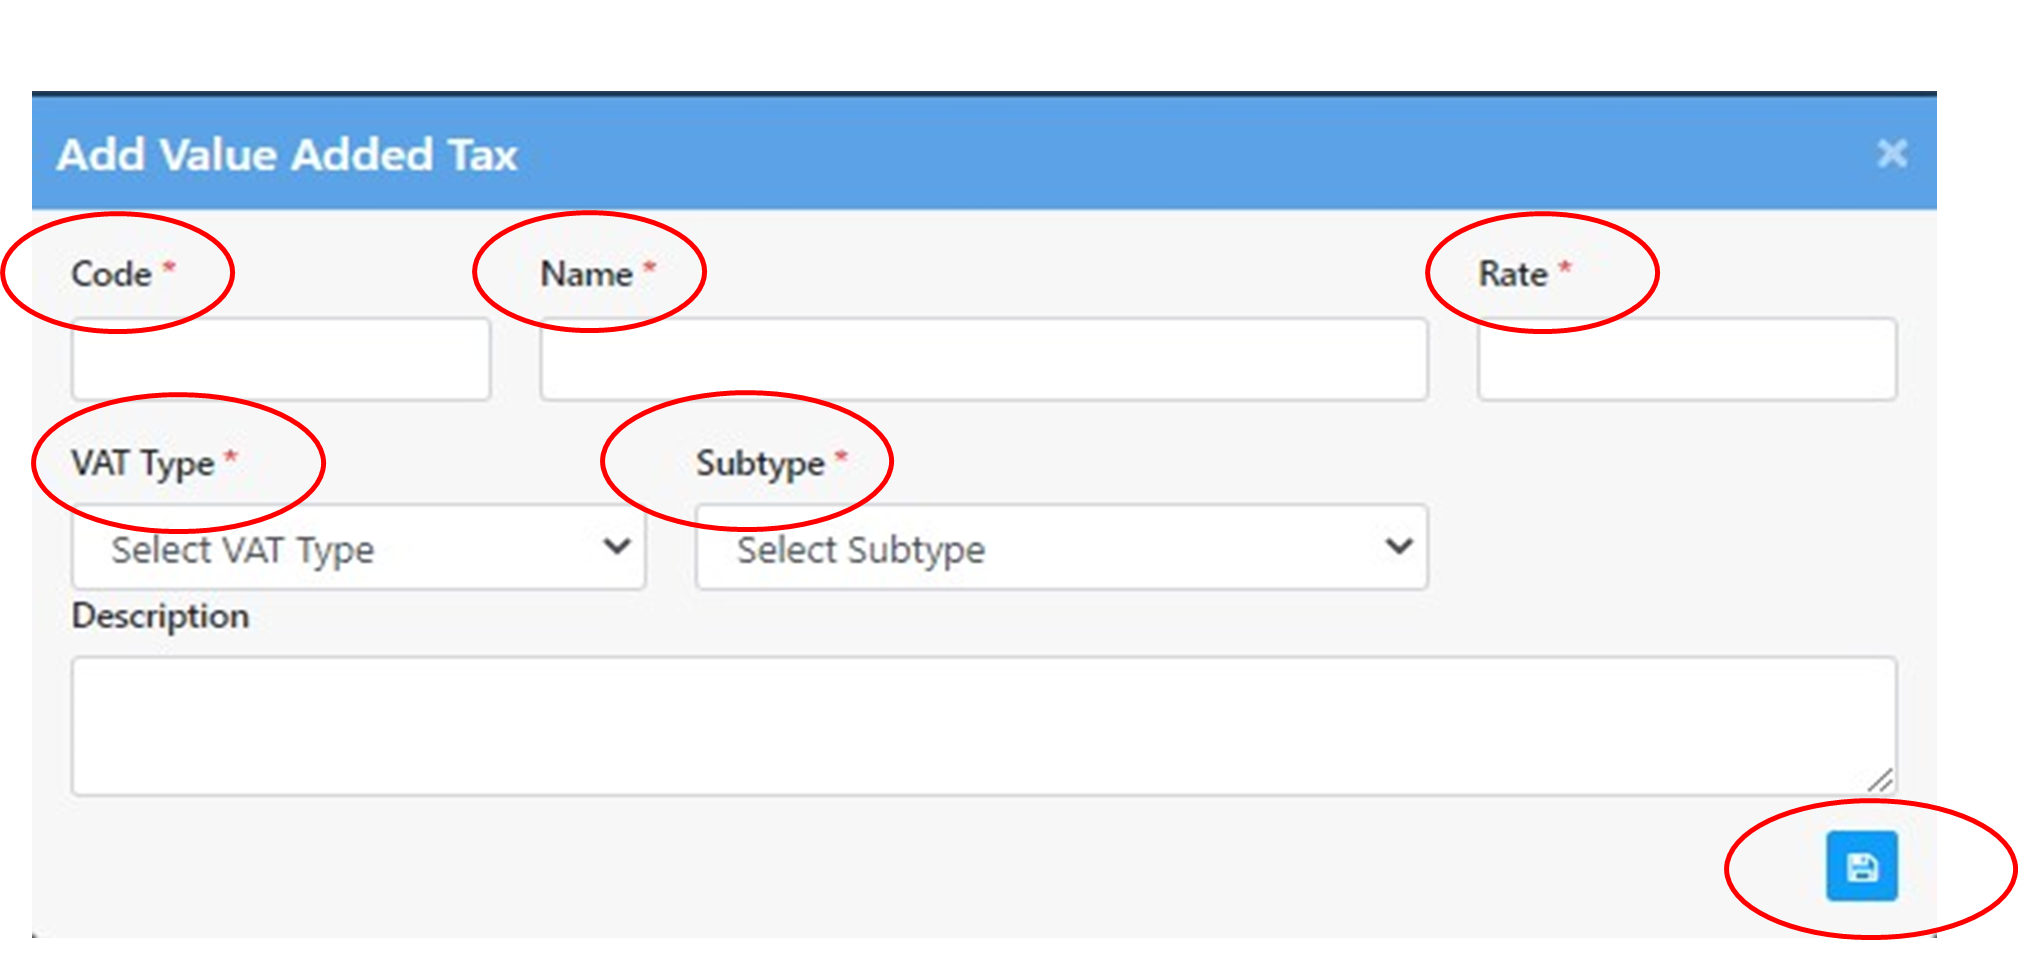
To value added tax, click the add button at the upper topmost part of the screen.
Fill up the required information, specifically the information with asteries. Then save, click save button at the lower part of the screen.
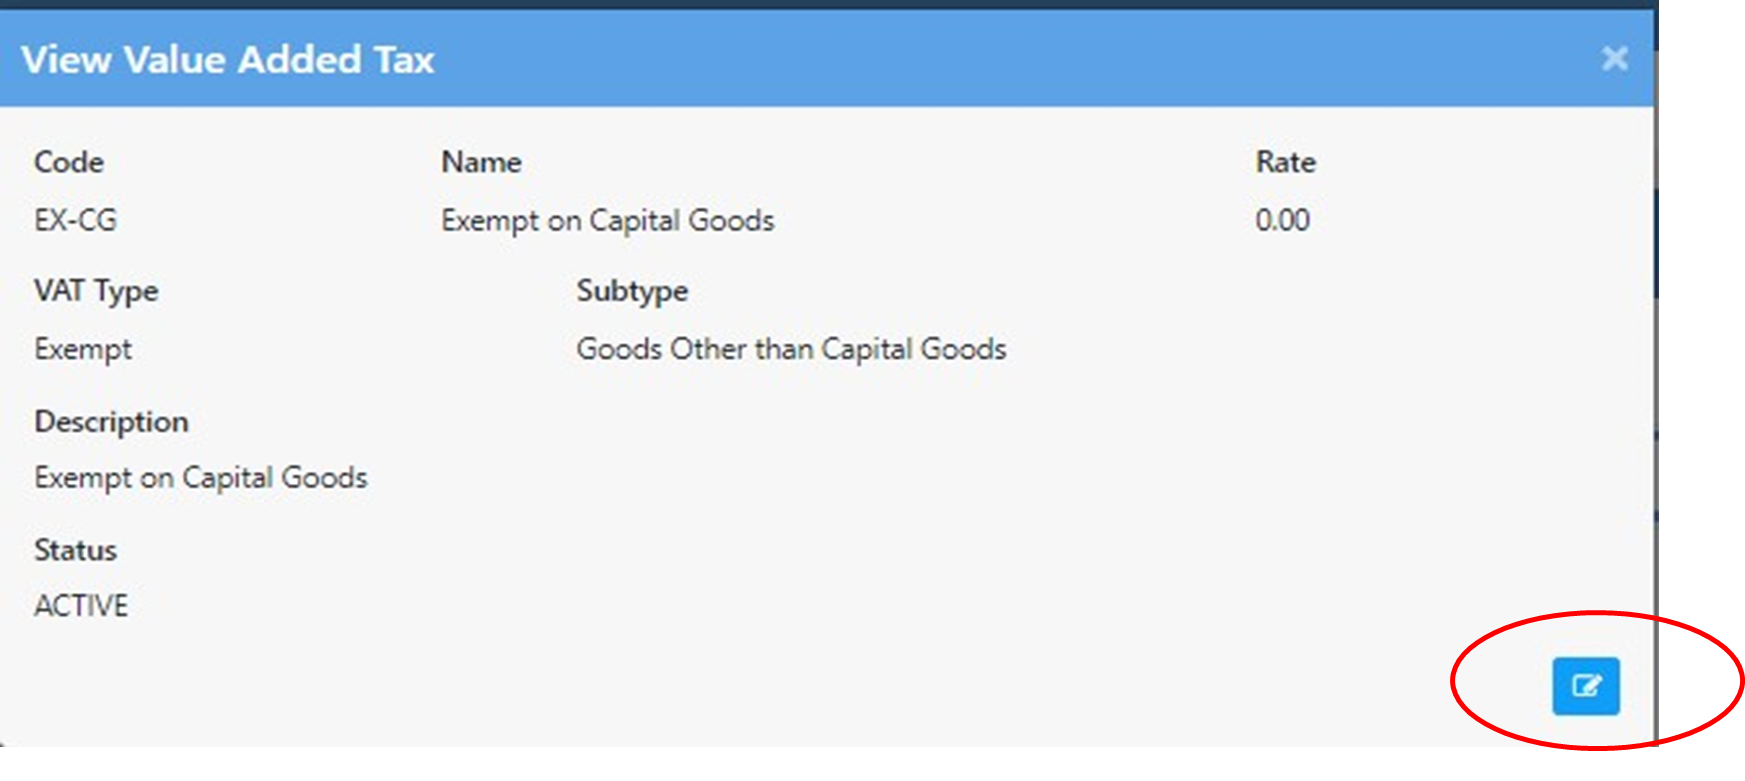
To edit, click the view button below action column. Then click the edit button then save and update.
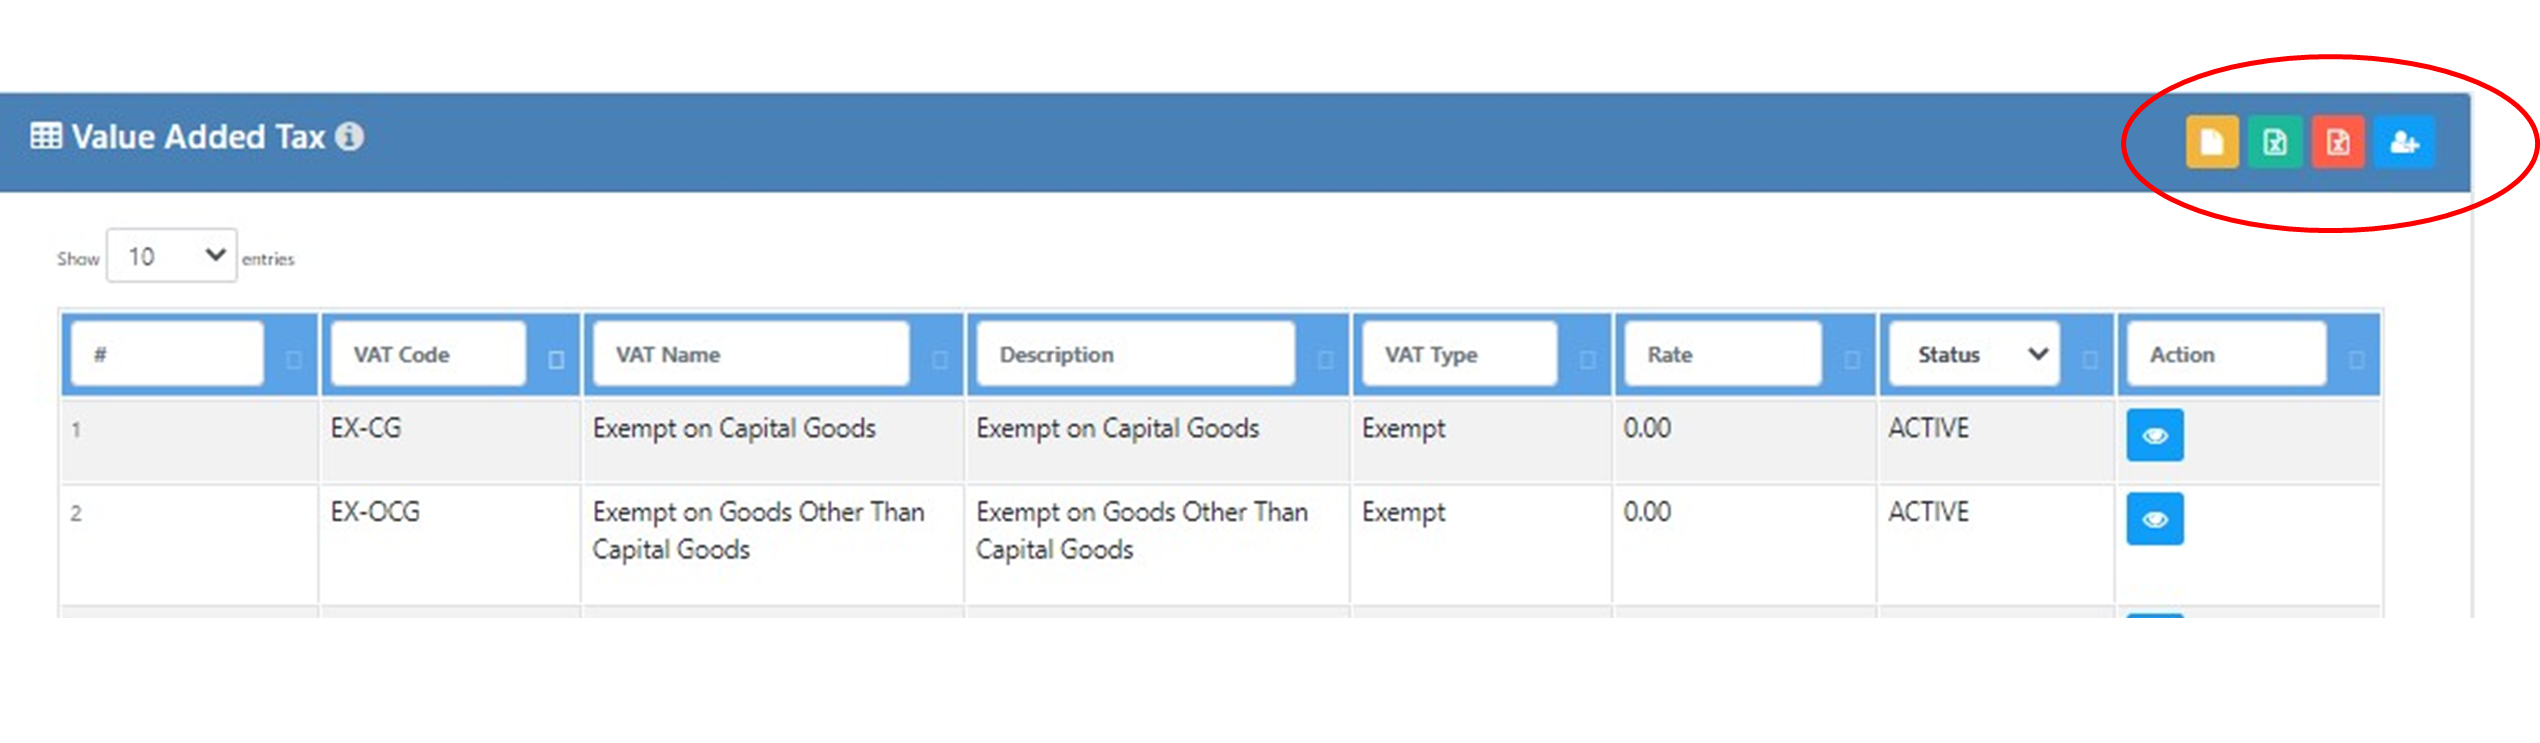
To download template, click the orange button
To import CSV or edited type of vendor, click the green button.
To export CSV or soft copy of vendor type, click the red button.
Responsibility Center
Type
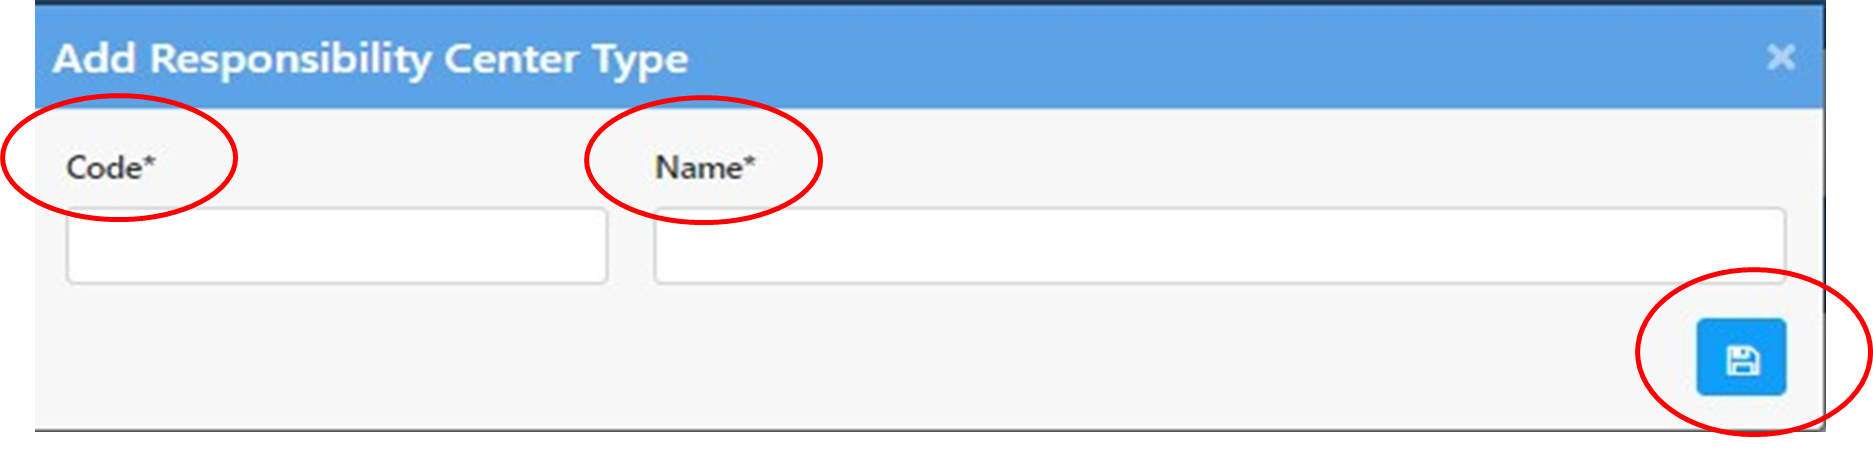
To add responsibility center type, click the add button at the upper rightmost part of the screen.
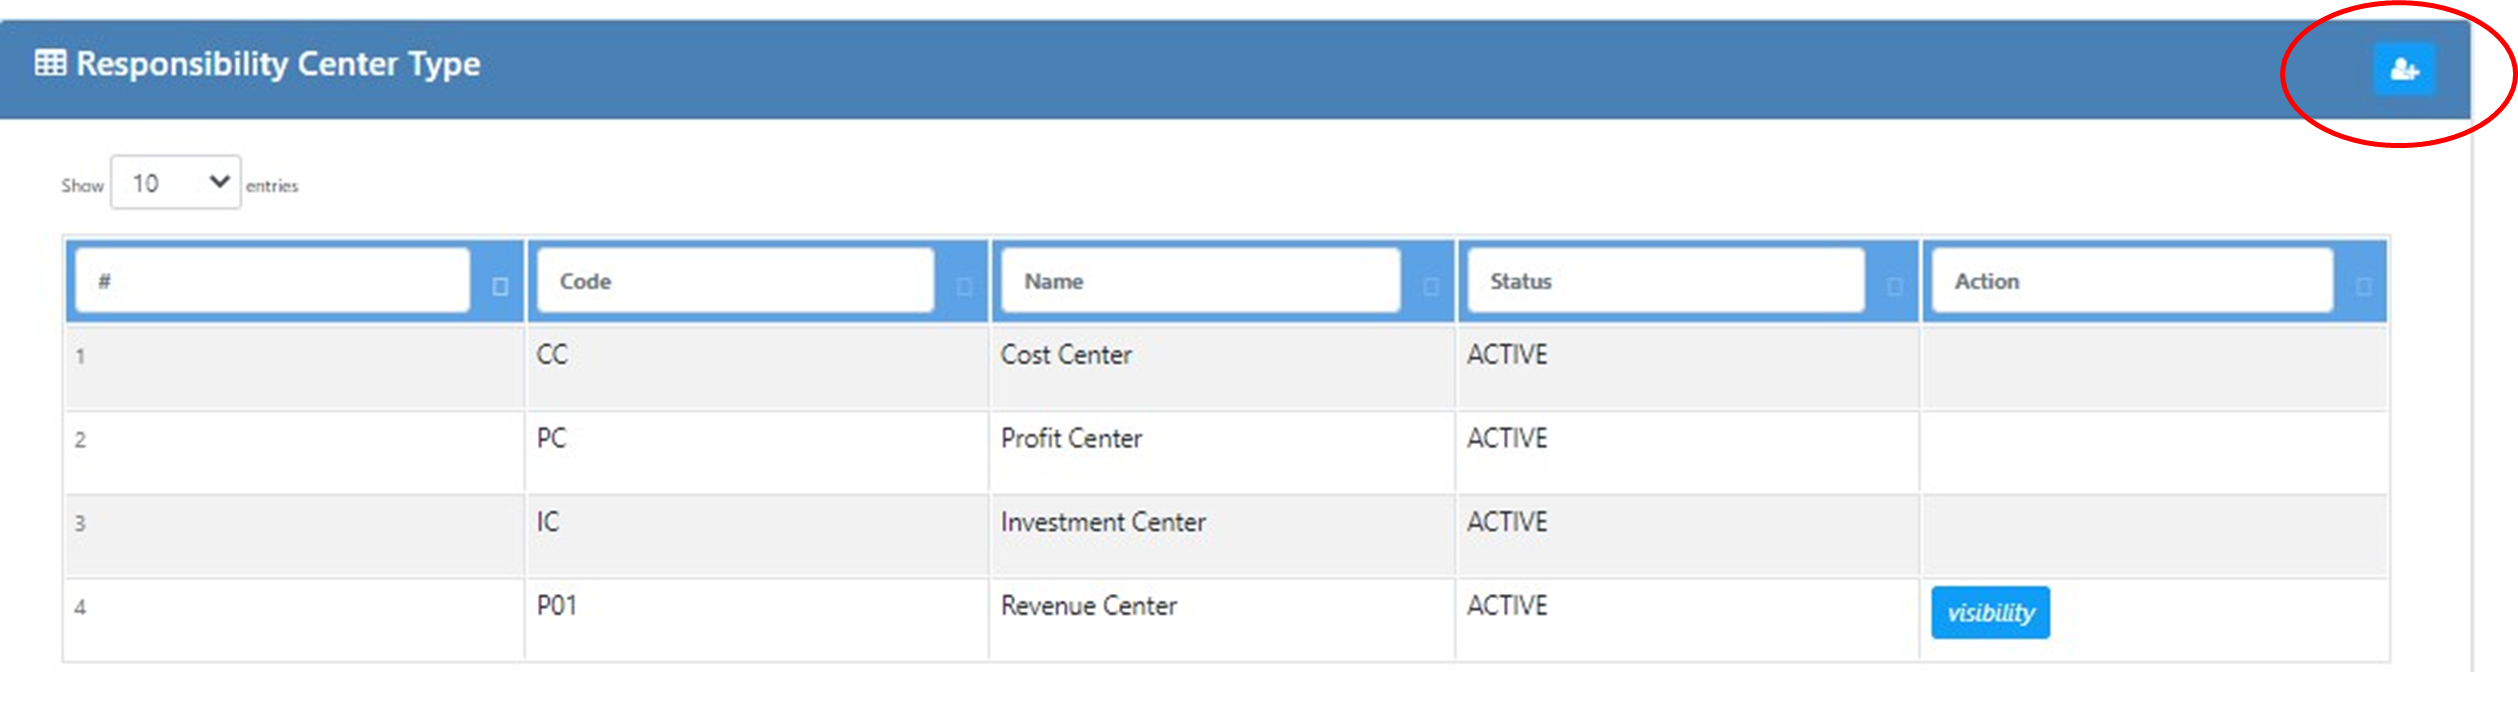
Fill up the required information, specifically the information with asteries. Then save, click save button at the lower part of the screen.
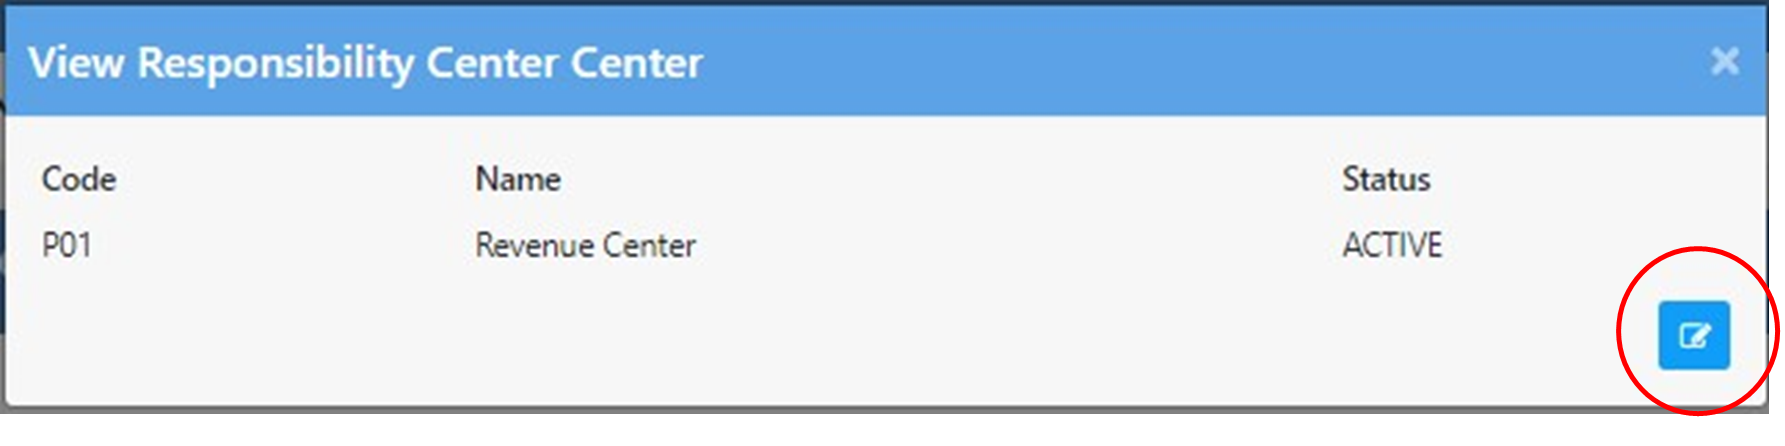
To edit, click the view button below action column. Then click the edit button then save and update.
List
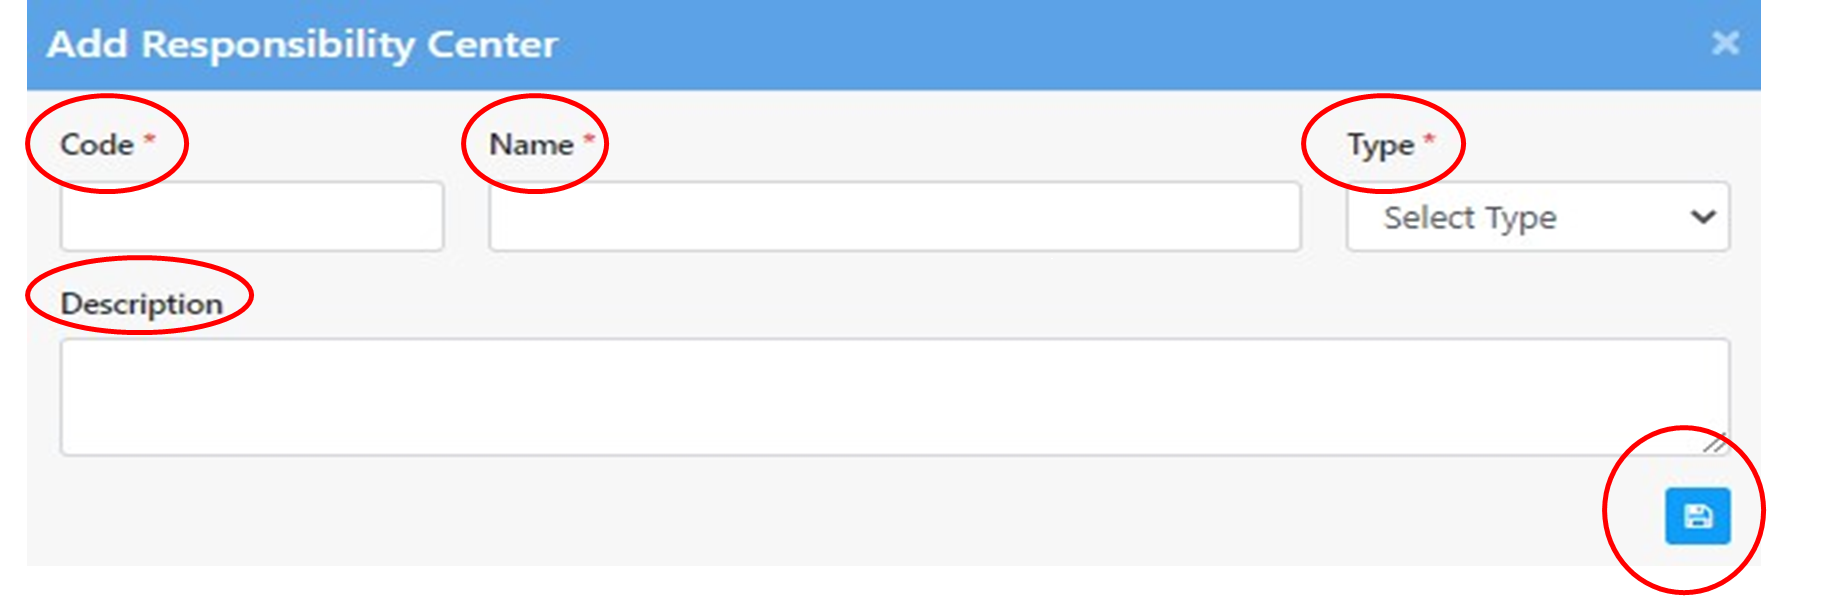
To add responsibility center list, click the add button at the upper rightmost part of the screen.
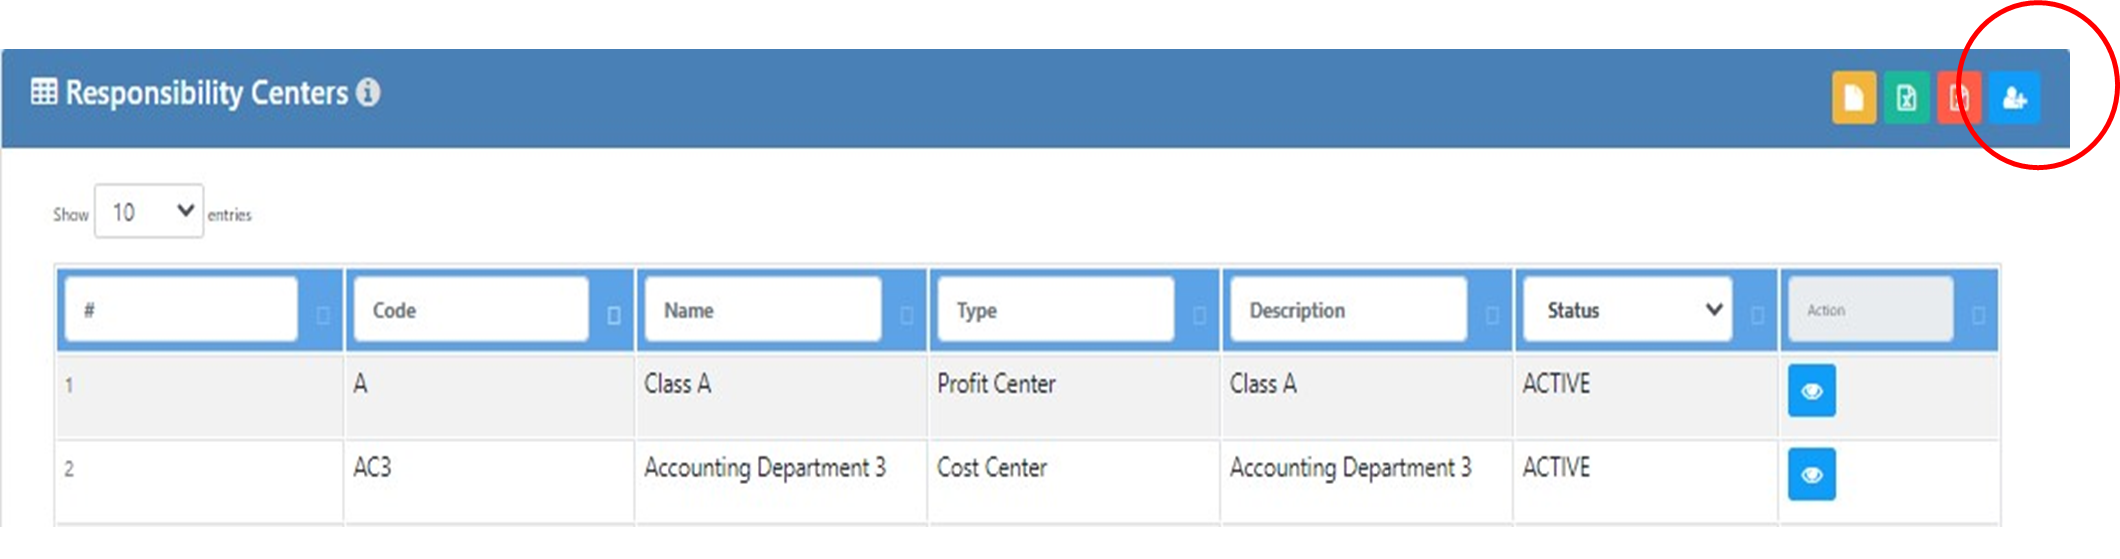
Fill up the required information, specifically the information with asteries. Then save, click save button at the lower part of the screen.
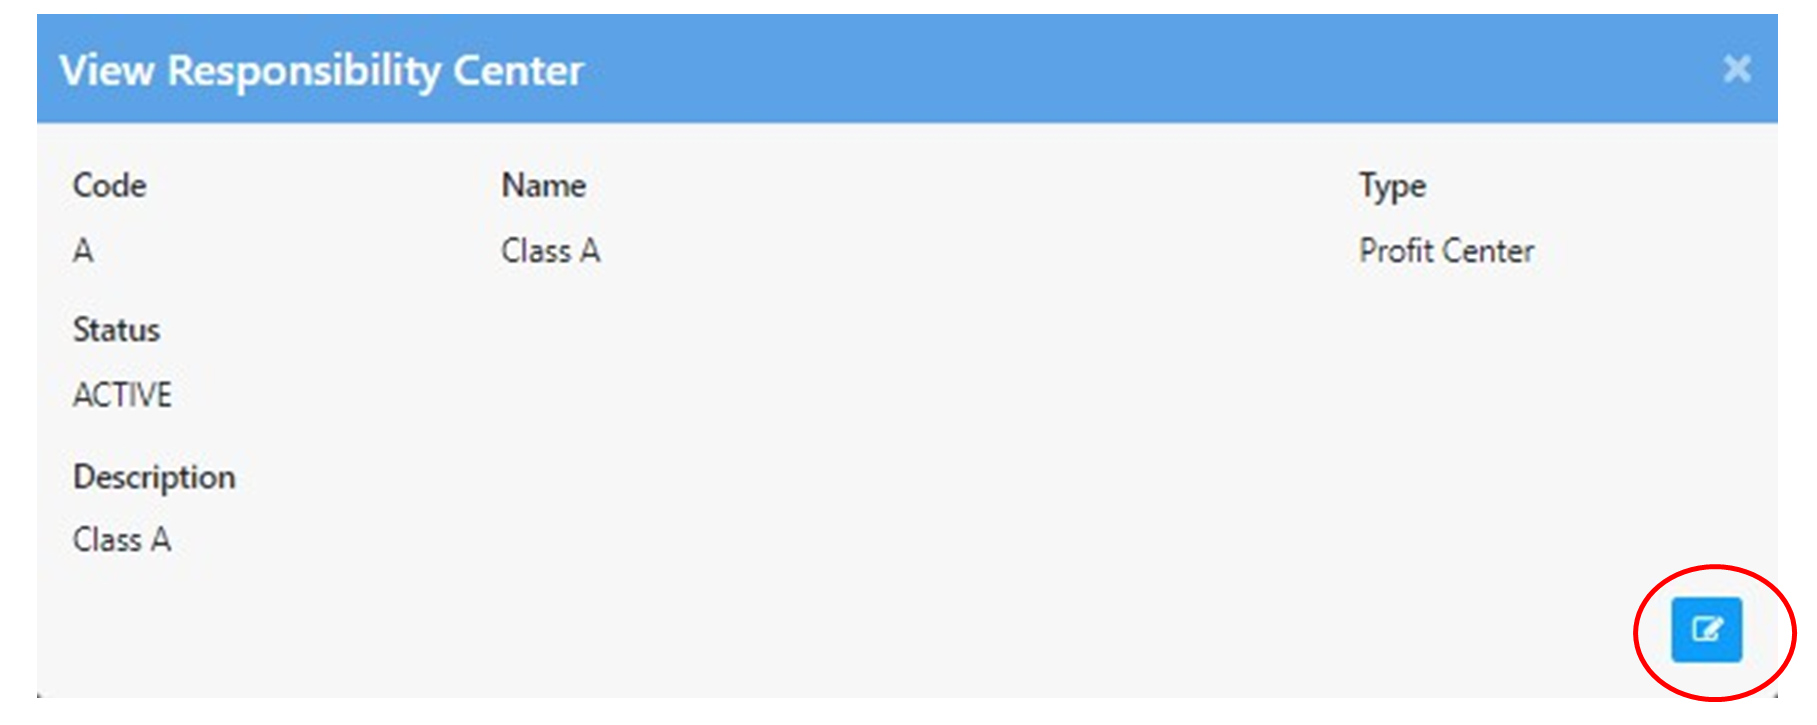
To edit, click the view button below action column. Then click the edit button then save and update.
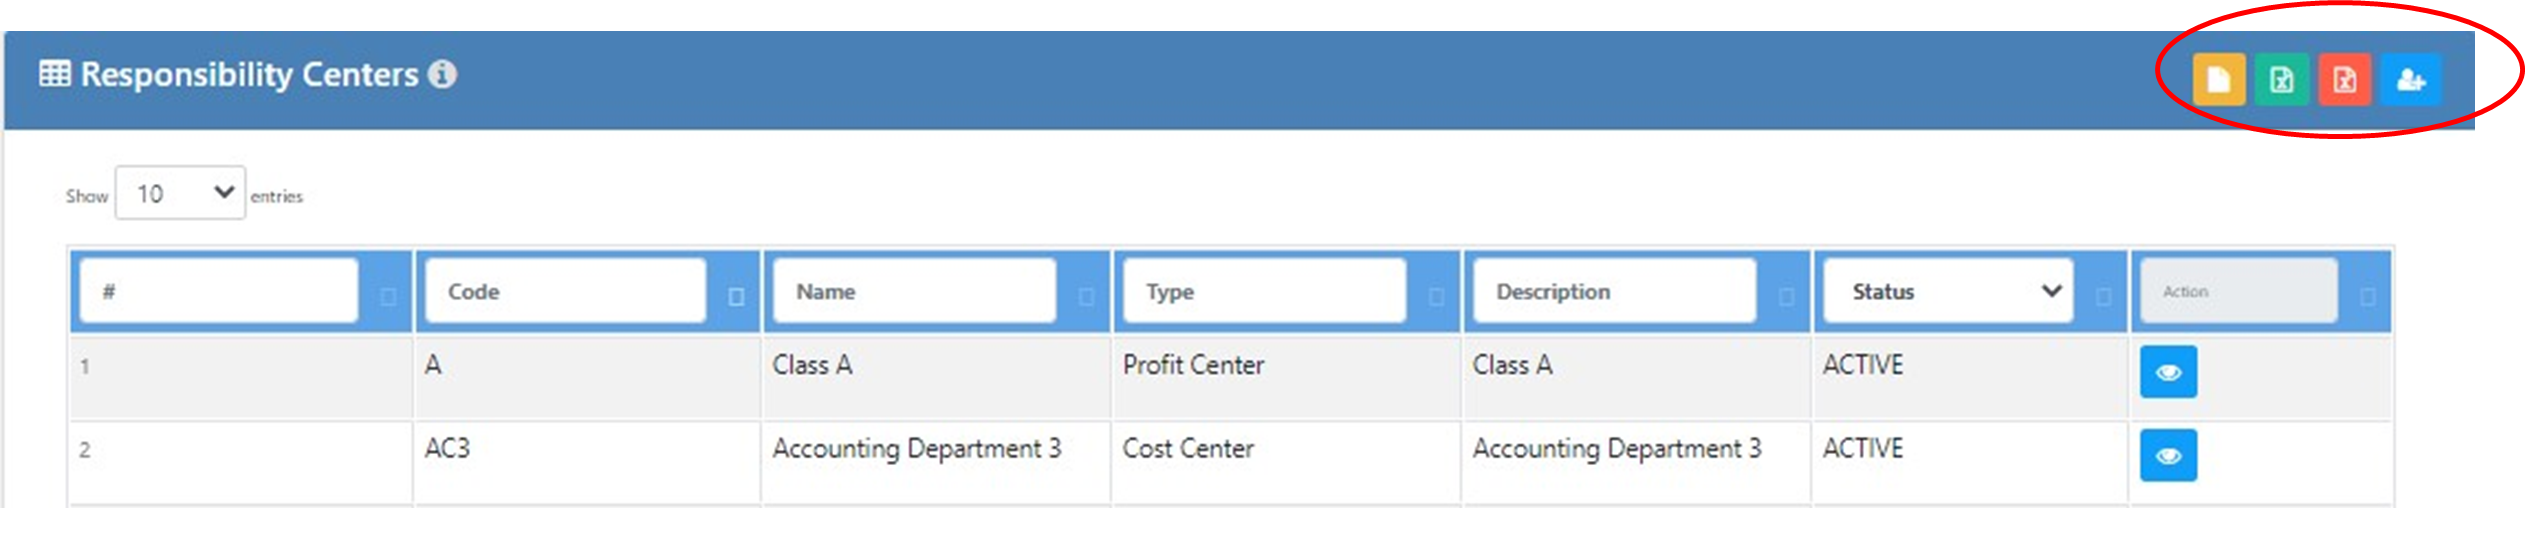
To download template, click the orange button
To import CSV or edited type of vendor, click the green button.
To export CSV or soft copy of vendor type, click the red button.
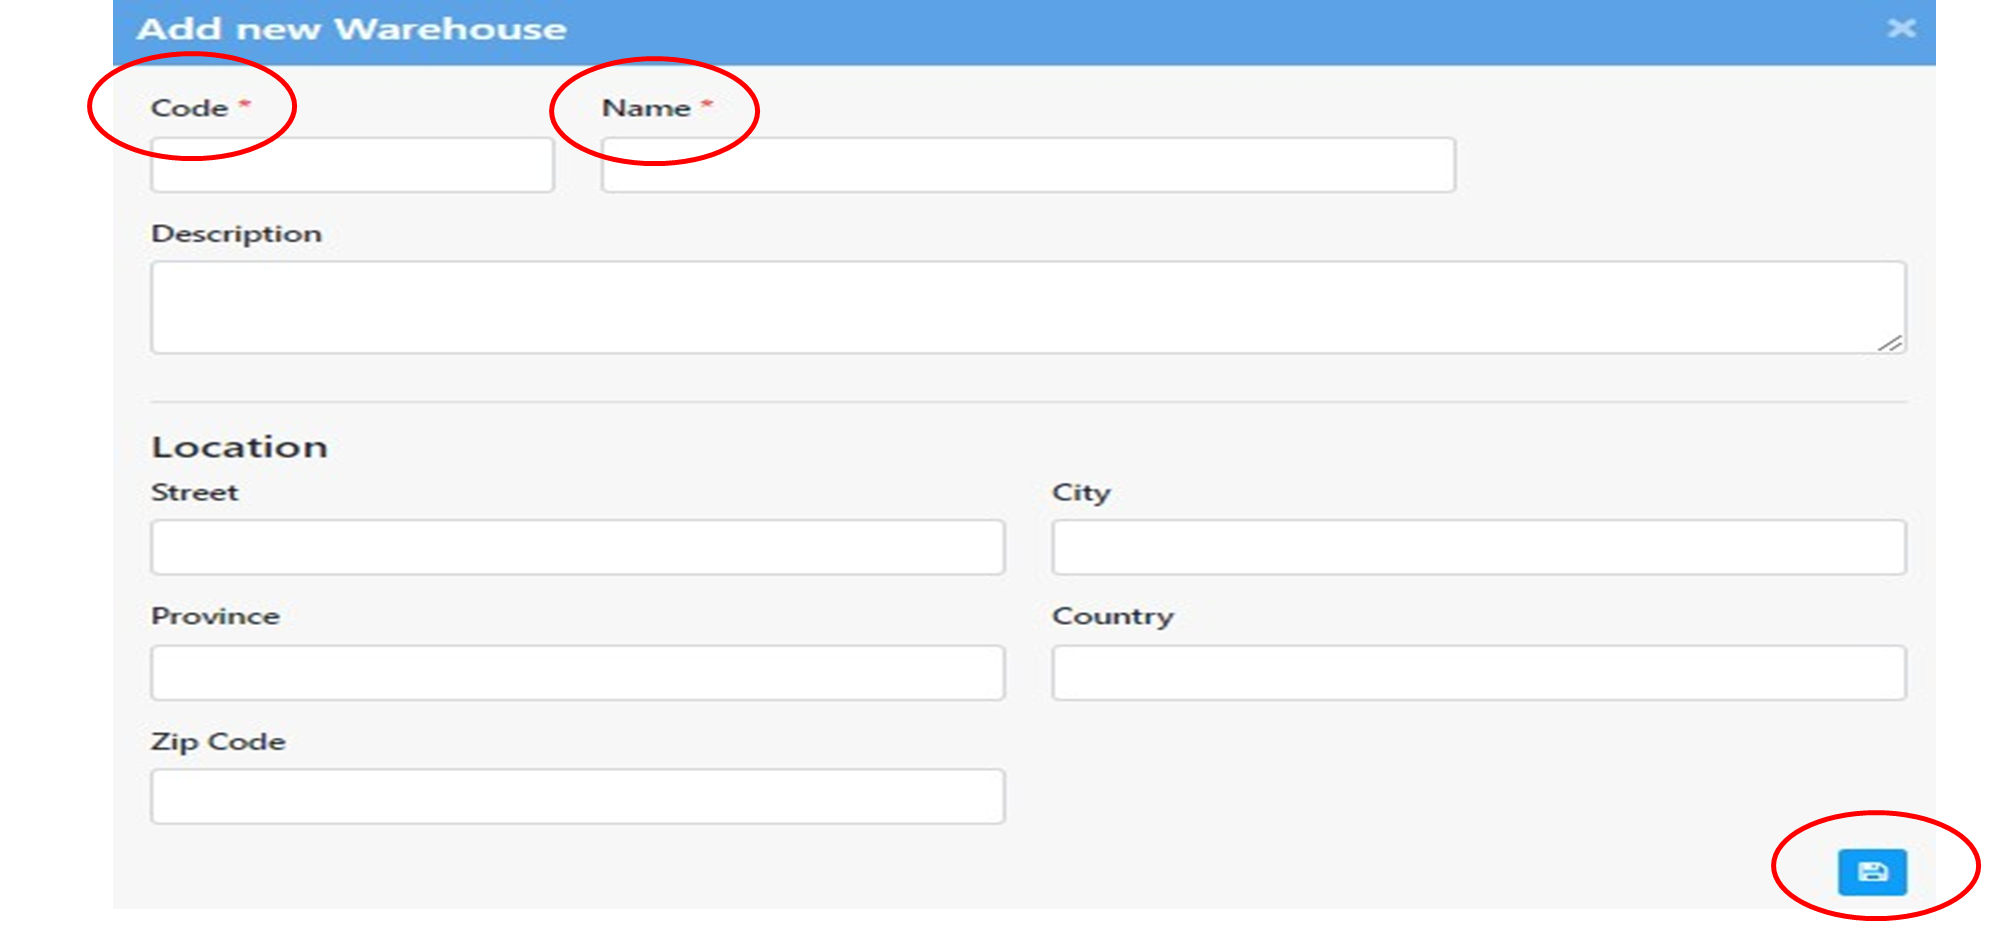
Warehouses
To add warehouses, click the add button at the upper rightmost part of the screen.
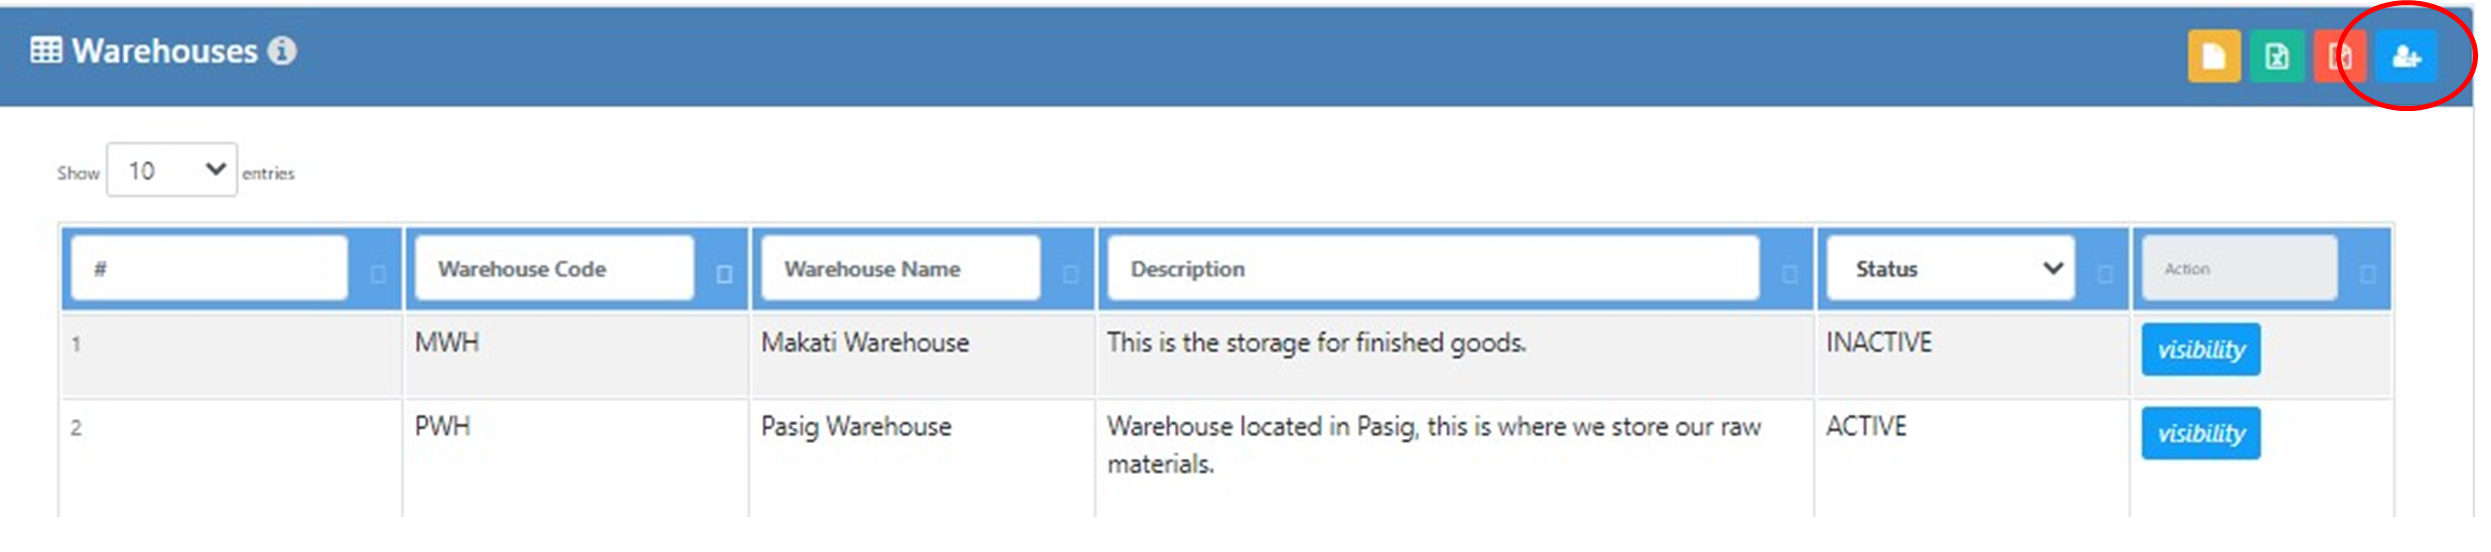
Fill up the required information, specifically the information with asteries. Then save, click save button at the lower part of the screen.
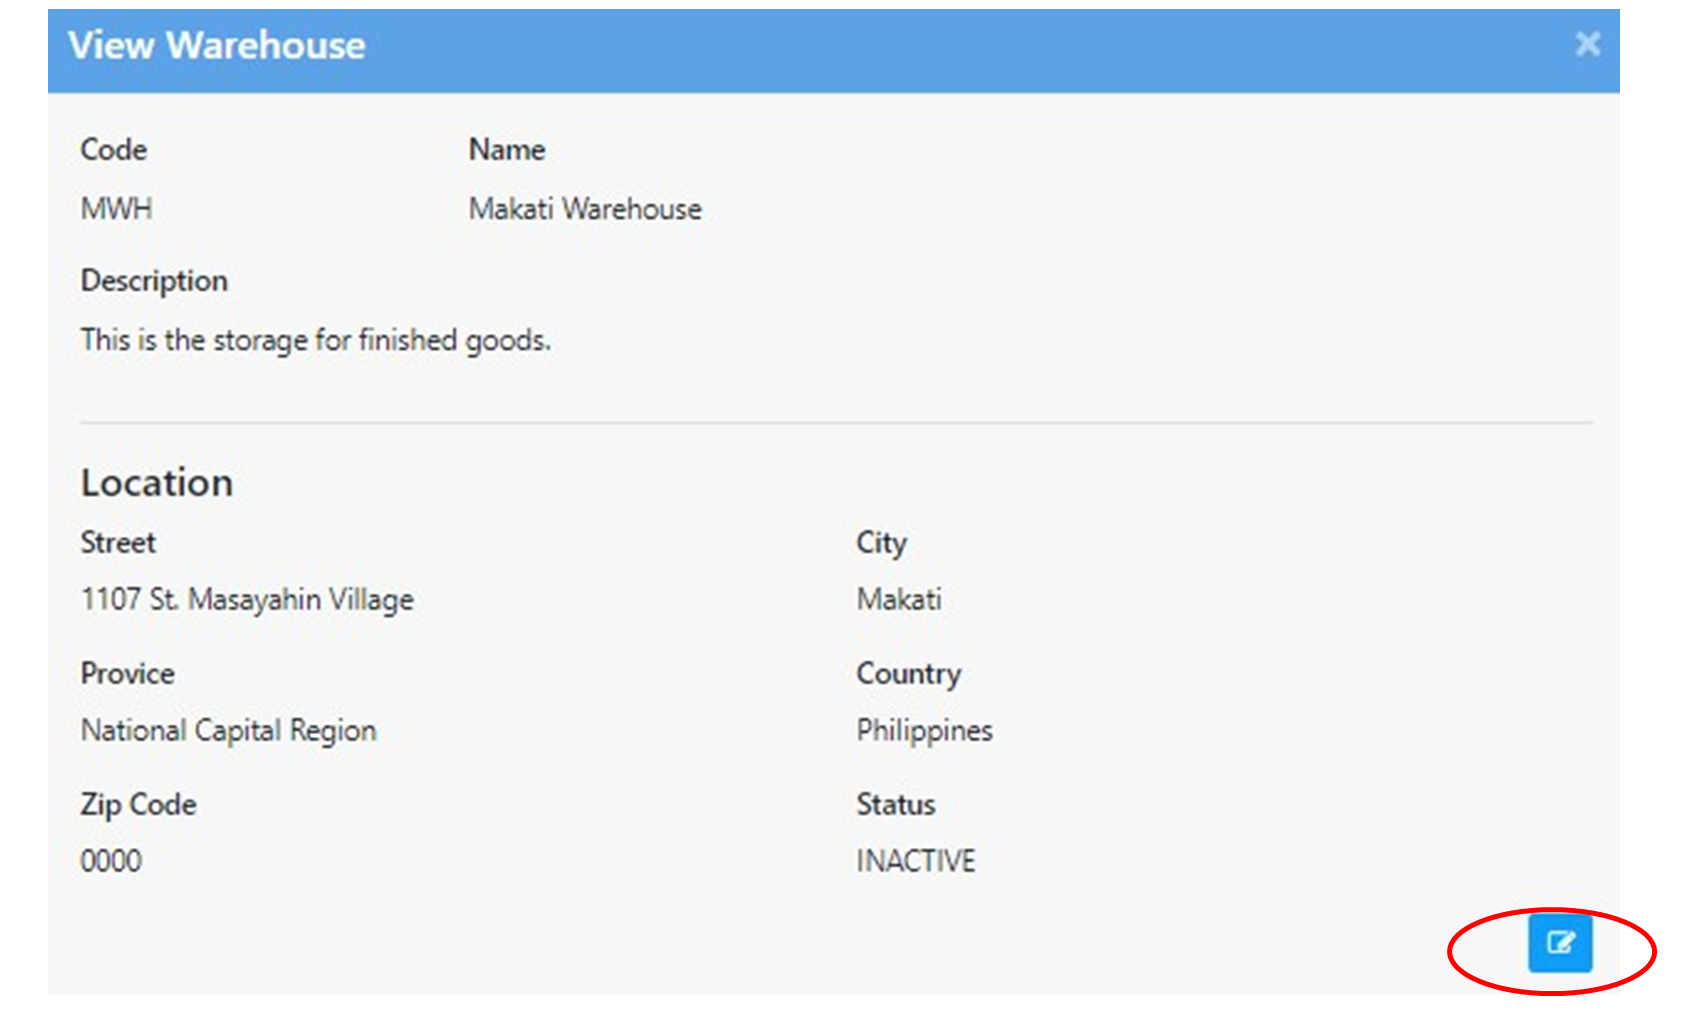
To edit, click the view button below action column. Then click the edit button then save and update.

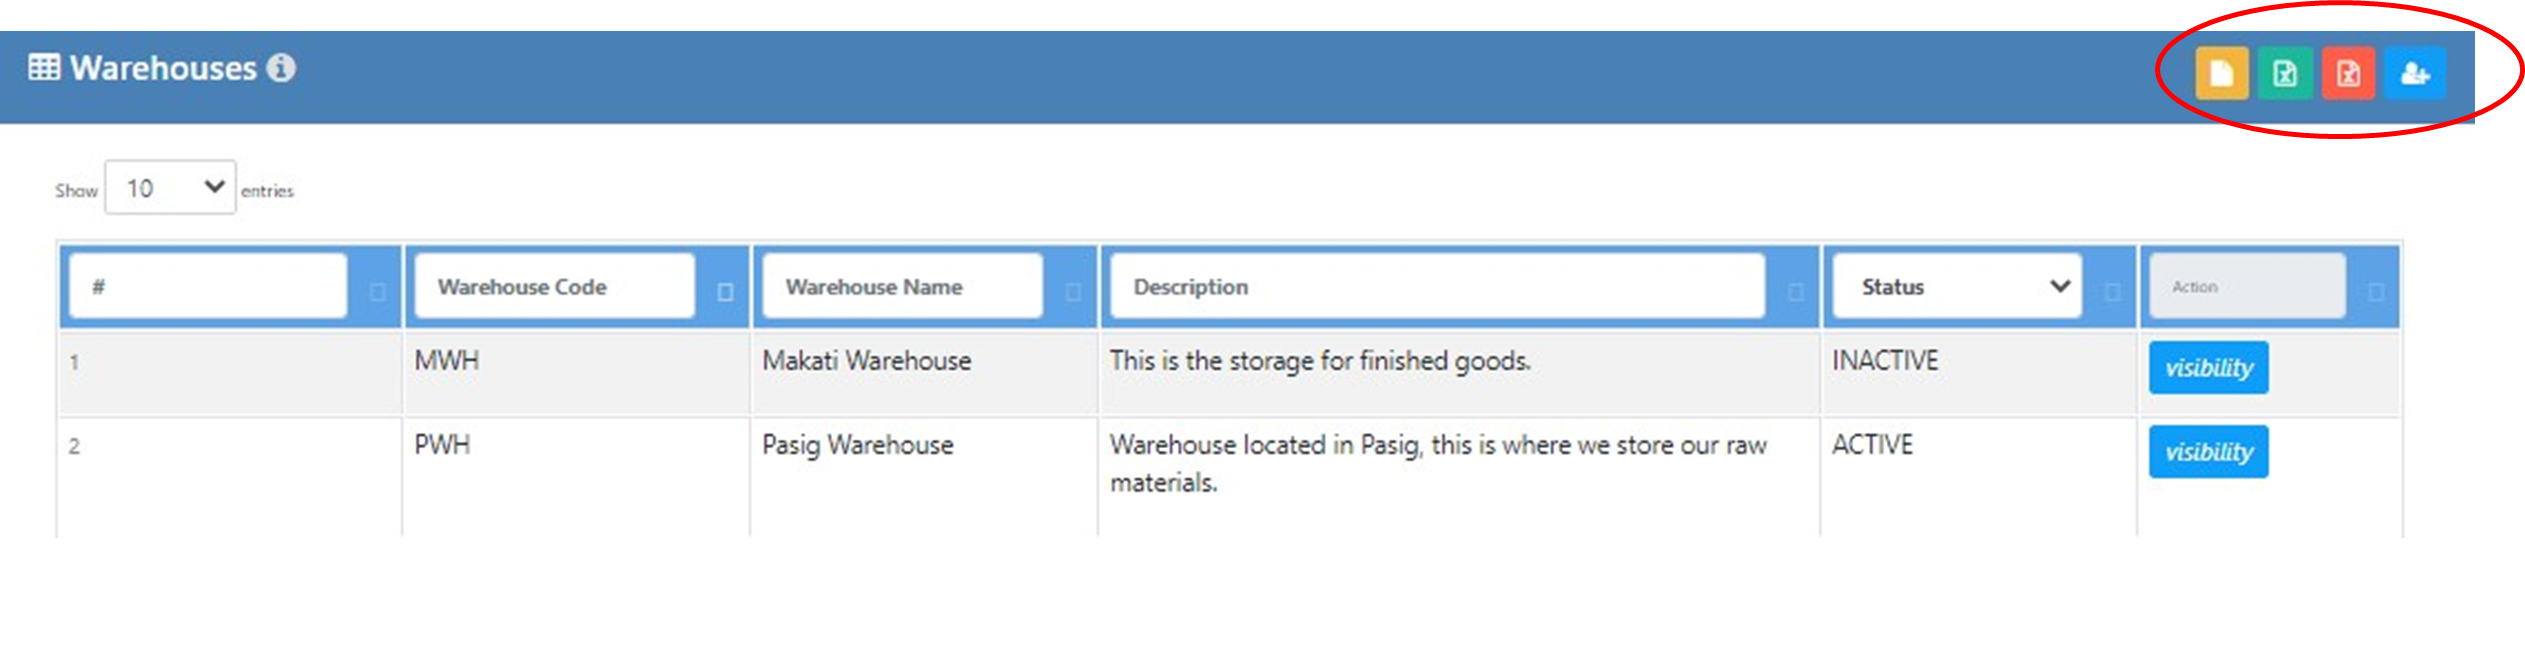
To download template, click the orange button
To import CSV or edited type of vendor, click the green button.
To export CSV or soft copy of vendor type, click the red button.
Proforma Entries
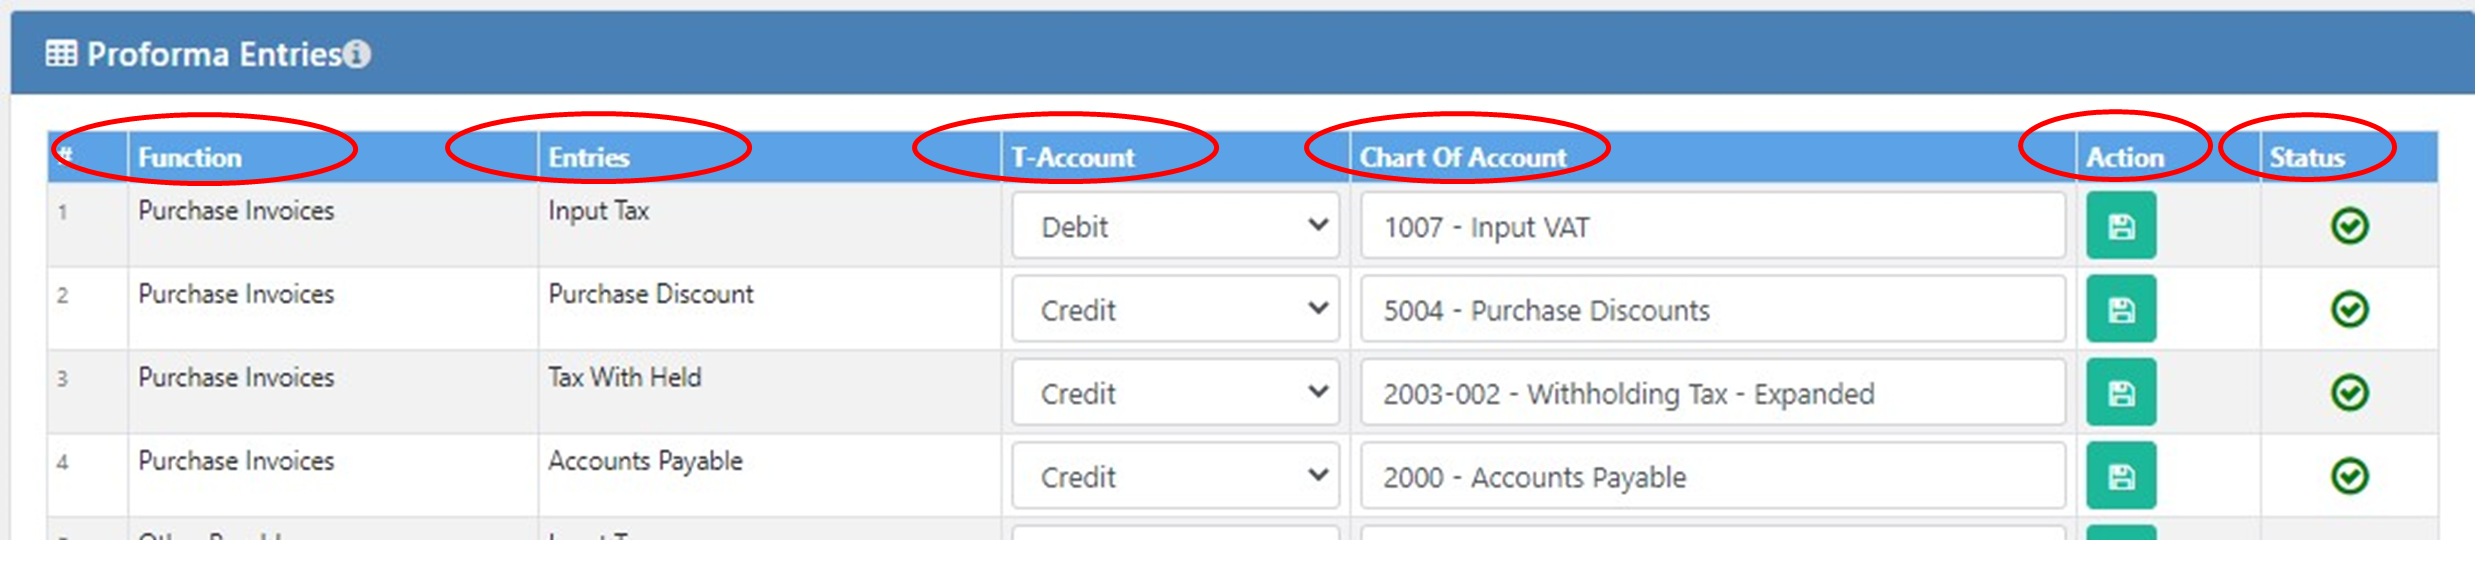
- Function — refers to the modules in the Accubooks Accounting System.
- Entries- refers to the chart of accounts that is part of the journal entries in a specific module.
- T-Account- its either debit or credit.
- Chart of Account- breakdown list of Chart of Accounts in the Accubooks Accounting System assigned to the specific module and journal entry.
- Action - all the changes will be reflected upon clicking the Save Button.
- Status - Checked Mark represents "Fields has been Saved" Exclamation Mark means "Please save your work". X Mark means “There are empty fields”