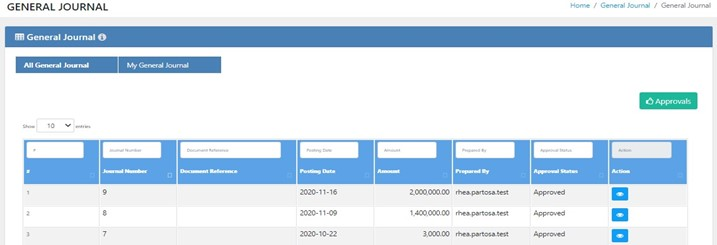
General Journal
Video Tutorial
Add Entries
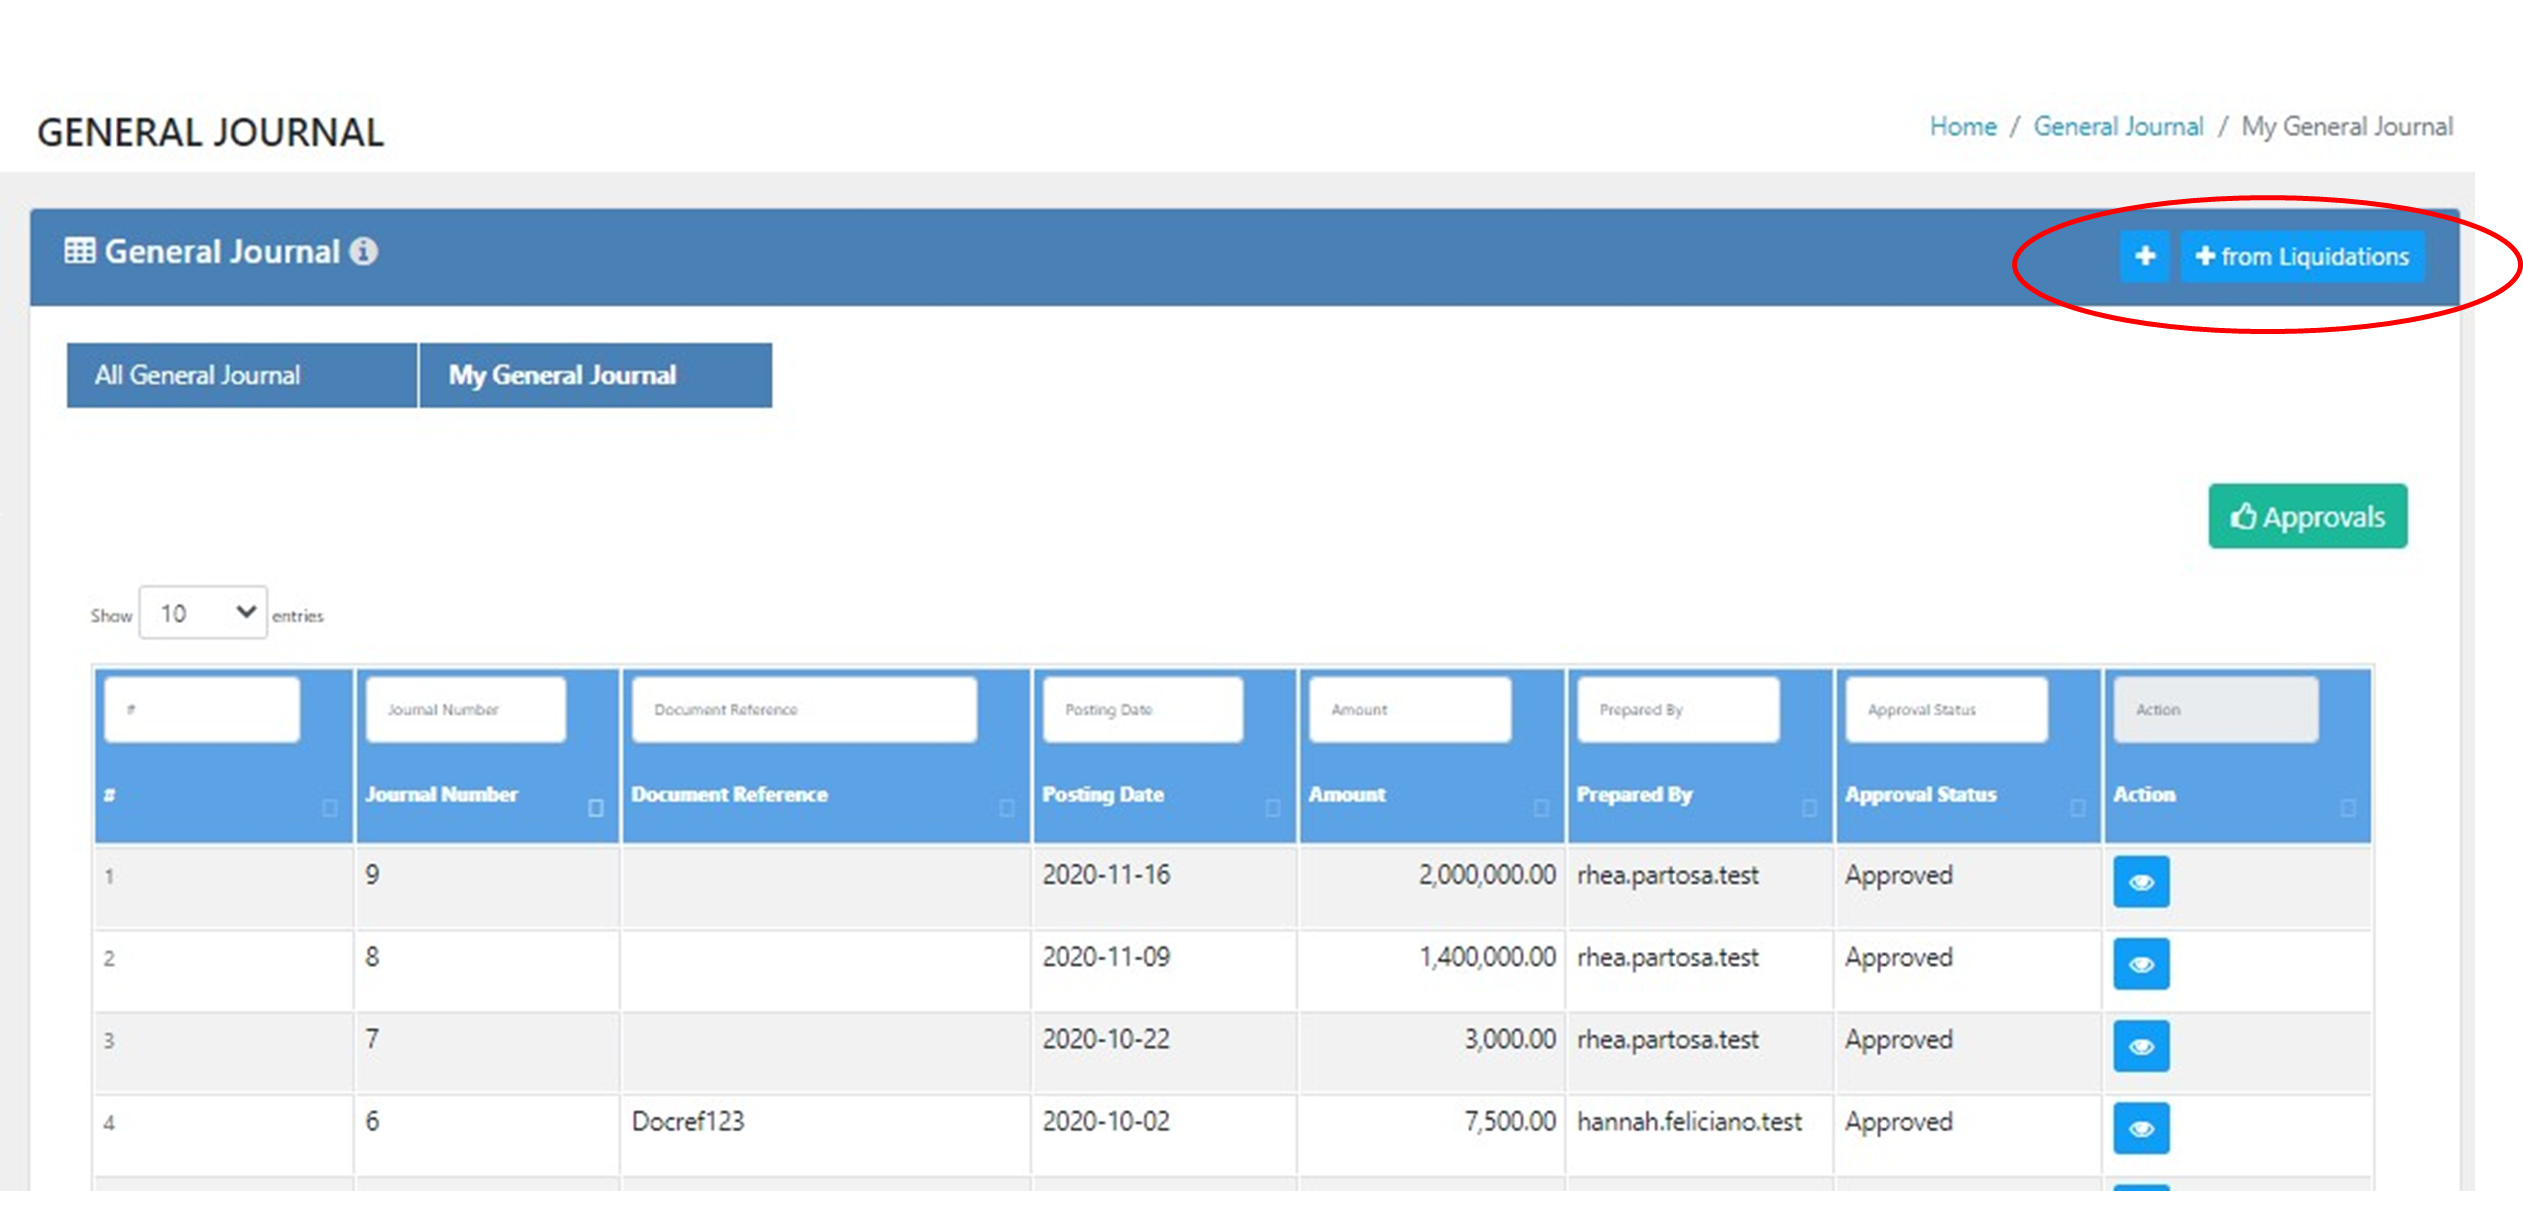
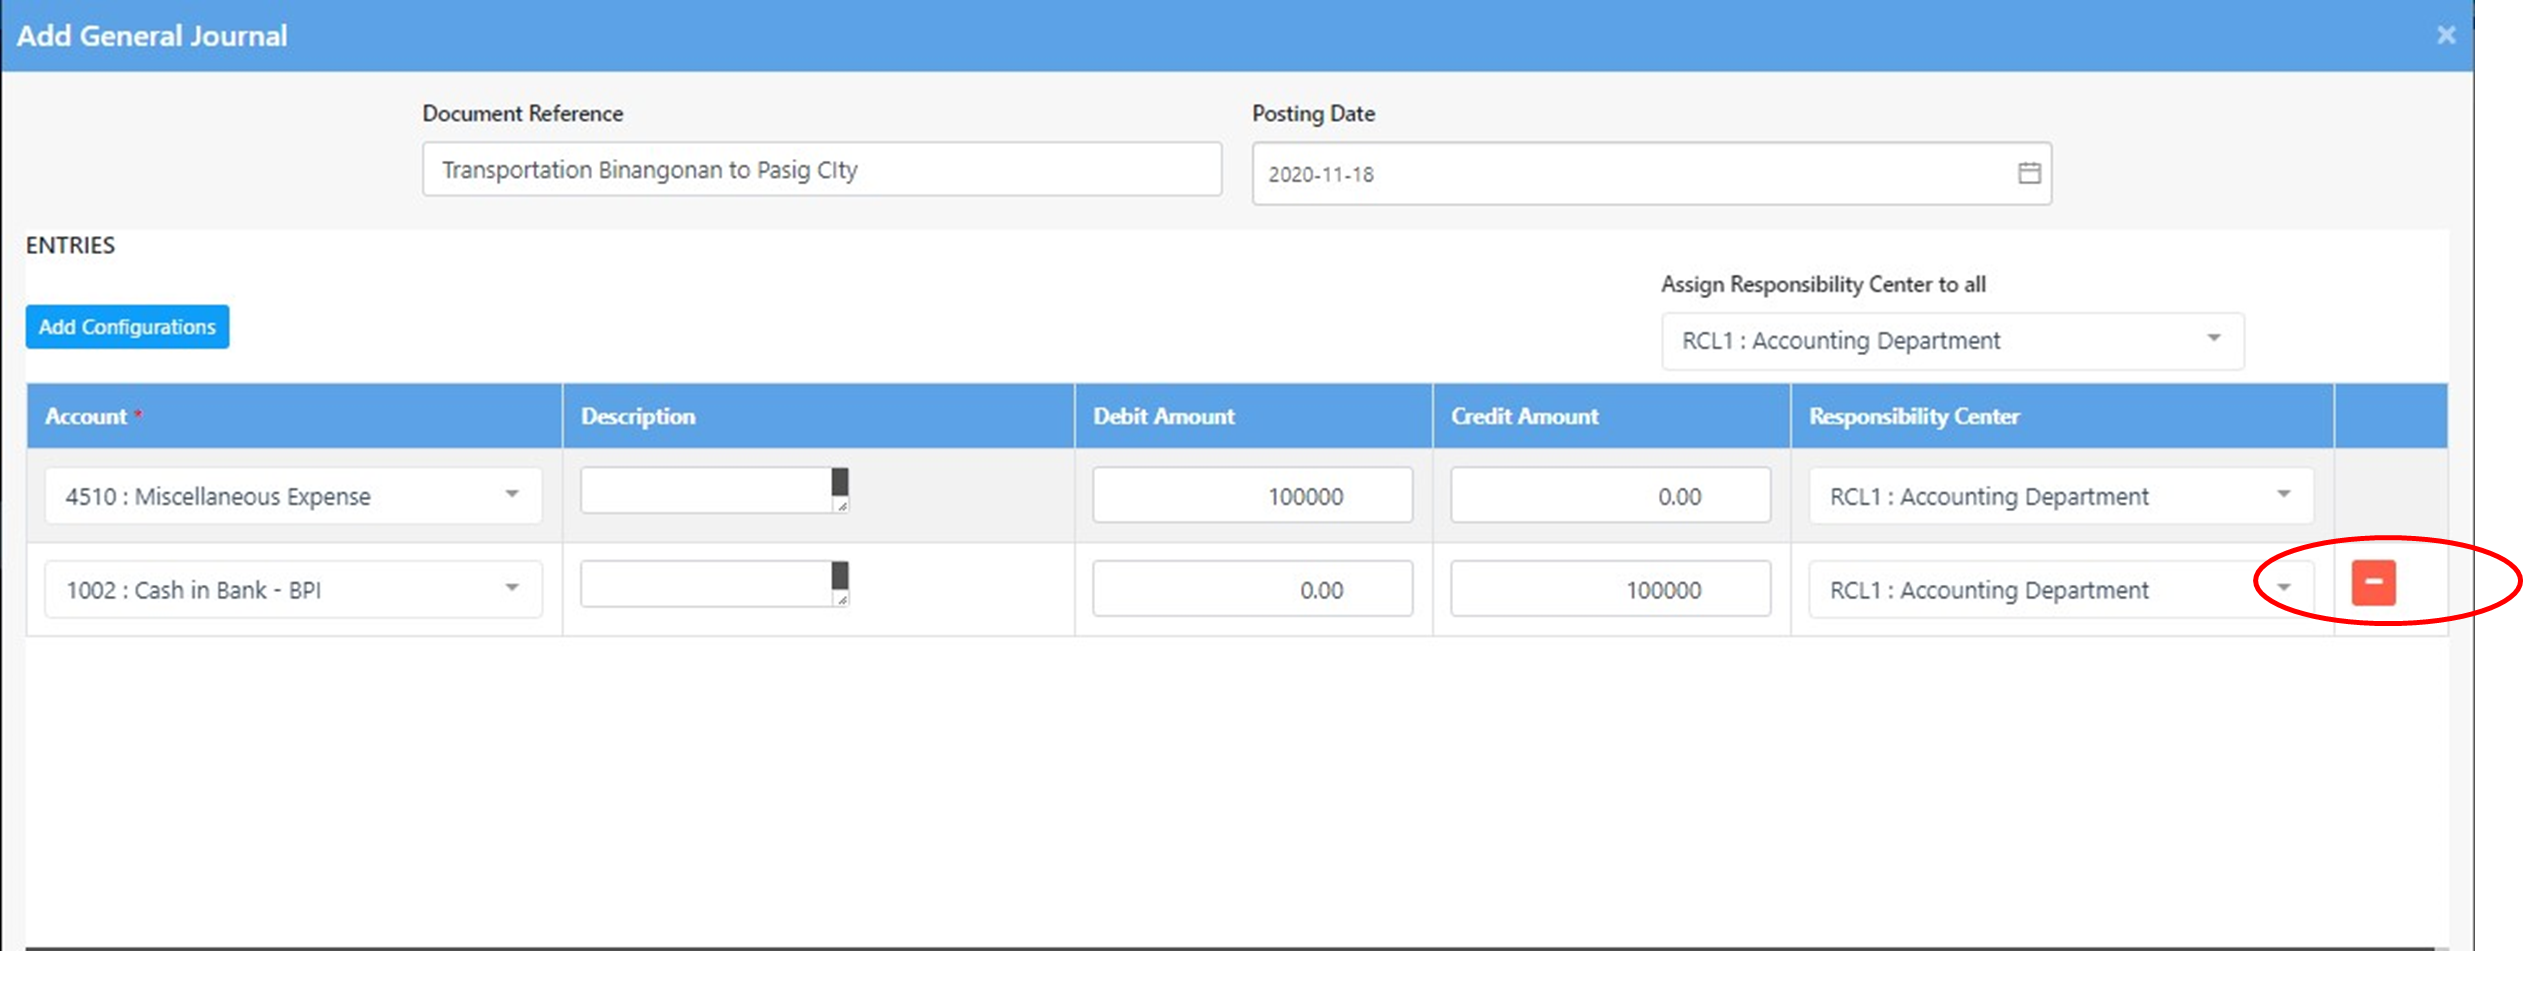
To ADD entries to general journal module, click the add button at the upper right most part of the screen.
To ADD entries coming from Liquidations, click the add button from Liquidations.
Fill Up The Required Fields:
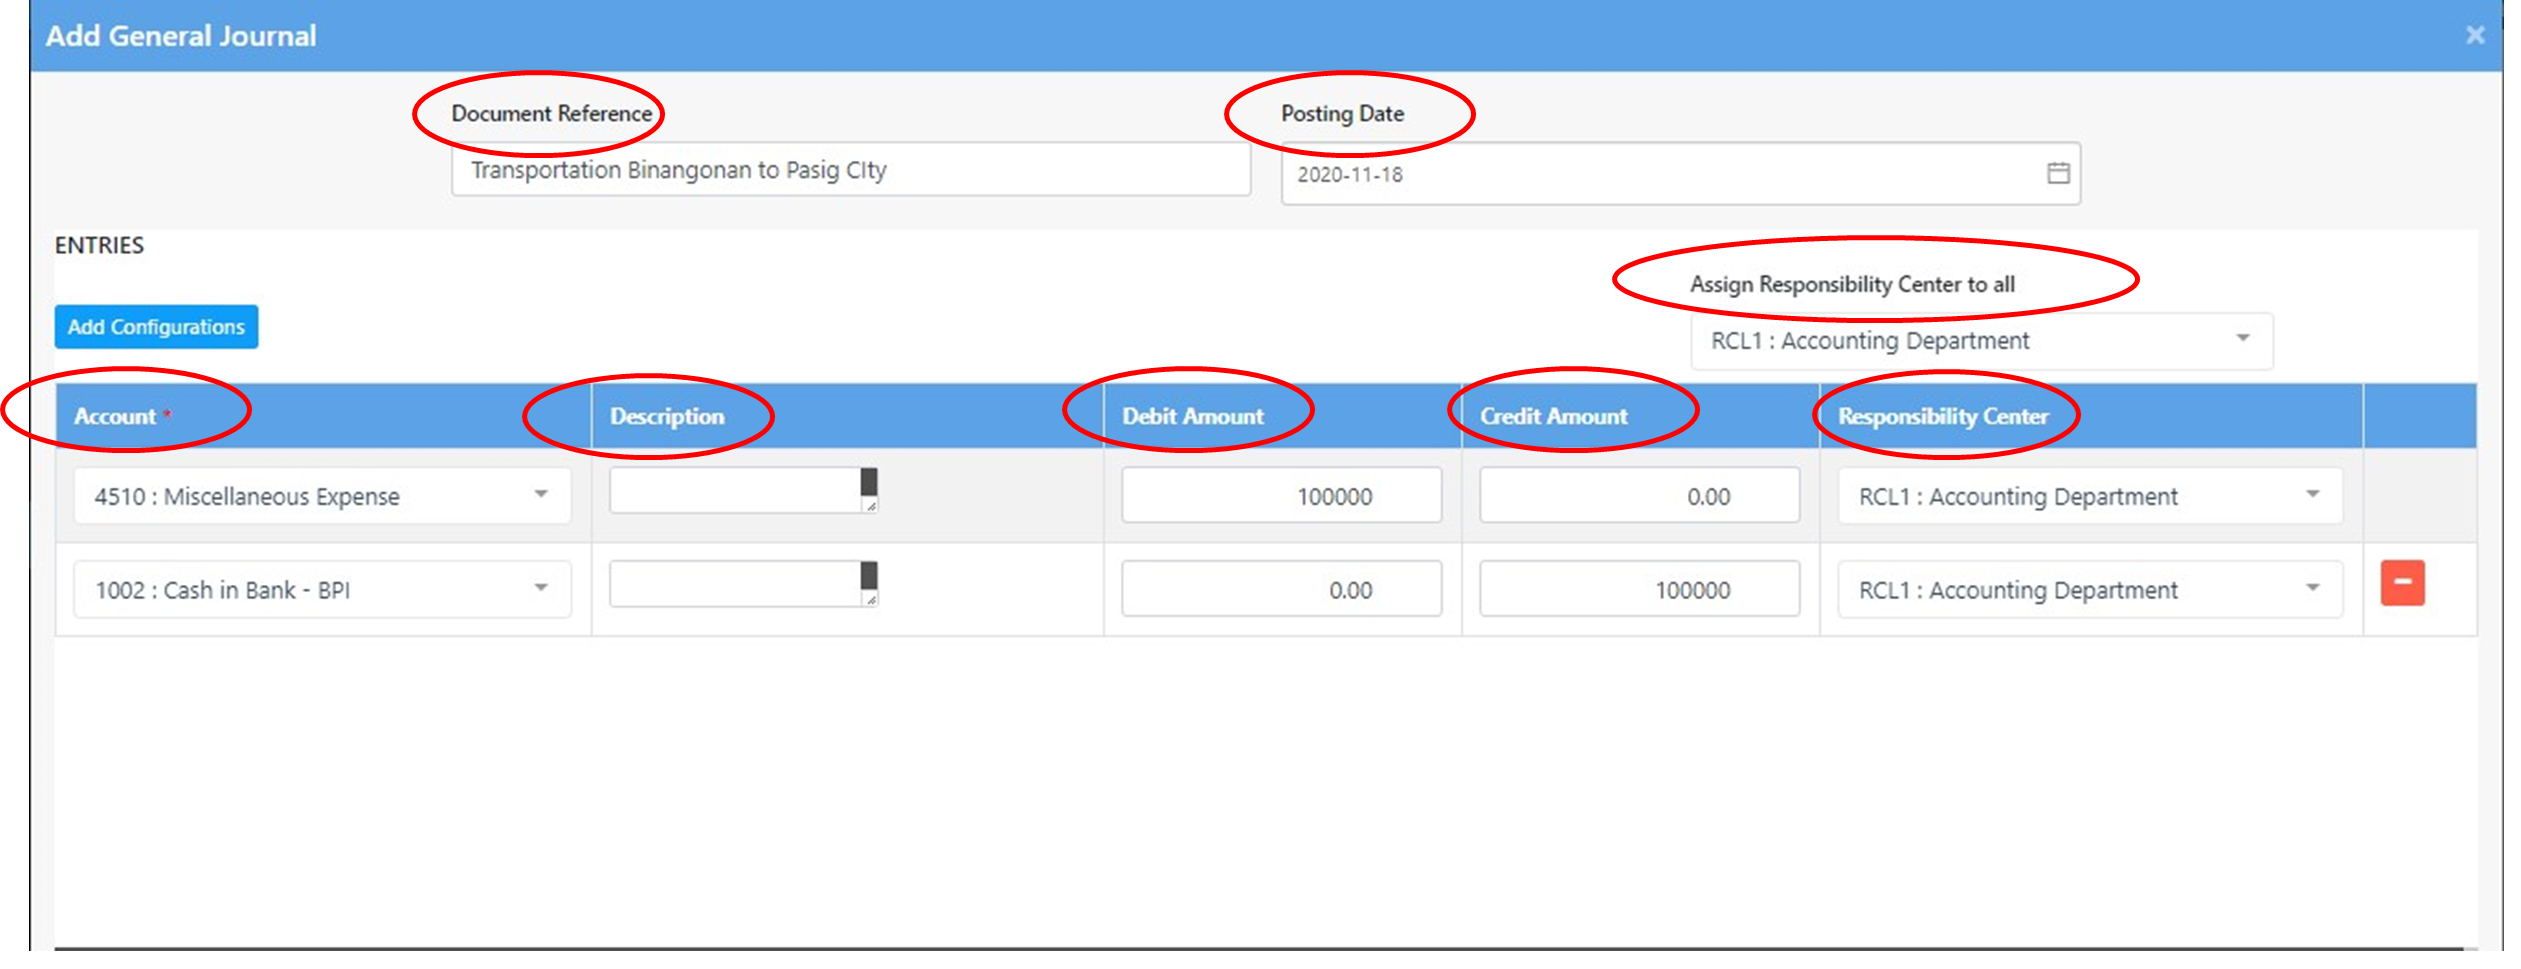
- Document Reference- document number or references.
- Posting Date – date posting entries to general journal.
- Assign Responsibility Center to All
- Chart of Account Name
- Description
- Debit Amount
- Credit Amount
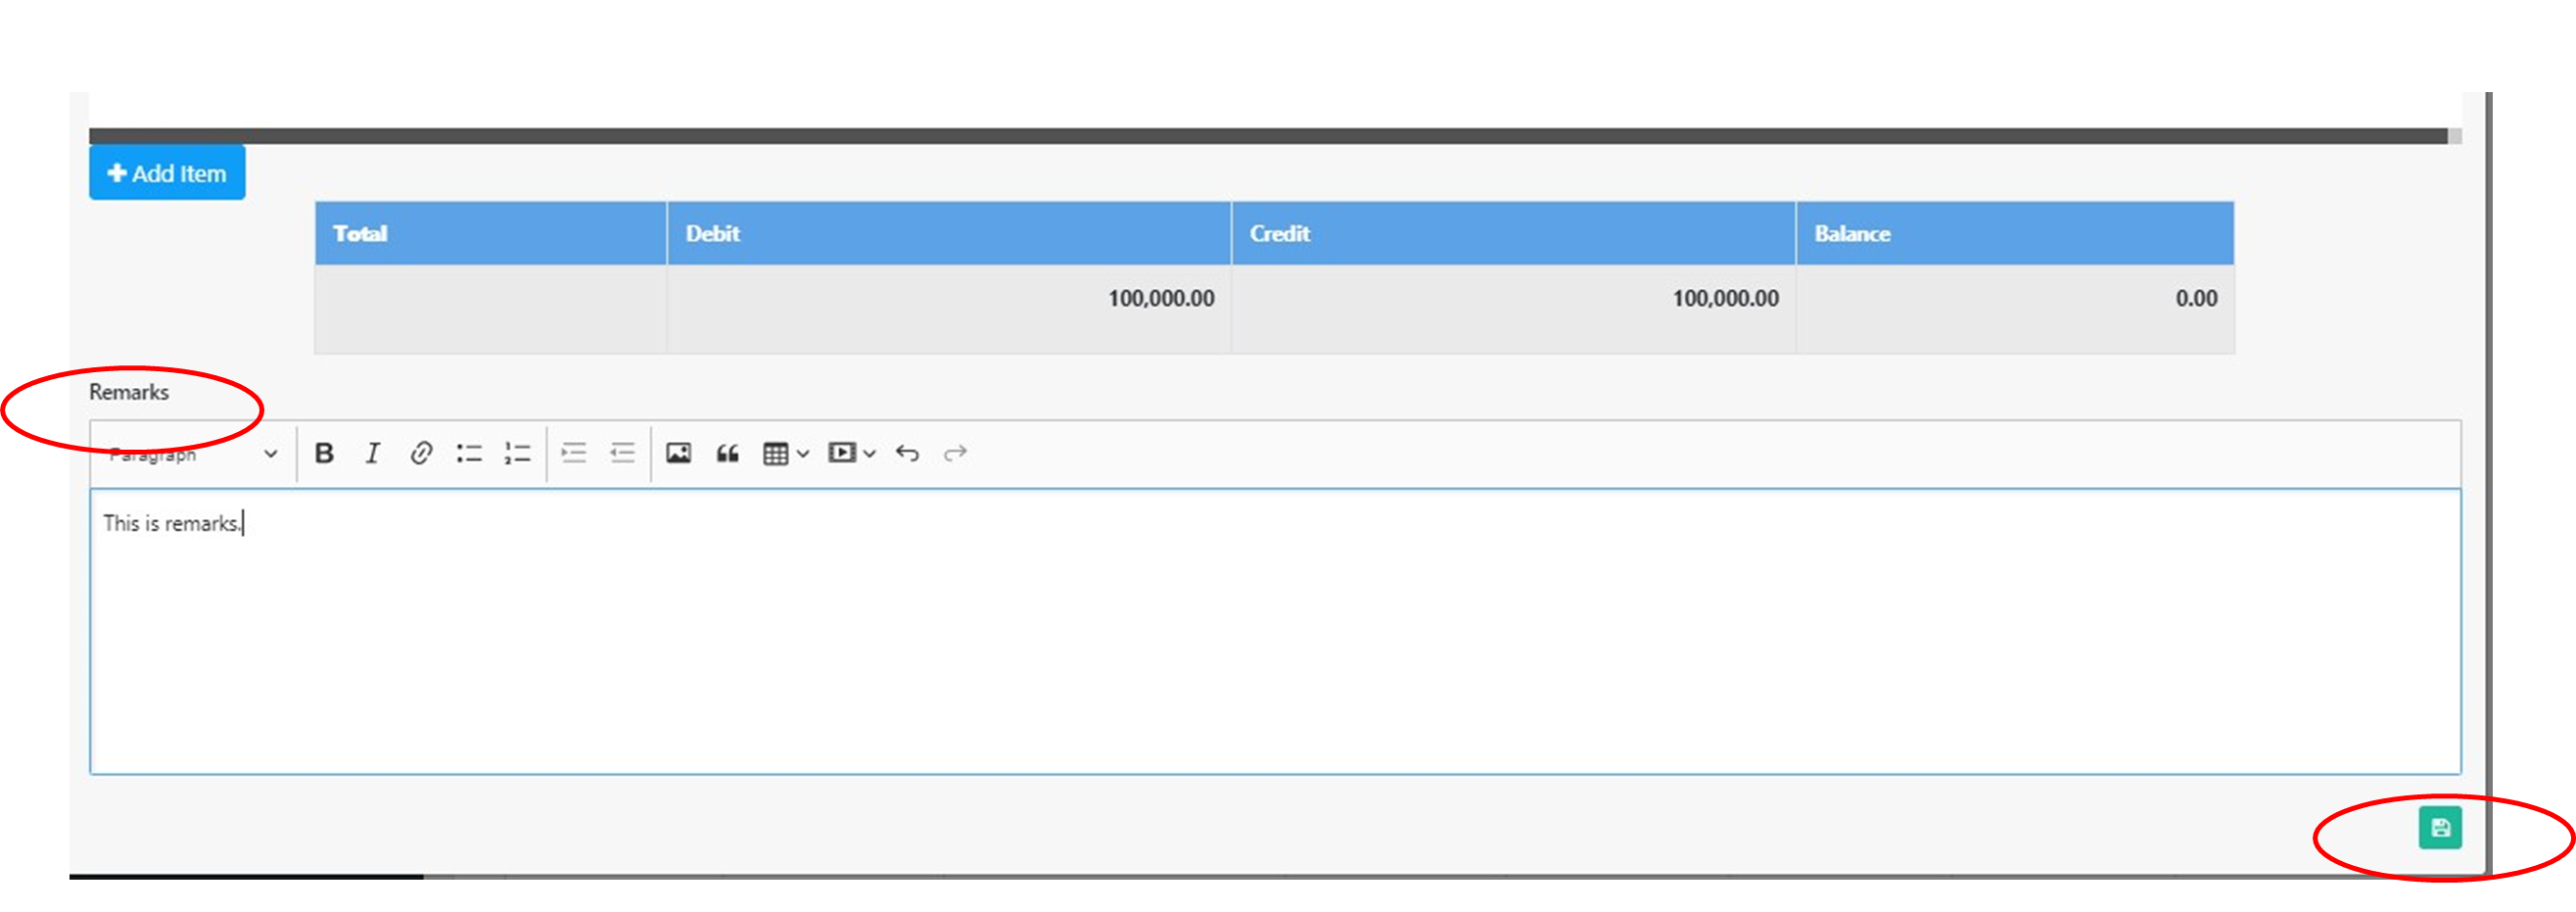
Add Items
To add item, click the add item below the line.

Delete Items
To delete item, click the negative sign at the right-side part of the screen.
Remarks and Save
FILL UP REMARKS - you can fill up necessary information about the General Journal in the Remarks Box. SAVE – to save the transaction click the save button at the bottom part of the screen.
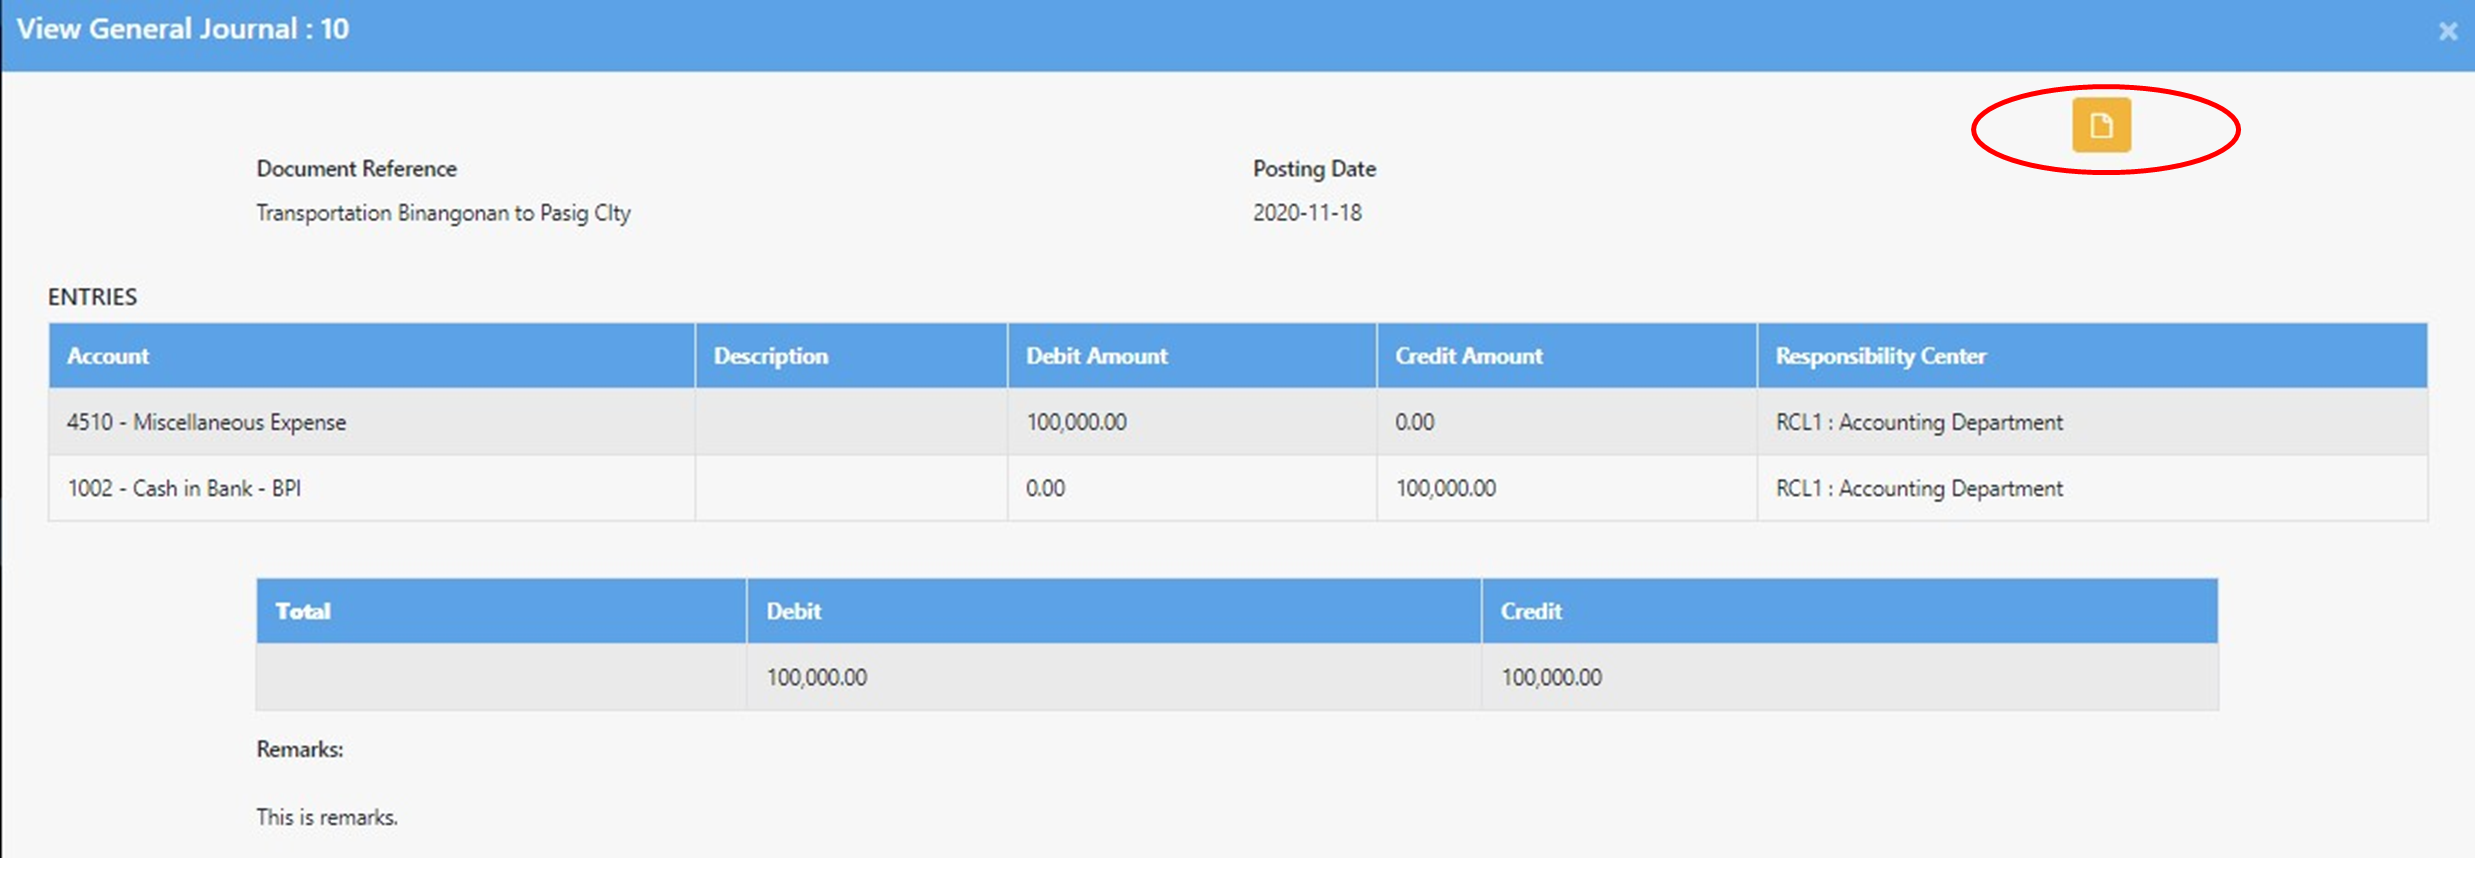
PDF Files
To view or upload forms in pdf file, click the orange file at the topmost part of the transaction in General Journal Module.
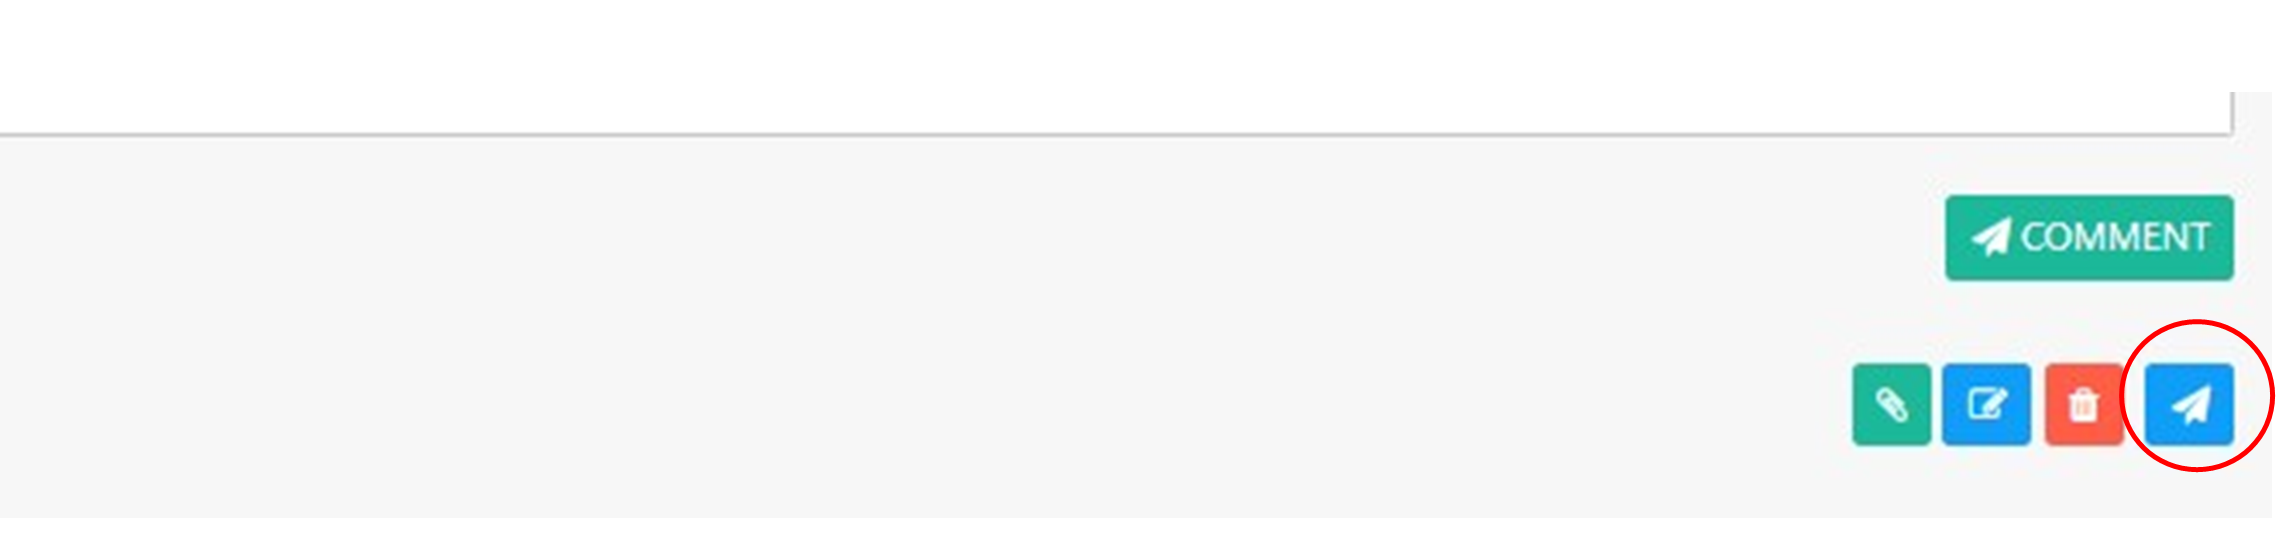
Submit Transactions
After saving the transaction, the next step is to submit transactions. To submit transactions, click the “airplane paper”
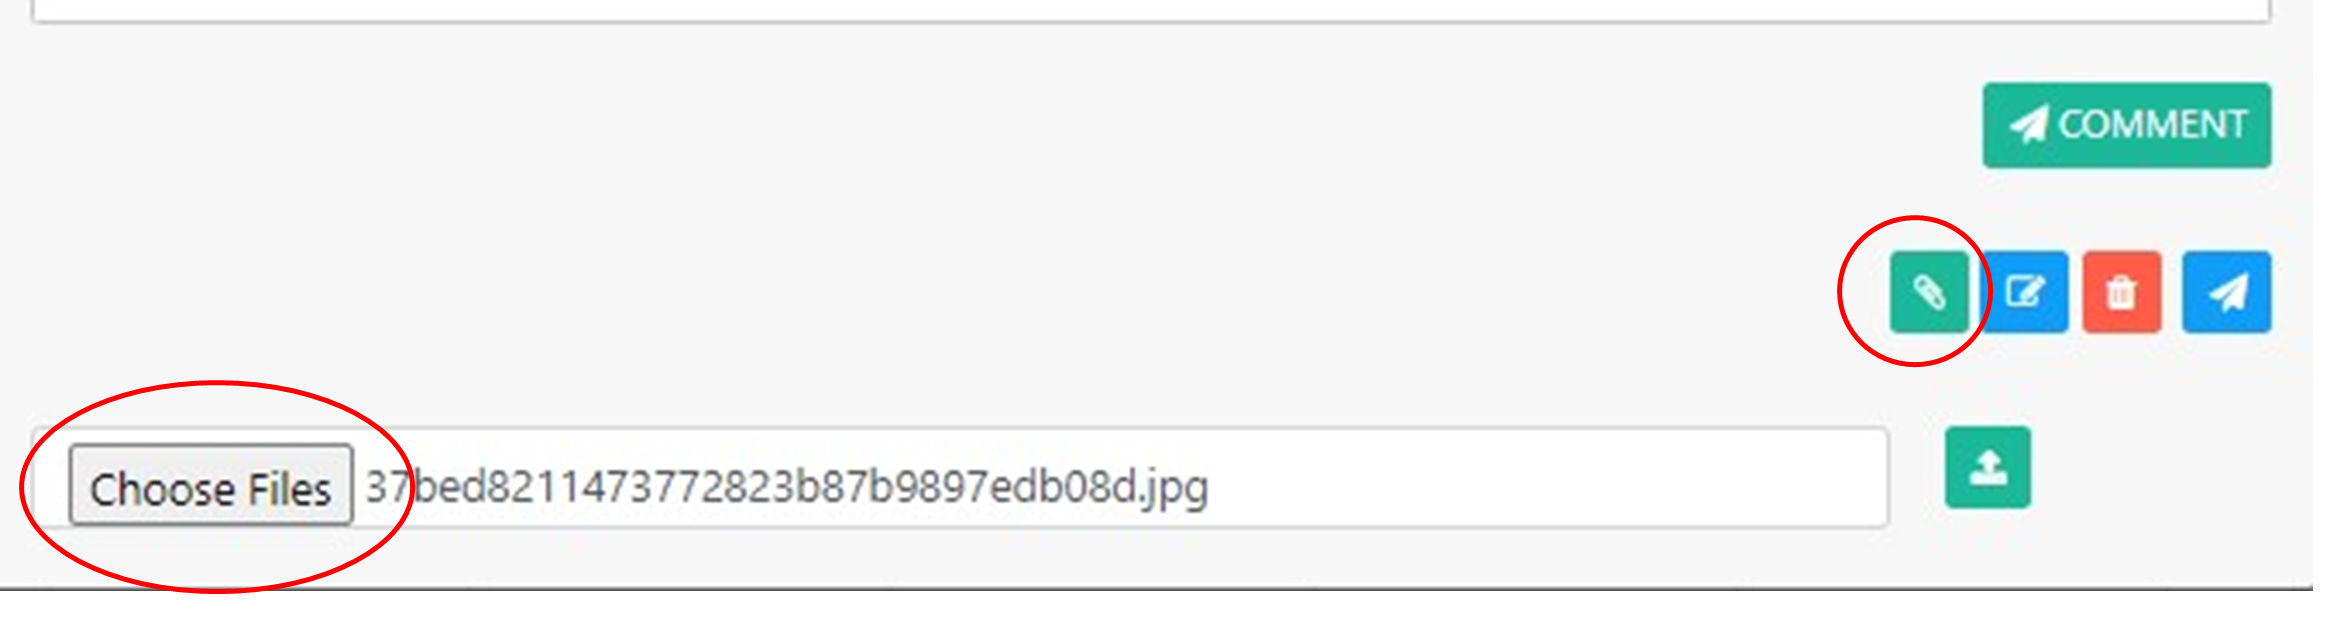
Attach a File
To attached file for the transactions, click choose file then attached the documents.
Delete Attachments
To delete attachments, click the negative sign under action.

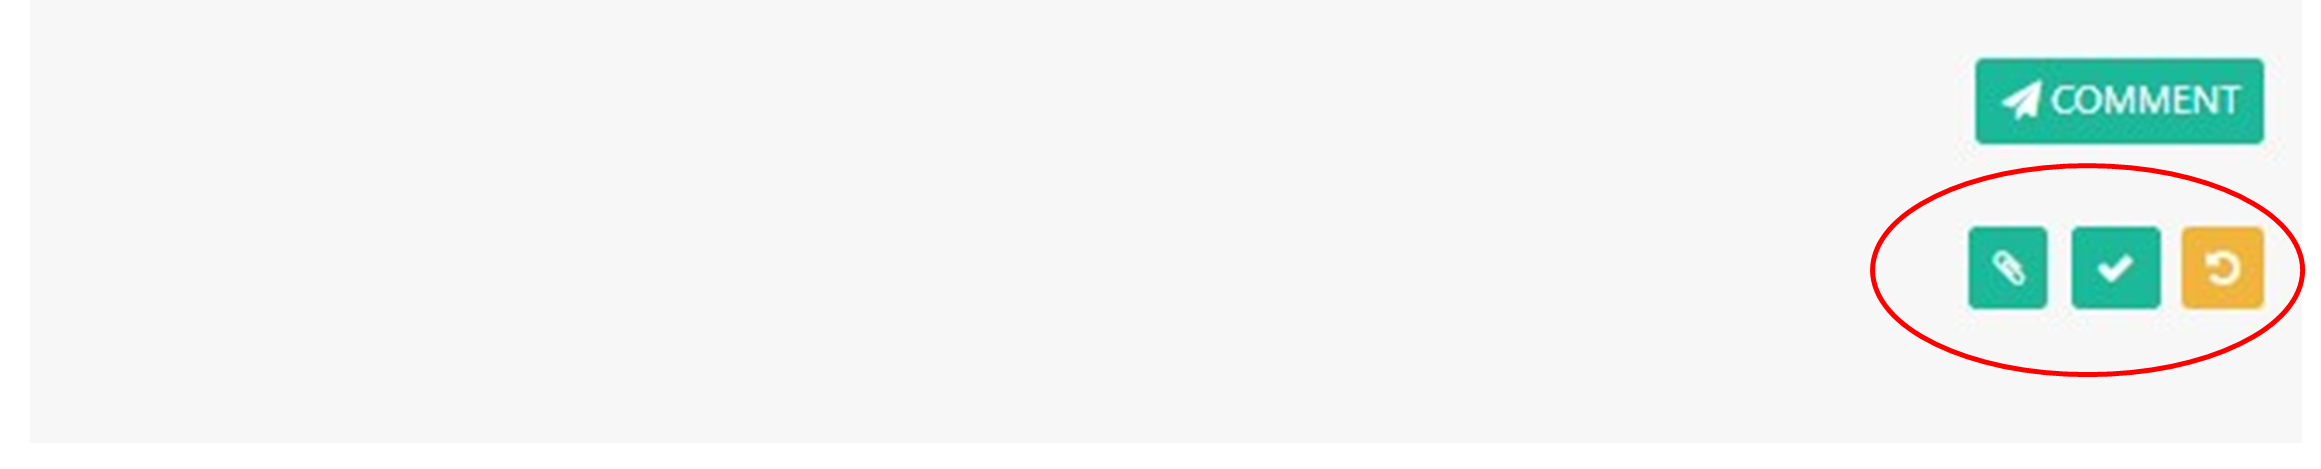
View/Check/Return Attachment
After saving, submitting, and adding attachments.
To view attachments, click the clip paper button.
To checked, click the checked button.
To return, click the return button.
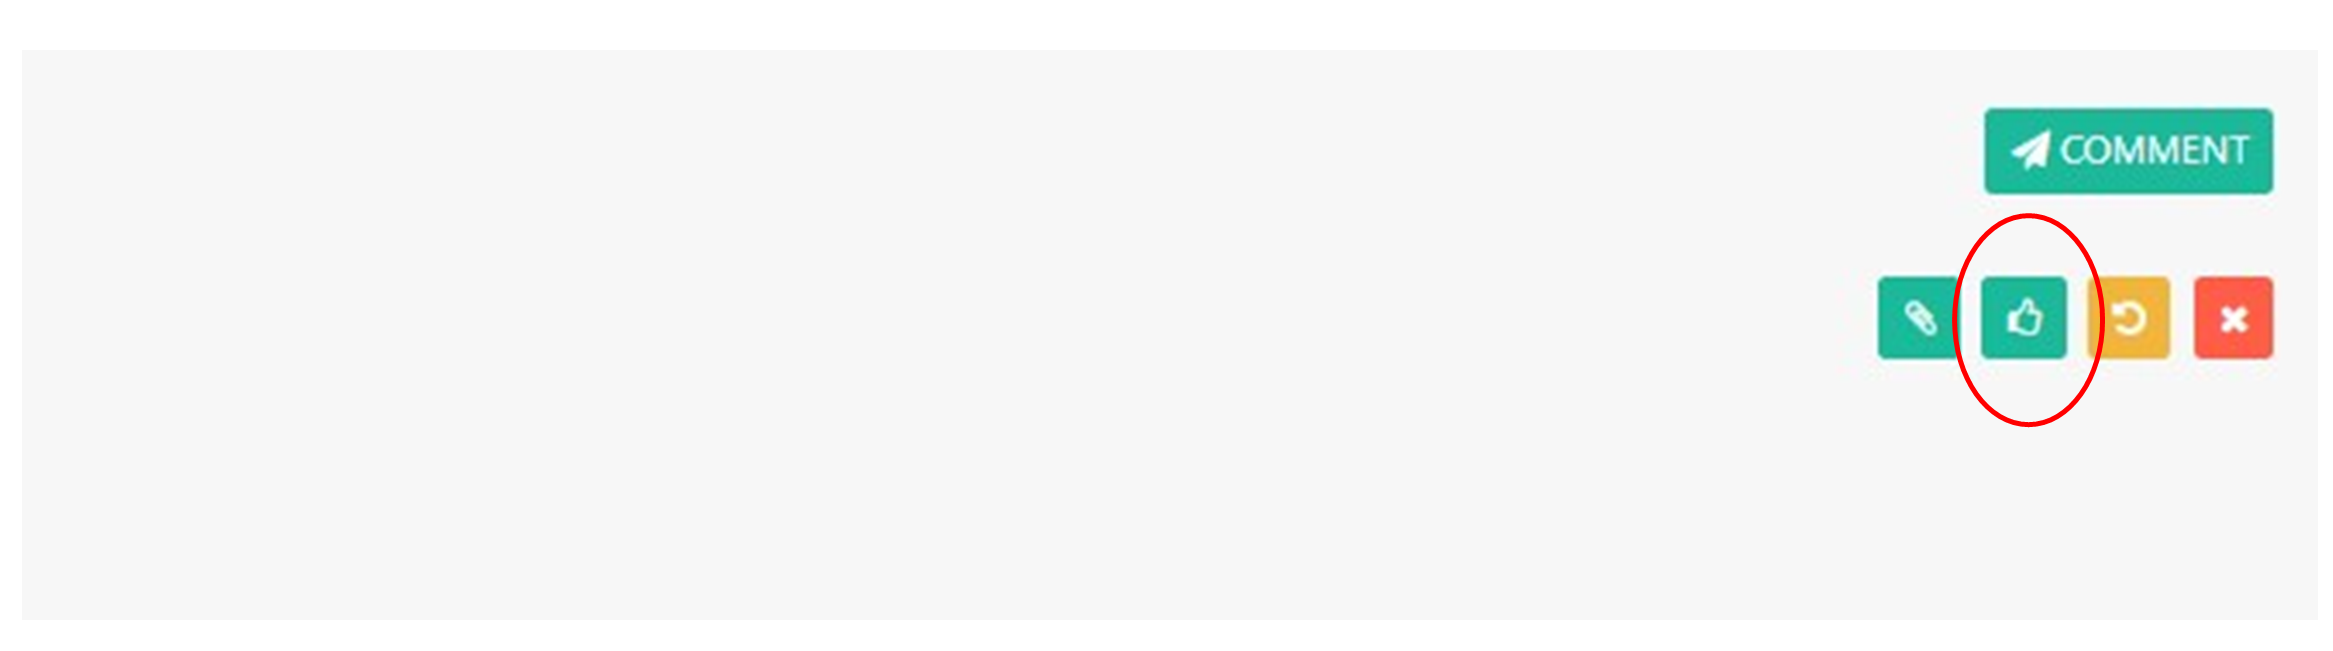
Approve Transactions
To approved transactions, click approved button.
Special Features
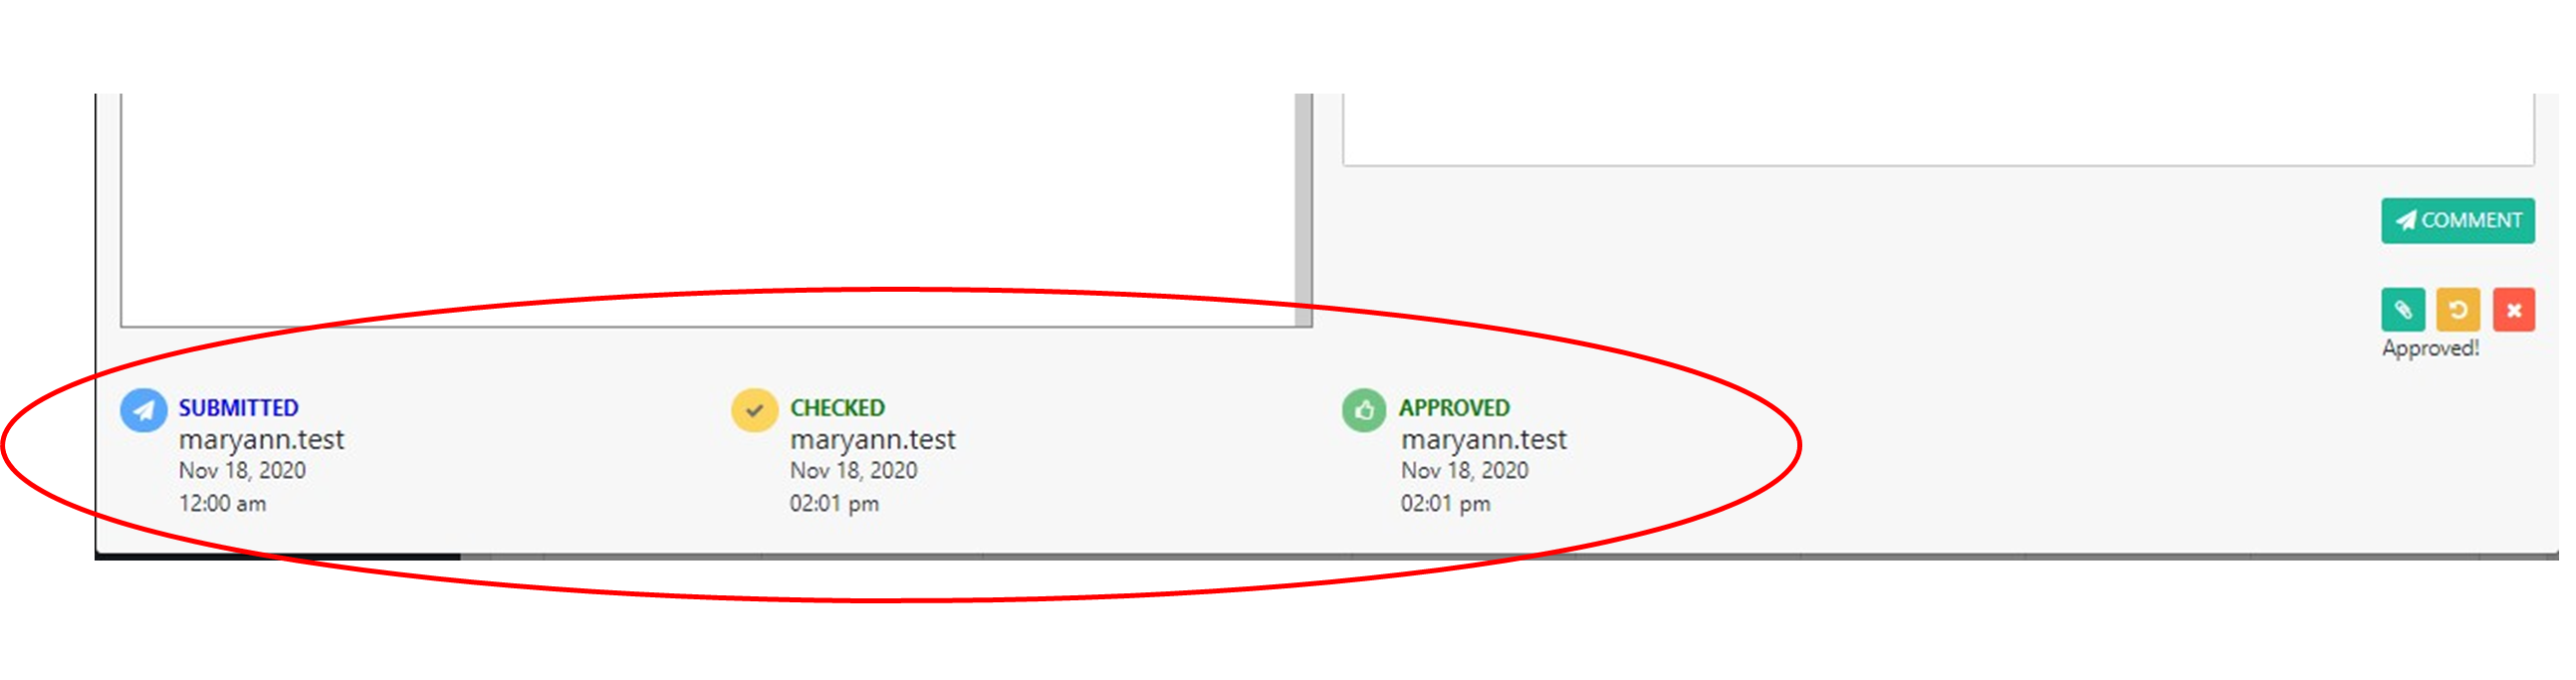
Time Stamp - it reflected the one who submitted, checked and approved the transactions. It shows the name, date, at time of the transaction were made.