Request for Payment
Add
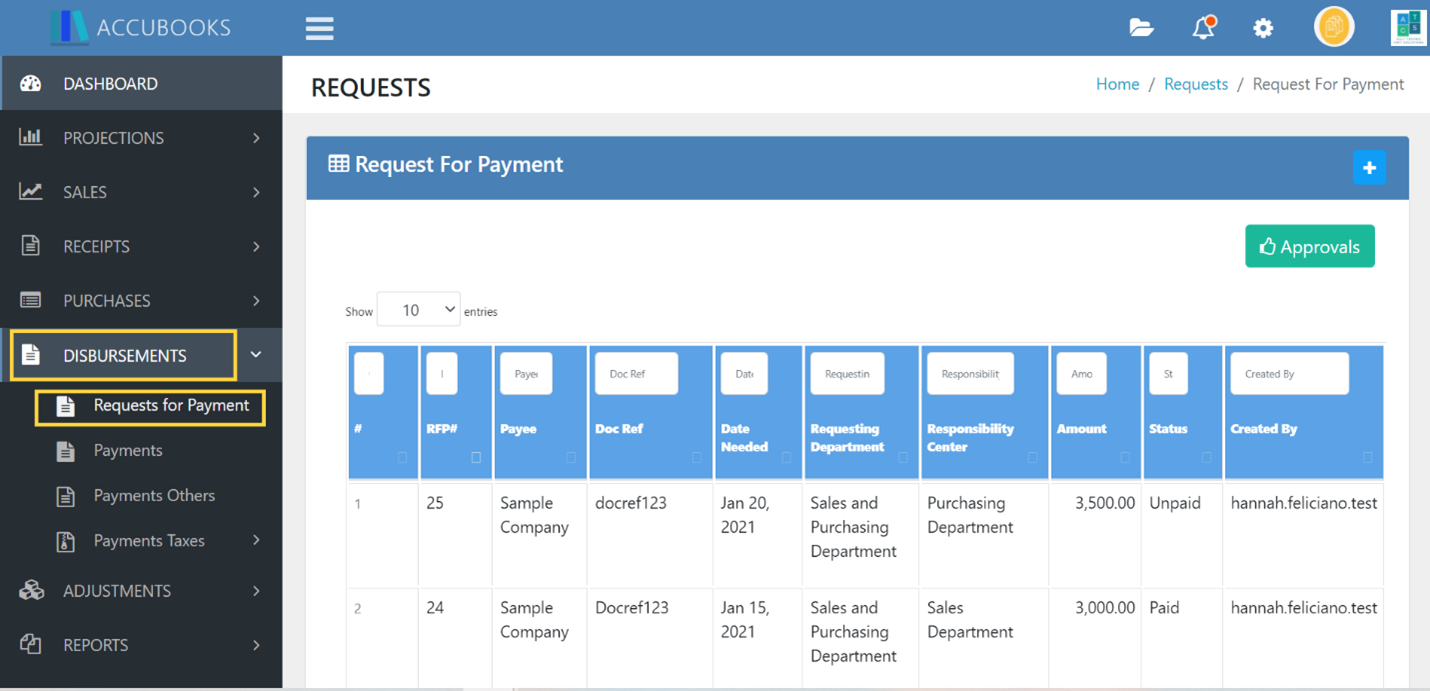
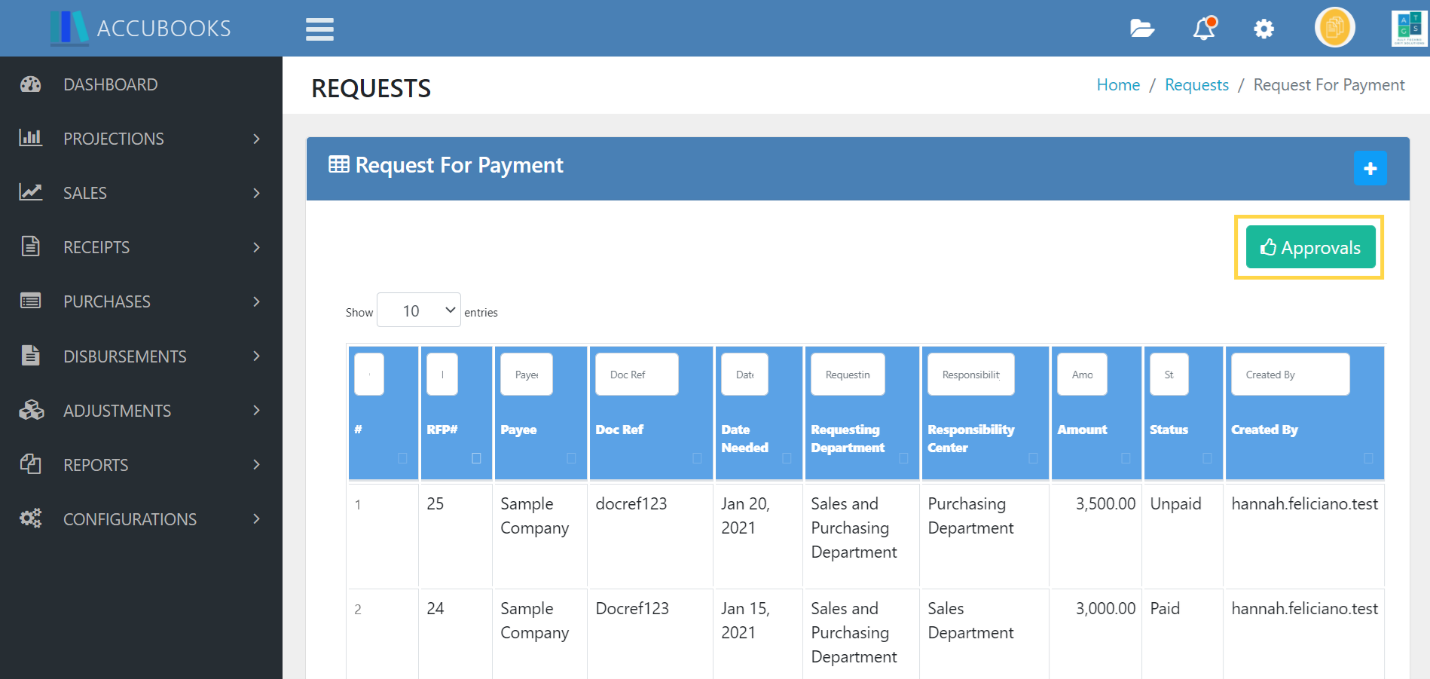
To create a new record in Request for Payment, go to Disbursements> Request for Payment.
Click the add button.

Fill up the following:
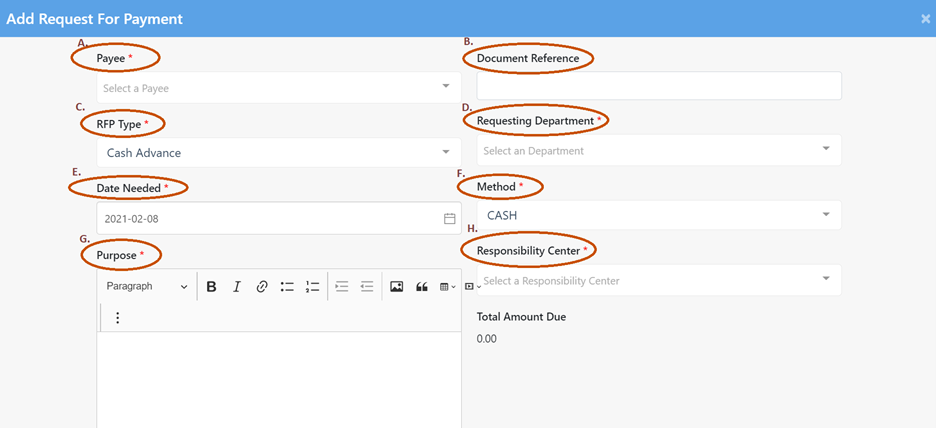
- Payee – select from the dropdown list. Make sure that the payee that you will select is already recorded in the Configurations> Vendor List.
- Document Reference – input the supporting document for the transaction created.
- RFP Type – choose from the drop down list the type of RFP (Reimbursement, Cash Advance, Down Payment and etc.).
- Requesting Department – choose from the drop down list the department who requested the payment.
- Date Needed – input the date.
- Method – choose from the drop down list the payment method whether it is cash or check.
- Purpose – indicate the purpose.
- Responsibility Center – indicate the responsibility center.
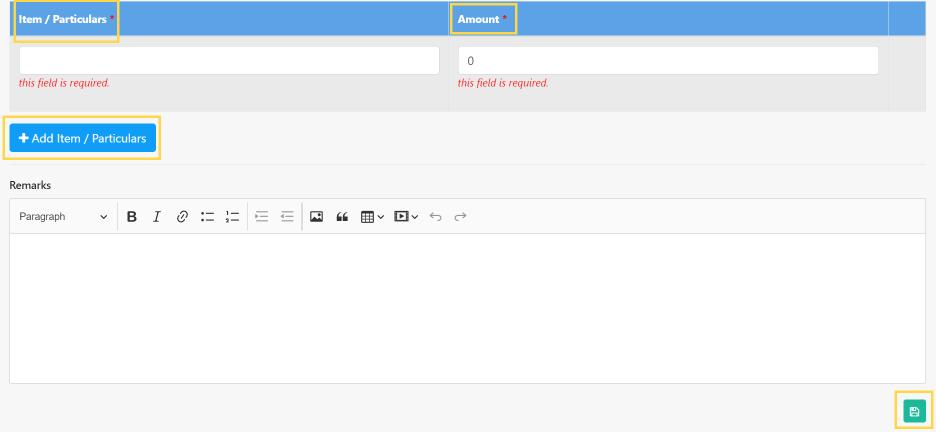
- Item/Particulars – indicate in the box the item/particulars which is the reason why payment is needed.
- Amount – indicate the amount.
- Add Item/Particulars – click this button to add another item if there are two or more items by which payment is needed.
Save
Click the disc icon to save the transaction created in Request for Payment Module.
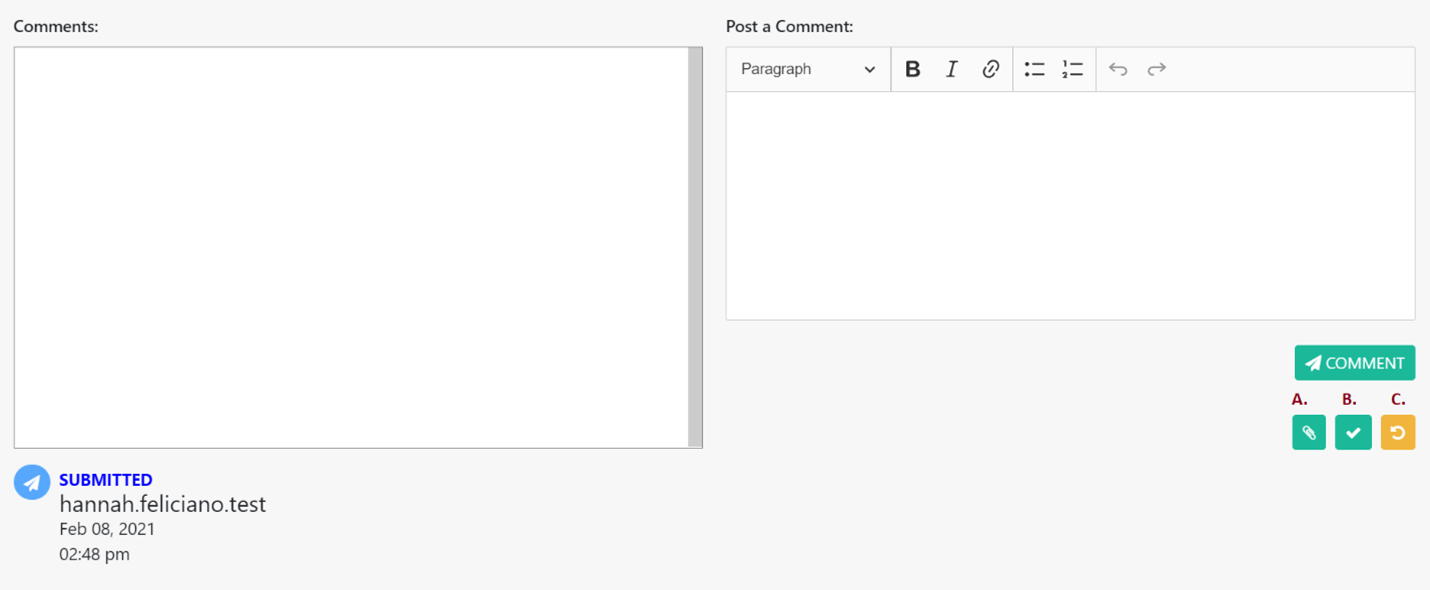
Indicate comments in the box provided and click the comment button in order for the comment to be posted.

- Attachment Button – click this button to attach a file. (Note: Once you submit the transaction that you have created you will no longer be able to attach a file neither change nor remove it.)
- Edit Button – click this button if there is an information that needs to be changed.
- Delete Button – click this button to delete the transaction that you have created.
- Submit Button – click this button to submit the transaction that you have created.
- Attachment Button – the assigned checker can only view the attached file.
- Check Button – the assigned checker is the only one who have access to this button.
- Return Button – click this button to return to “created status” the transaction that you have created. This button allows the preparer to edit the transaction that has been created if the assigned checker had seen an information that needs to be changed or corrected.
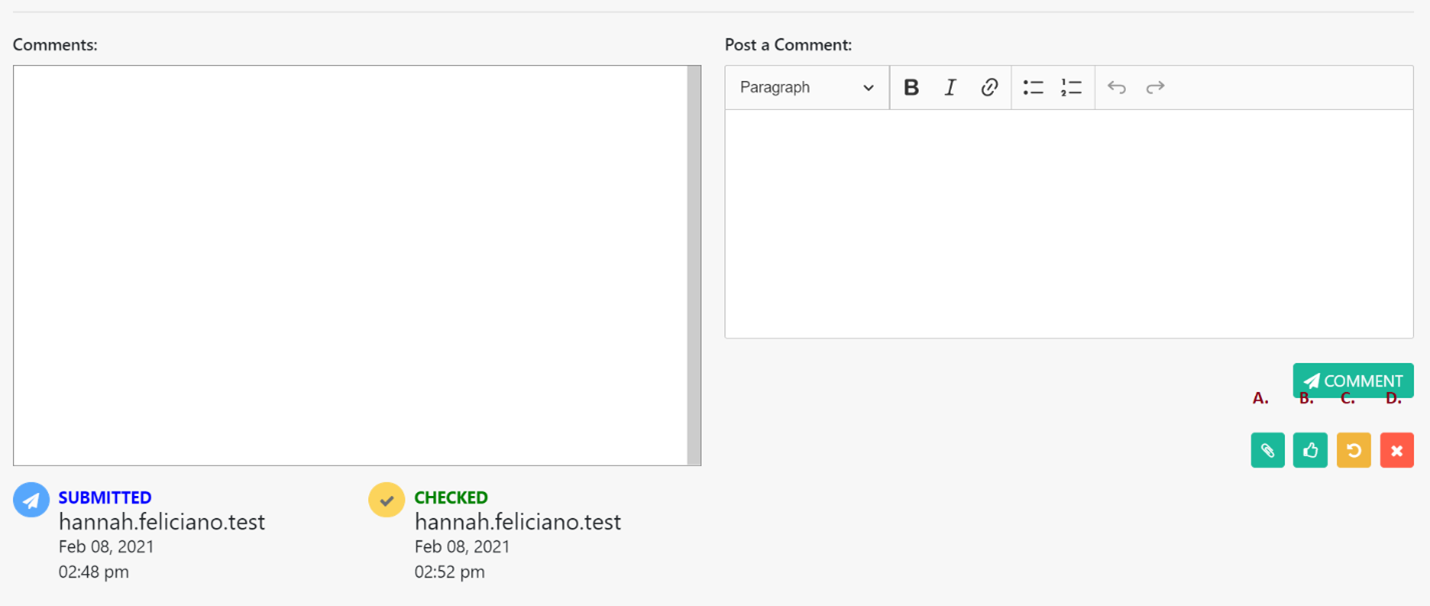
- Attachment Button – the assigned checker can only view the attached file.
- Approve Button – the assigned approver is the only one who have access to this button. If you click this button the transaction will have an “approved status”. Note that transactions with approved status are the only transactions that will be reflected in Balance Sheet, Income Statement and other reports.
- Return Button – click this button to return to “created status” the transaction that you have created. This button allows the preparer to edit the transaction that has been created if the assigned checker had seen an information that needs to be changed or corrected.
- Cancel Button – click this button to cancel the transaction that you have created.
Approve Transactions
Click the Approvals Button to approve 2 or more transactions.
View/Duplicate
Click the eye button to view the transaction created.
Click the duplicate button to create another exact same copy of the existing transcations in Request for Payment Module.

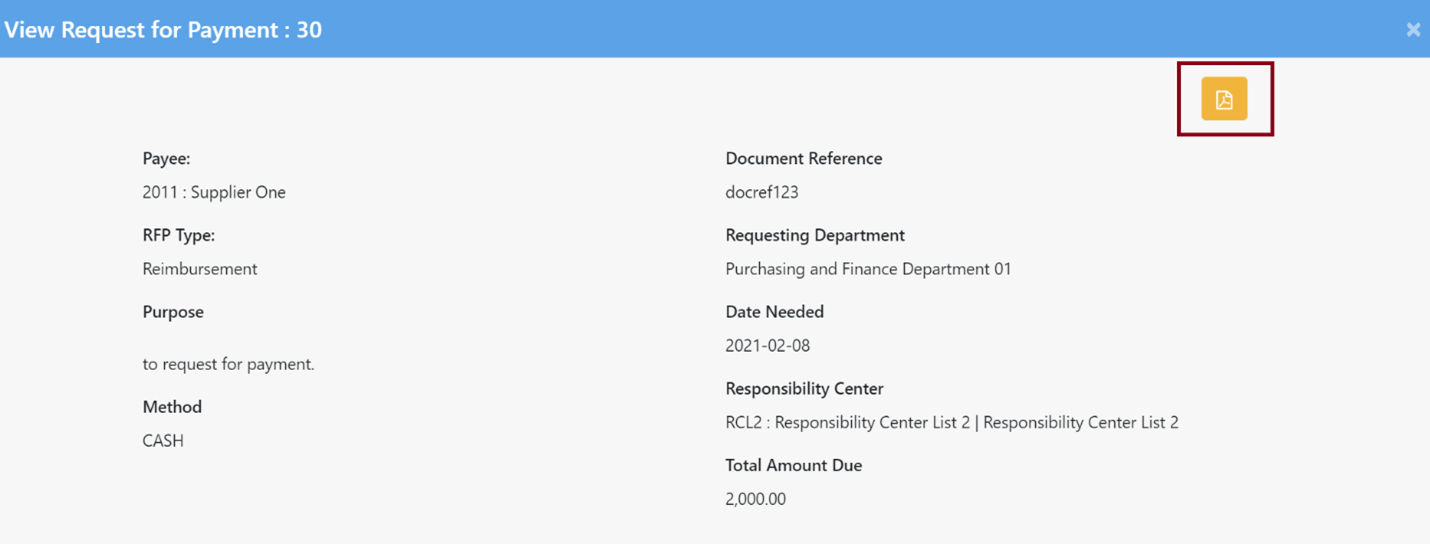
Convert to PDF
Click this button to convert the transaction created into a downloadable format.